- Reference/Release Notes/2.92/Asset Browser
- Workflow
- Creating Assets
- Mounting Asset Libraries
- Using Assets
- Additional Features
- About Milestone 1
- Трудности и «глюки», возникающие у новичков в программе Blender, и как их преодолеть
- Перевод программы и подсказок
- Забагивание области просмотра
- Clipping
- Нормали
- Двойные вертексы
- Карты нормалей
- Reference/Release Notes/3.0/Asset Browser
- Workflow
- Creating Assets
- Mounting Asset Libraries
- Using Assets
- Catalogs
- Additional Features
- Pose Libraries
- About Milestone 1
- Changes Since 2.93
Reference/Release Notes/2.92/Asset Browser
Blender 2.92 includes a new editor: Asset Browser.
This is the first part of the Asset Browser project: basic listing and browsing for Blender data-blocks saved locally.

The About Milestone 1 section gives more information about what to expect from the current implementation.
Workflow
Creating Assets

The Mark Asset operator turns a data-block into an asset data-block. It’s available in a few places:
- Right-click a data-block in the Outliner >Mark Asset or Outliner >ID Data >Mark Asset. This way you can also select multiple data-blocks and mark them as assets.
- Right-click a button that represents a data-block (e.g. a data-block selector or material slot) >Mark Asset.
- Search menu in the Outliner.
- Save the file, if you want the new asset data-block to be available in other projects.
There’s also the Clear Asset operator. It removes all asset metadata and turns an asset data-block back into a regular data-block.
Mounting Asset Libraries

It is possible to select any directory as asset library. This can be done in Preferences > File Paths > Asset Libraries.
There is a default library pointing to the following paths:
| Platform | Path |
|---|---|
| Windows | C:\Users\username\Documents\Blender\Assets\ |
| Linux | |
| MacOS |
Using Assets

The Asset Browser is a new, regular editor.
In the Asset Browser, you can:
- Select an asset library to browse in.
- Choose a category of assets to show.
- Drag collection, object, image and material assets into 3D Views.
- View metadata of the active asset.
- Edit metadata of the active asset in the Current File asset library.
Most display and filter options won’t work yet, that is expected.

Additional Features
- Support for generating object previews. (rB4b039669)
- Support for loading custom images as data-block previews. (rB812ea918)
- Operator to regenerate automatic data-block previews. (rB58d818f8)
- Asset data-blocks show a asset icon in the Outliner and search menus. (rB3fc9fc1c)
- Various Python API additions, check the dedicated release notes.
- Only Assets options for link and append.
About Milestone 1
For the first milestone, the user takes the role of the asset manager and is in charge over where and how assets are stored. The Asset Browser gives a view into user-managed asset libraries.
Use-Cases
The main use-case is local user asset libraries. That is, a user can store data-blocks for own reuse in self defined locations on the hard drive, and conveniently access them from any project.
For simple projects that may also be enough, where all .blends are in a single directory or in few directories (which can individually be mounted as asset libraries in the Preferences).
- Data-blocks are not automatically assets. They have to be explicitly be marked as such.
- An asset library is a directory containing .blend files. Each of the .blend files can contain asset data-blocks.
- To make an asset library available in other projects, it has to be mounted in the Preferences.
- Asset creation and metadata editing can only be done for the current file.
- I.e. you can’t just drag a data-block into an asset library, or move assets between asset libraries from within Blender.
- So to edit an asset library, you have to open one of its .blend files and do the edits there.
- This way, Blender doesn’t automatically have to decide how the asset will be stored inside the asset library and how to deal with dependencies (e.g. the image texture of a material). The user is fully in charge of managing that.
- Save the file to make the edits to the asset library available elsewhere.
- The Current File asset library is special:
It always shows the assets of the current file (no manual refreshing or saving needed) and it is the only asset library that allows editing of asset metadata (e.g. name, preview, description or tags). So like for asset creation, to edit the metadata of an asset, the file that contains the asset has to be opened, edited (via the Current File asset library) and saved. - For when an Asset Browser shows an external asset library that was edited, there is a refresh button next to the asset library selector.
More Information
For more high-level design information, refer to this design overview or this blogpost.
(In old documents about the Asset Browser/Manager project, the term «repository» may be used for libraries still.)
Источник
Трудности и «глюки», возникающие у новичков в программе Blender, и как их преодолеть
Blender это замечательный бесплатный 3d пакет, который делает возможным и доступным осуществление гигантского количества проектов, и, как человек, прошедший путь от абсолютного новичка в 3d до преподавателя данной программы в учебном центре «Специалист» в Москве, я могу поделиться несколькими типами, которые помогут преодолеть несколько несложных, но каверзных моментов, которые хоть и очень просты, но далеко не очевидны, и могут заставить просидеть несколько часов в поиске решения проблемы.
Перевод программы и подсказок
Перевод программы и подсказок — Blender, как и почти все программы является англоязычной, но в настройках (preferences) мы можем сделать его интерфейс русскоязычным. Переводить его полностью на русский язык я бы не советовал, т.к. названия всех терминов и команд почти необходимо знать на английском языке для дальнейшего развития, и, так или иначе, много из них заимствовано великим и могучим русским языком и используется всеми и повсеместно (нормали, фейсы, вертексы и т.д.). А вот перевод подсказок действительно может упростить процесс входа в программу и снять много вопросов в процессе их появления. Окошко с подсказкой возникает при наведении курсора мыши на любой элемент blender.
Для того чтобы активировать подсказки, если они не работают, нужно зайти в меню Edit-Preferences-Interface. Поставить галочку напротив Tooltips.
Для активизации перевода подсказок в том же разделе открываем выпадающее меню Translation, ставим русский язык, и галочку напротив Affect Tooltips.

Забагивание области просмотра
Следующая проблема с которой я постоянно сталкивался это забагивание области просмотра — при попытке панорамировать вид\приблизиться\отдалиться от объекта, blender упорно отказывается это делать, точнее делает это очень медленно . Тут помогает функция Frame, которая перезахватывает выбранный объект во вьюпорте и данная проблема устраняется.
Находится эта функция в меню View-Frame selected.

Clipping
Некст проблема это clipping — при попытке работать с объектом на близком расстоянии область обрезает часть нашего объекта, и мешает нам работать.
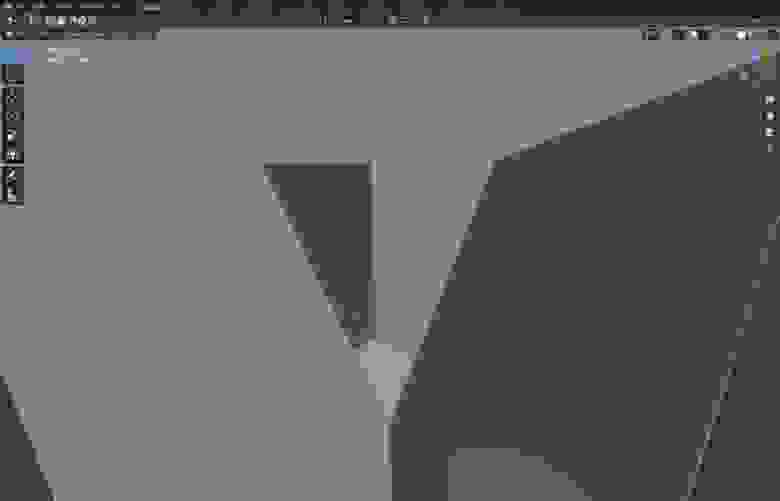
устраняется заходом в боковое меню нажатием кнопки N, и во вкладке view в выпадающем меню view, уменьшаем значение Clip Start (Например 0,001)

Нормали
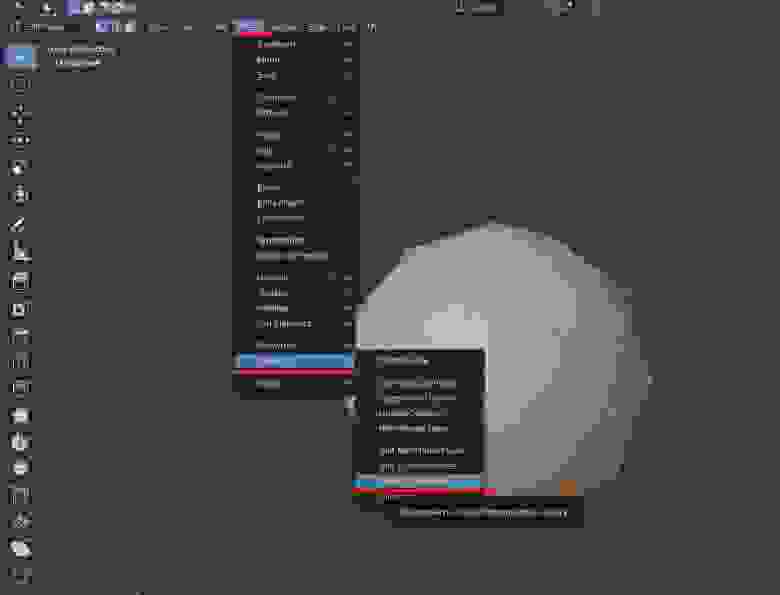
Следующая проблема это нормали — будь то незнание того — что это? или незнание того — как их привести в правильное положение. Проблемы с нормалями возникают например при попытке запечь карты деформации, во время скульптинга, при попытке нажать Shade smooth и тд.
-Нормали это вектор перпендикулярный плоскости полигона, который указывает блендеру куда ему отражать свет. Направлен этот вектор только в одну сторону, то есть если нормаль вашего полигона развернута внутрь объекта, как часто случается в blender, то из за этого у вас будут проблемы на каком-то этапе работы.
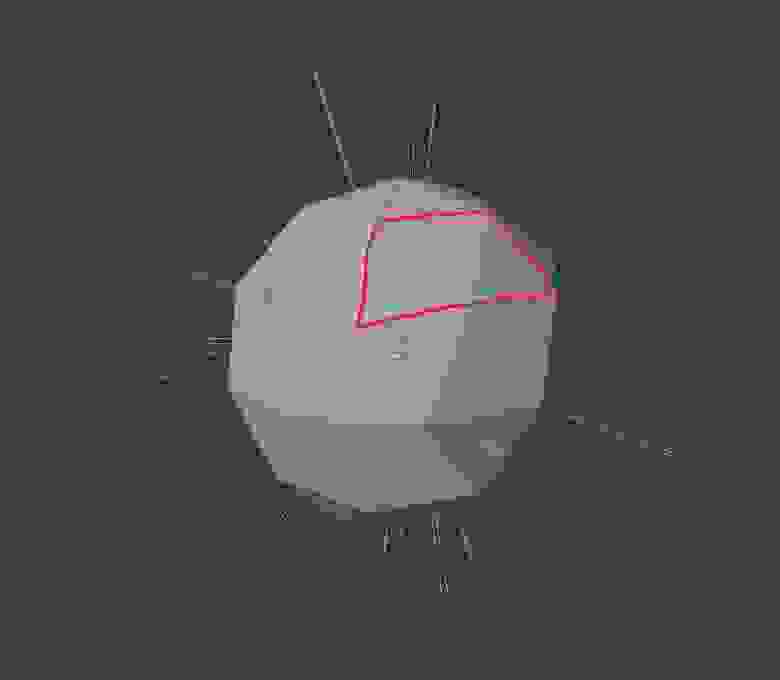
Как мы можем видеть на данном изображении — все нормали объекта, кроме трех выделенных, повернуты наружу, а три выделенные — внутрь. При обычном режиме затенения Shade flat — этого не видно, но если я включу режим затенения shade smooth, то результат будет совсем иным.
Проверить направление нормалей своего объекта я могу перейдя в edit mode, и в выпадающем меню overlays поставить галочку напротив Face orientation . Тогда все нормали повернутые наружу будут отображаться синим цветом, а направленные внутрь — красным. В этом же меню Overlays я могу включить отображение нормалей как векторов.

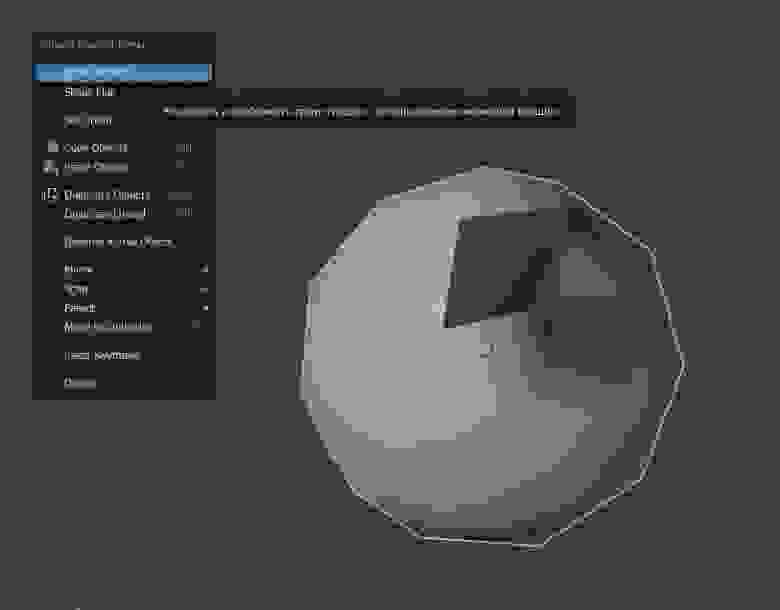
Развернуть нормали нам помогут функции Mesh-Normals-Flip (или recalculate outside)
Flip — развернет выделенные полигоны.
Также мы можем выделить все полигоны объекта (шорткат А) и нажать Recalculate outside чтобы blender автоматически пересчитал все наши полигоны наружу.
За направлением нормалей лучше следить.
Двойные вертексы
Двойные вертексы — часто в процессе моделирования и оперирования командой Extrude могут создаться вертексы, которые стоят друг в друге и будут портить нашу топологию, это может нам аукнуться на этапах UV развертки, создания рига и тд. Чтобы избежать этого, на промежуточных этапах работы можно выделять всю свою модель в режиме работы с вершинами и нажимать Mesh-clean up-merge by distance. Двойные вертексы будут объединяться.
Карты нормалей
Карты нормалей запеченные в других программах (substance painter, Zbrush) дают странный результат в Blender .
Проблема в том что карты нормалей, в вышеперечисленных, и не только, программах, запекаются c использованием DirectX, а blender работает с OpenGL. Если говорить простым языком то нам нужно развернуть зеленый канал на карте нормалей. Делается это следующим образом:
Надеюсь, что данный пост поможет людям, осваивающим блендер, проскочить несколько часов поиска решения проблем!
Источник
Reference/Release Notes/3.0/Asset Browser
Blender 3.0 includes a new editor: Asset Browser.
This is the first part of the Asset Browser project: basic listing and browsing for Blender data-blocks saved locally.
The About Milestone 1 section gives more information about what to expect from the current implementation.
Workflow
Creating Assets
The Mark Asset operator turns a data-block into an asset data-block. It’s available in a few places:
- Right-click a data-block in the Outliner >Mark Asset or Outliner >ID Data >Mark Asset. This way you can also select multiple data-blocks and mark them as assets.
- Right-click a button that represents a data-block (e.g. a data-block selector or material slot) >Mark Asset.
- Search menu in the Outliner.
- Save the file, if you want the new asset data-block to be available in other projects.
There’s also the Clear Asset operator. It removes all asset metadata and turns an asset data-block back into a regular data-block.
Mounting Asset Libraries
It is possible to select any directory as asset library. This can be done in Preferences > File Paths > Asset Libraries.
There is a default library pointing to the following paths:
| Platform | Path |
|---|---|
| Windows | C:\Users\username\Documents\Blender\Assets\ |
| Linux | |
| MacOS |
Using Assets
The Asset Browser is a new, regular editor.
In the Asset Browser, you can:
- Select an asset library to browse in.
- Choose a category of assets to show.
- Drag collection, object, image and material assets into 3D Views.
- View metadata of the active asset.
- Edit metadata of the active asset in the Current File asset library.
Most display and filter options won’t work yet, that is expected.
Catalogs
Assets can be organised in catalogs (rB9b12b23d). These are independent of the blend file the asset is stored in, providing great flexibility.
Additional Features
- Support for generating object previews. (rB4b039669)
- Support for loading custom images as data-block previews. (rB812ea918)
- Operator to regenerate automatic data-block previews. (rB58d818f8)
- Asset data-blocks show a asset icon in the Outliner and search menus. (rB3fc9fc1c)
- Various Python API additions, check the dedicated release notes.
- Only Assets options for link and append.

- Support rendering previews for Action datablocks (rB17534e28). It uses the scene camera and renders the current frame with Solid shading (i.e. the Workbench engine). It assumes the scene is already set up properly for preview rendering, i.e. it does not apply the Action itself to whatever is rendered. To configure the look of the preview, set the scene render engine to Workbench in the properties panel, and configure the shading options there.
- «Frame Selected» operator to scroll to the selected files or assets (5a67407d5a). This has shortcut Numpad . in Blender’s default keymap, and F in the Industry Compatible keymap.
Pose Libraries
The new Asset Browser also was used as a base for a new approach to Pose Libraries. For further info, refer to the notes on the Animation & Rigging page or to the Pose Libraries v2.0 blog post for a throughout explanation.
About Milestone 1
For the first milestone, the user takes the role of the asset manager and is in charge over where and how assets are stored. The Asset Browser gives a view into user-managed asset libraries.
Use-Cases
The main use-case is local user asset libraries. That is, a user can store data-blocks for own reuse in self defined locations on the hard drive, and conveniently access them from any project.
For simple projects that may also be enough, where all .blends are in a single directory or in few directories (which can individually be mounted as asset libraries in the Preferences).
- Data-blocks are not automatically assets. They have to be explicitly be marked as such.
- An asset library is a directory containing .blend files. Each of the .blend files can contain asset data-blocks.
- To make an asset library available in other projects, it has to be mounted in the Preferences.
- Asset creation and metadata editing can only be done for the current file.
- I.e. you can’t just drag a data-block into an asset library, or move assets between asset libraries from within Blender.
- So to edit an asset library, you have to open one of its .blend files and do the edits there.
- This way, Blender doesn’t automatically have to decide how the asset will be stored inside the asset library and how to deal with dependencies (e.g. the image texture of a material). The user is fully in charge of managing that.
- Save the file to make the edits to the asset library available elsewhere.
- The Current File asset library is special:
It always shows the assets of the current file (no manual refreshing or saving needed) and it is the only asset library that allows editing of asset metadata (e.g. name, preview, description or tags). So like for asset creation, to edit the metadata of an asset, the file that contains the asset has to be opened, edited (via the Current File asset library) and saved. - For when an Asset Browser shows an external asset library that was edited, there is a refresh button next to the asset library selector.
More Information
For more high-level design information, refer to this design overview or this blogpost.
(In old documents about the Asset Browser/Manager project, the term «repository» may be used for libraries still.)
Changes Since 2.93
The Asset Browser was experimental until 3.0. Here are the changes done compared to the previous releases (where it was still experimental).
- Add option to link assets on drag & drop (f6c5af3d47).
Источник


