Corona Renderer Helpdesk for 3ds Max plugin
How can we help you today?
Corona Hair Material Print
Modified on: Wed, 13 May, 2020 at 10:50 AM
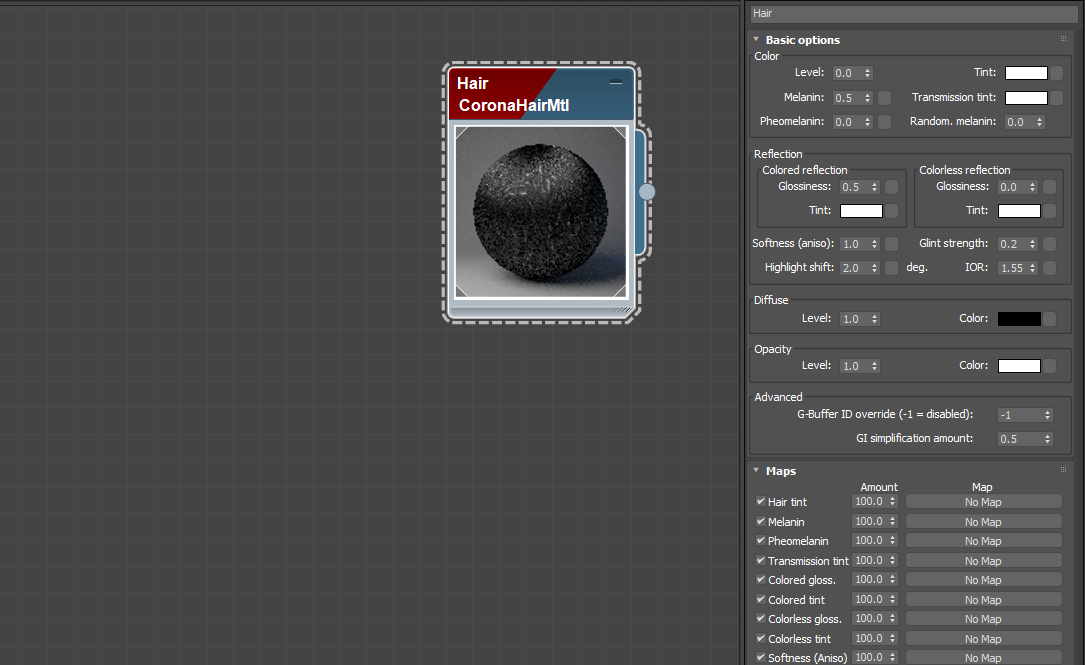
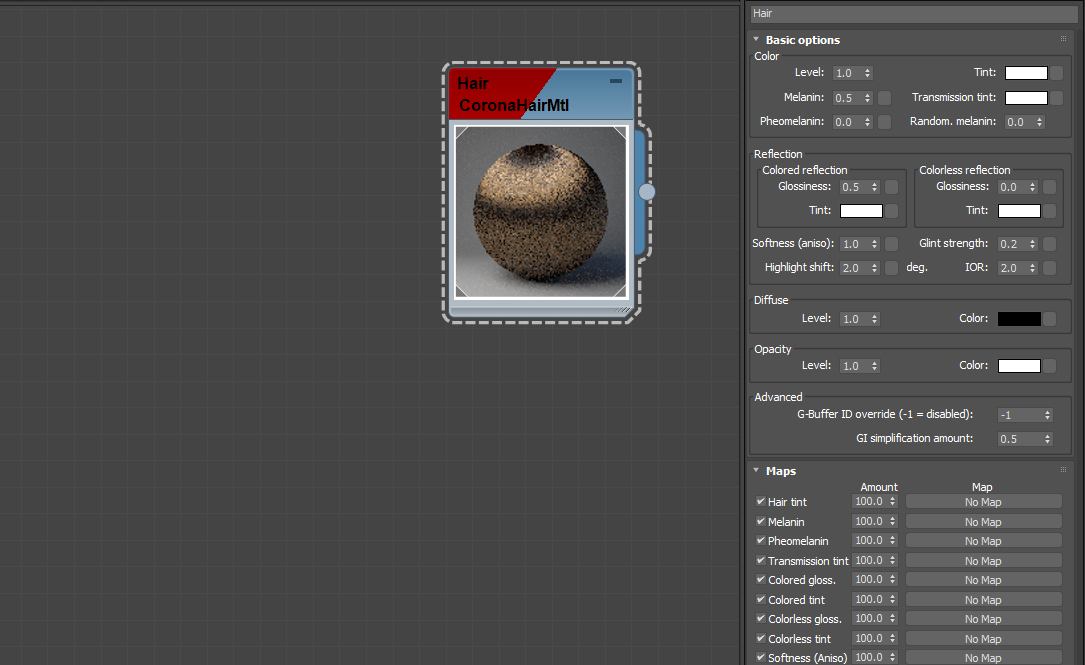
Corona Hair Material
The Corona Hair Material can be used to render realistic human hair, but also animal fur, or synthetic fibers. It features a number of options allowing you to easily control the appearance of the hair material, all wrapped in a convenient user interface.
Hair Geometry
Corona Renderer supports the following plugins for generating hair geometry:
Note: when rendering hair with Corona Renderer, using any of the above plugins, you do not need to adjust any settings in the 3ds Max Effects dialog!
Applying the Corona Hair Material to any other objects than special hair geometry (e.g. to boxes, spheres, or teapots) will most likely result in incorrect rendering and visible artifacts/issues.
Hair Material
Hair has particular unique qualities that need a dedicated shader. The Corona Hair Material is physically accurate, and handles the unique highlights and transmission properties that hair requires, while still rendering quickly and giving you the ease of use in controlling the material that you expect from Corona Renderer.
The hair material is mainly intended for creating human hair and animal fur, as it includes properties based on natural hair model (melanin pigment amount, anisotropic reflections, hair fiber caustics), however it can be as well used to render carpet strands, fuzzy fabrics, nylon strings, and other types of synthetic fibers.
Note: to apply the hair material to hair generated using the native 3ds Max Hair and Fur modifier, select the modifier, and drag-and-drop the material under the «Custom shader» rollout («mr shader» in older versions of 3ds Max).
CoronaHairMod Modifier
The CoronaHairMod modifier can be used to control the «level of detail» of the hair geometry. By default, each hair strand is rendered as a flat 2D plane to achieve the best rendering speed at the cost of some realism. Using this modifier, you can force Corona to render hair as 3D tubes, which is useful for close-ups (e.g. eyelashes when the camera is zoomed in on an eye). Generally, for shots where the shape of each individual hair strand is not visible up close, it is best to use the default settings for optimal performance and quality.


By default, when the CoronaHairMod modifier is not used, hair strands are rendered as flat planes.

The CoronaHairMod modifier can be used to render hair as 3D tubes, which is useful for close-ups.
Examples
Usually, adjusting various parameters of the hair material is needed, depending on the kind of hair that is to be rendered. Below you will find a list of basic hair material examples:
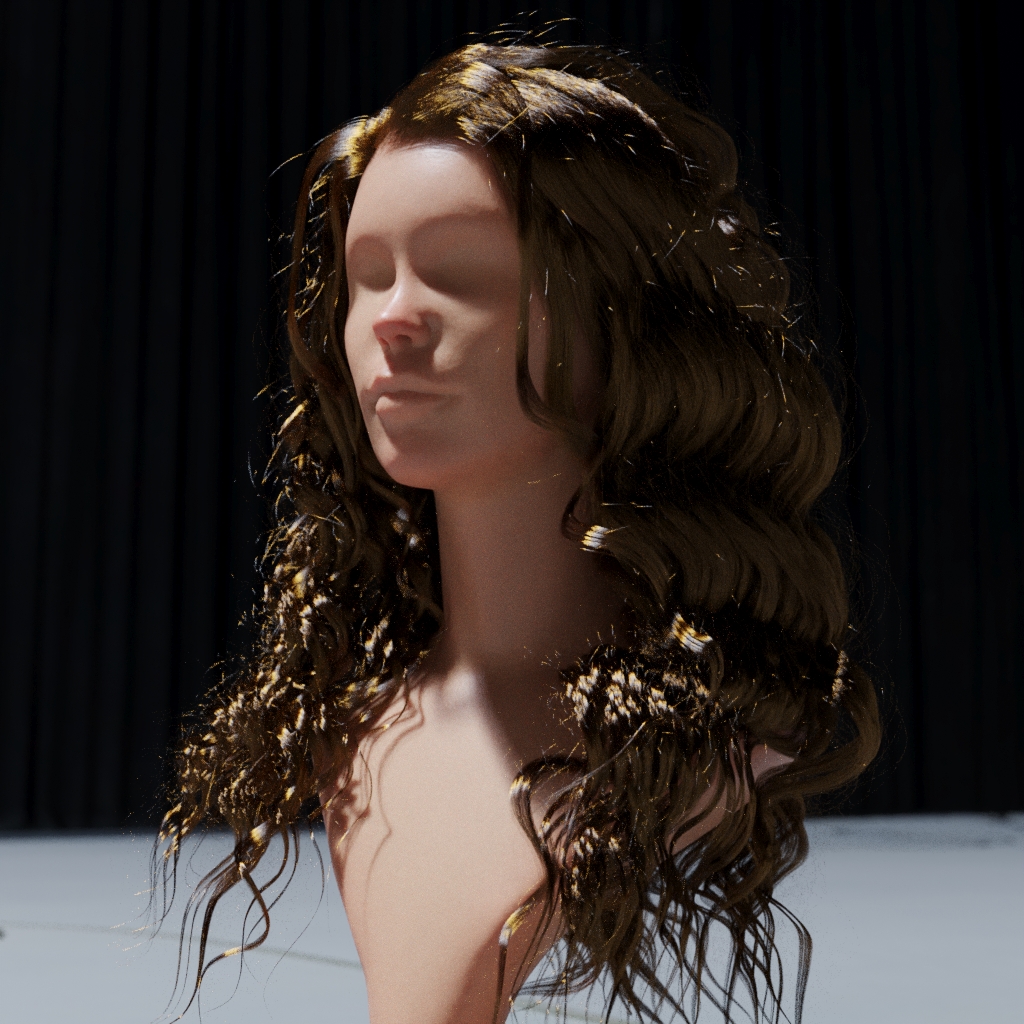
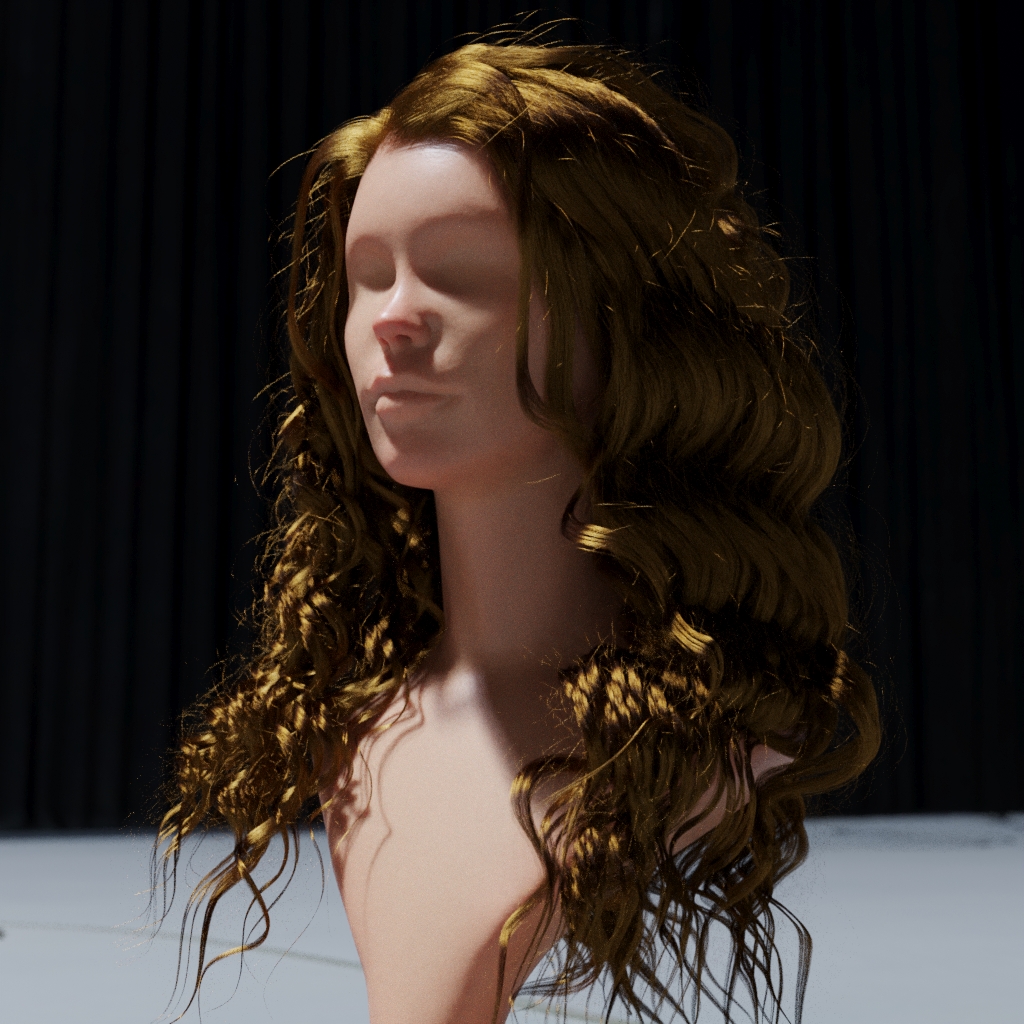
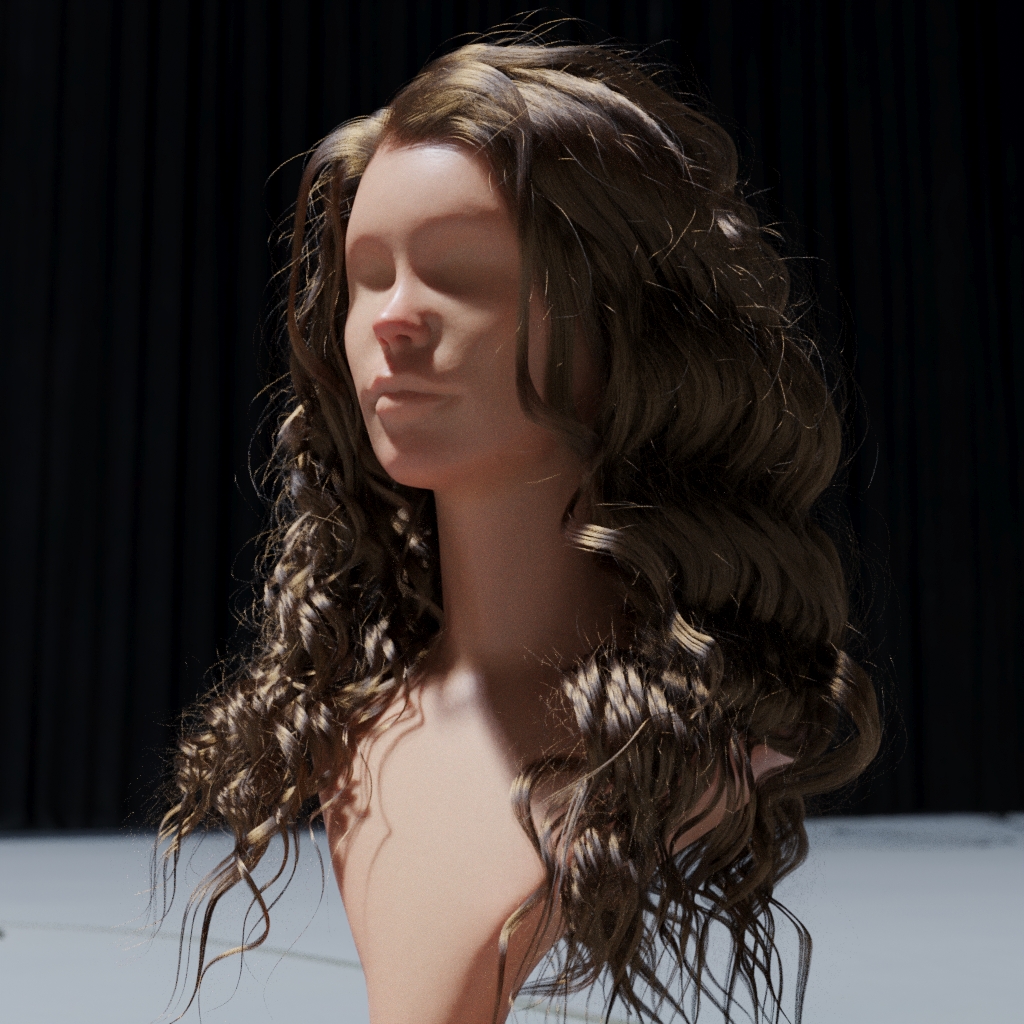
Note: the female head model with hair was kindly provided by Andrew Krivulya / https://artofcharly.artstation.com/
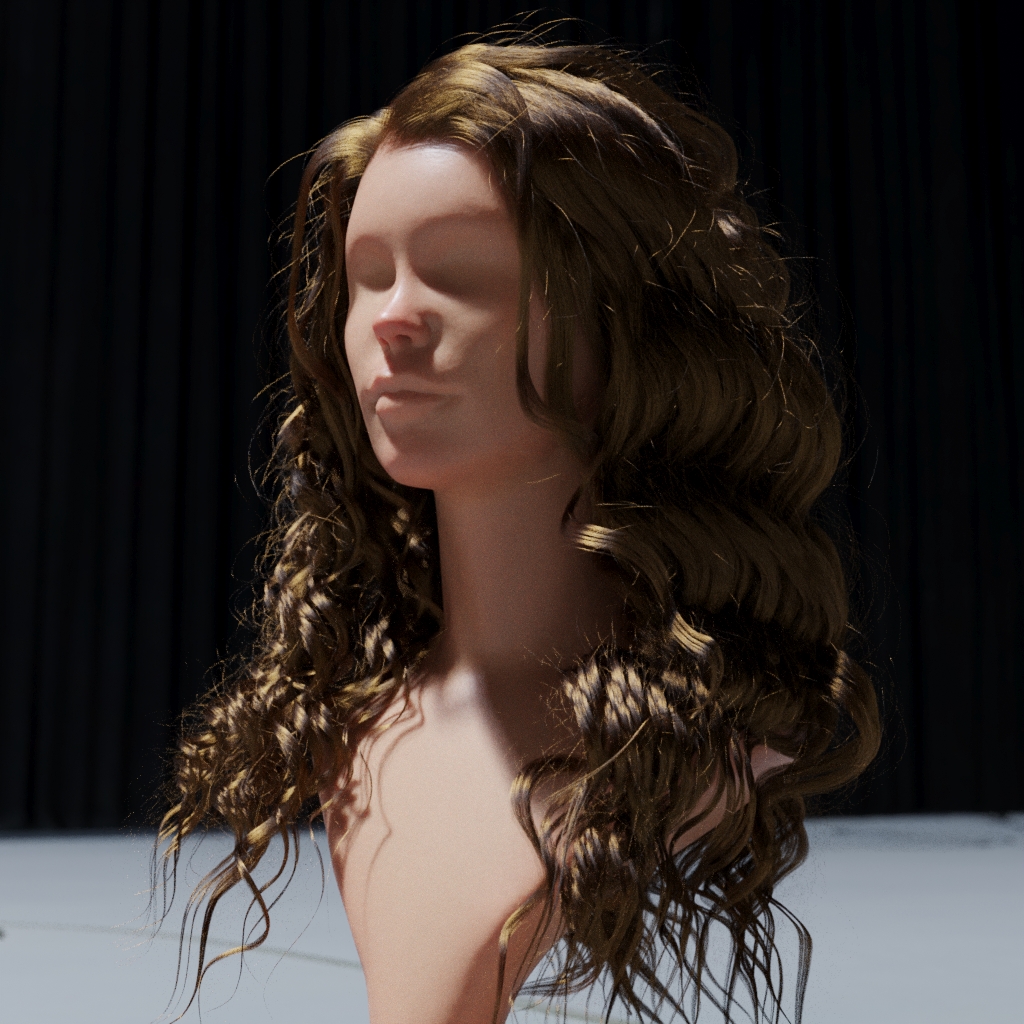
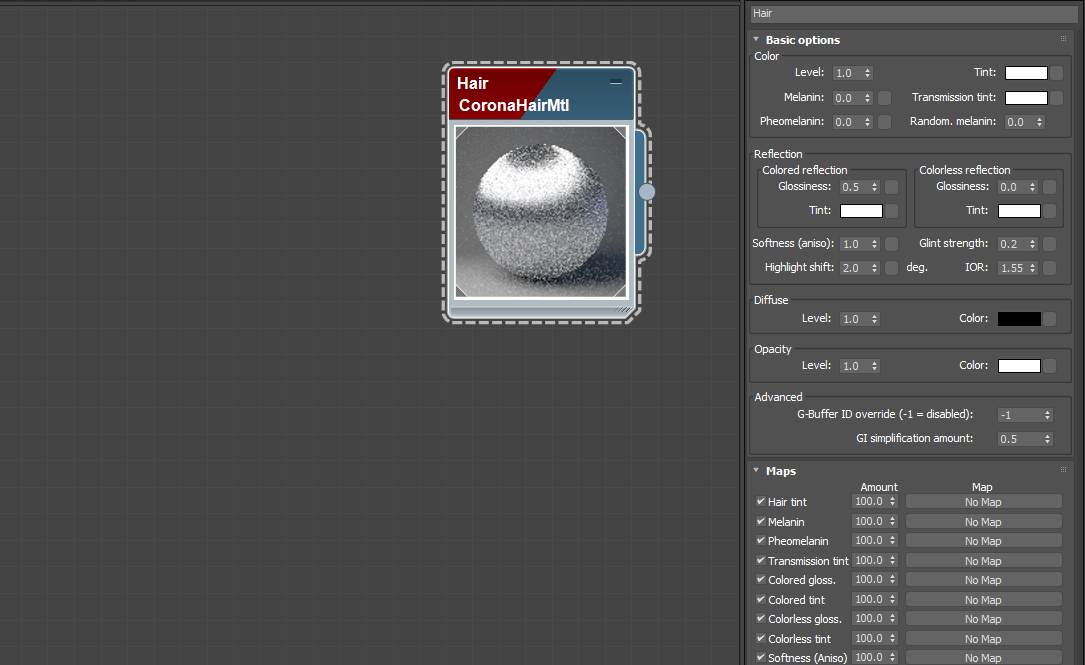
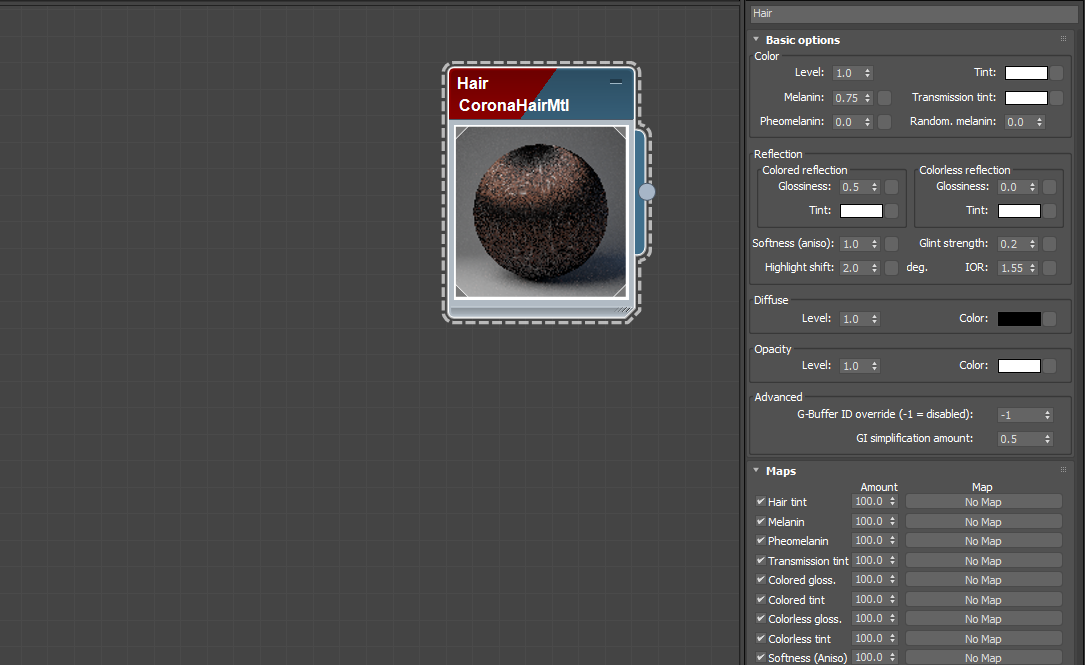
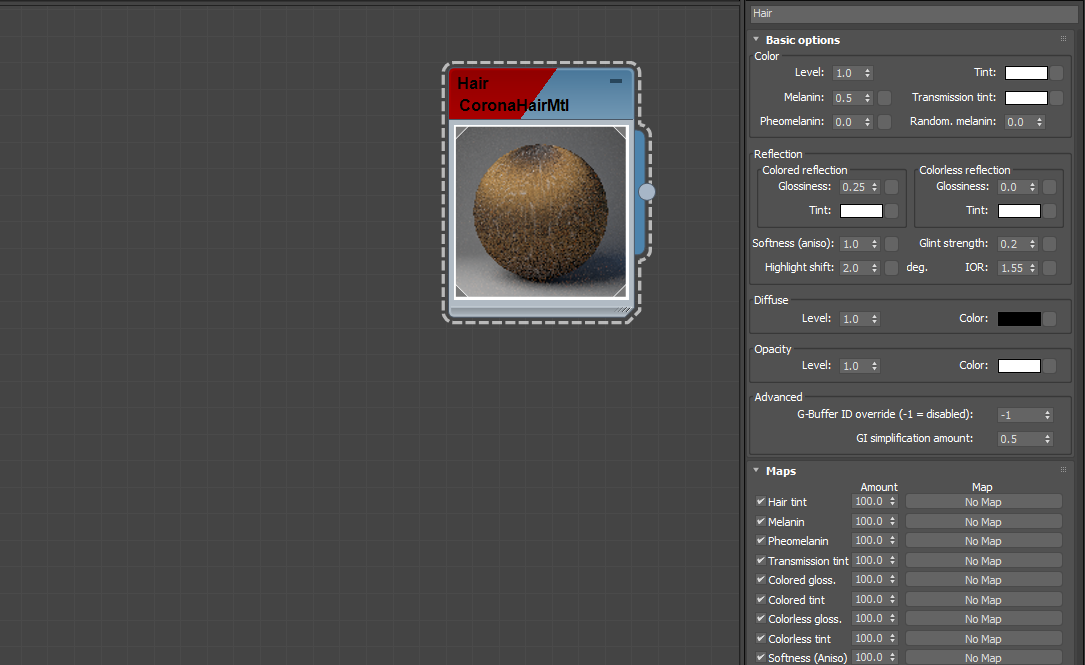
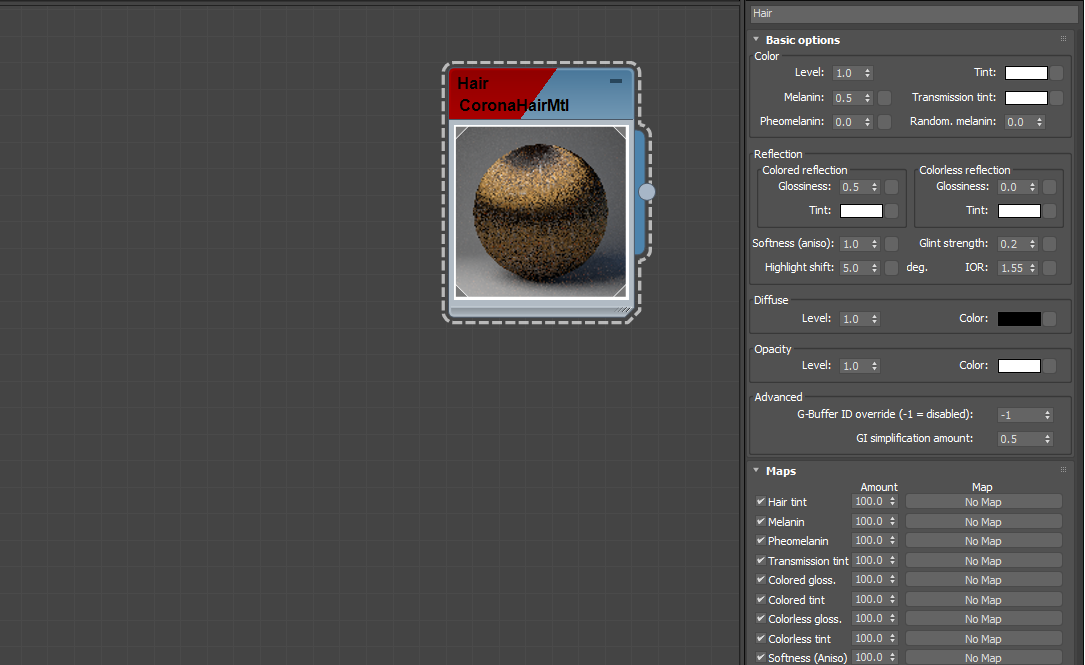
Default hair material settings. This is what we get out of the box, when a new Corona Hair Material is created:
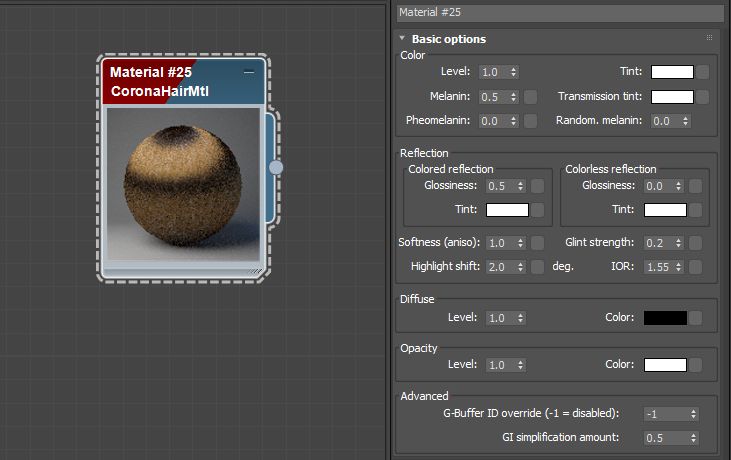
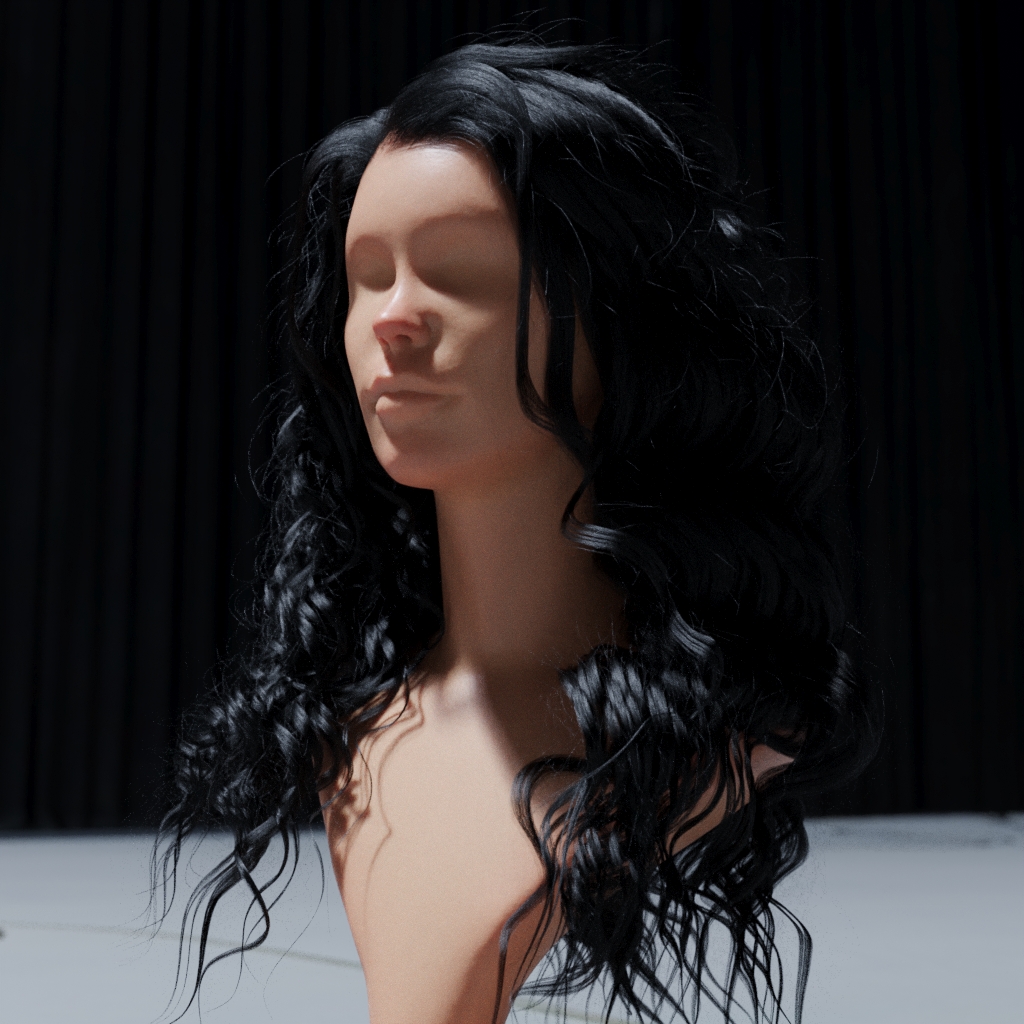
Color > Level under Basic options changed to 0 (from the default 1). This results in completely black hair:
Melanin lowered to 0 (from the default 0,5). This results in completely white hair:

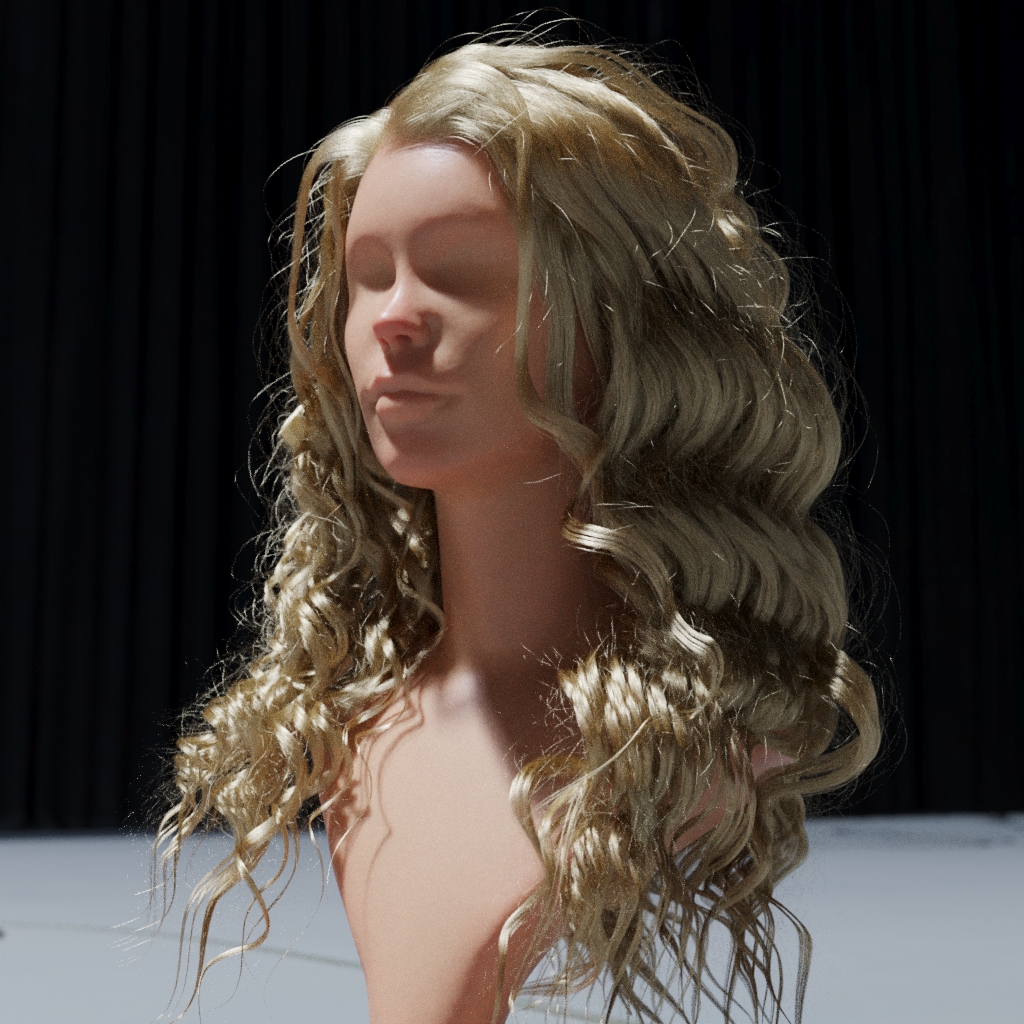
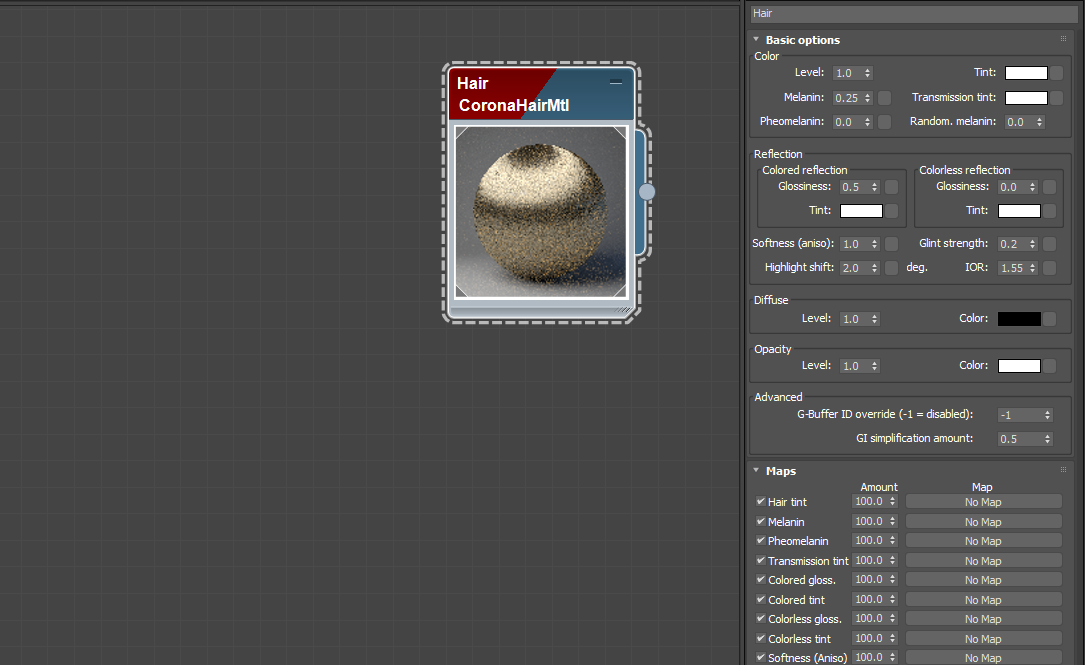
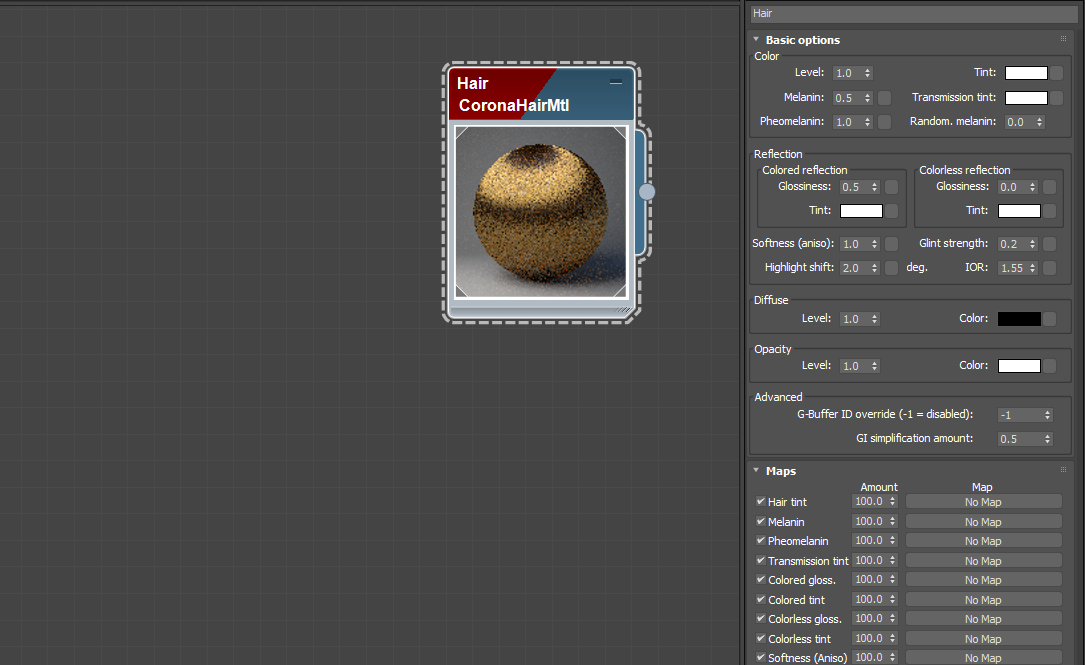
Melanin lowered to 0,25 (from the default 0,5). This results in brighter, blonder hair, compared to the default rendering:
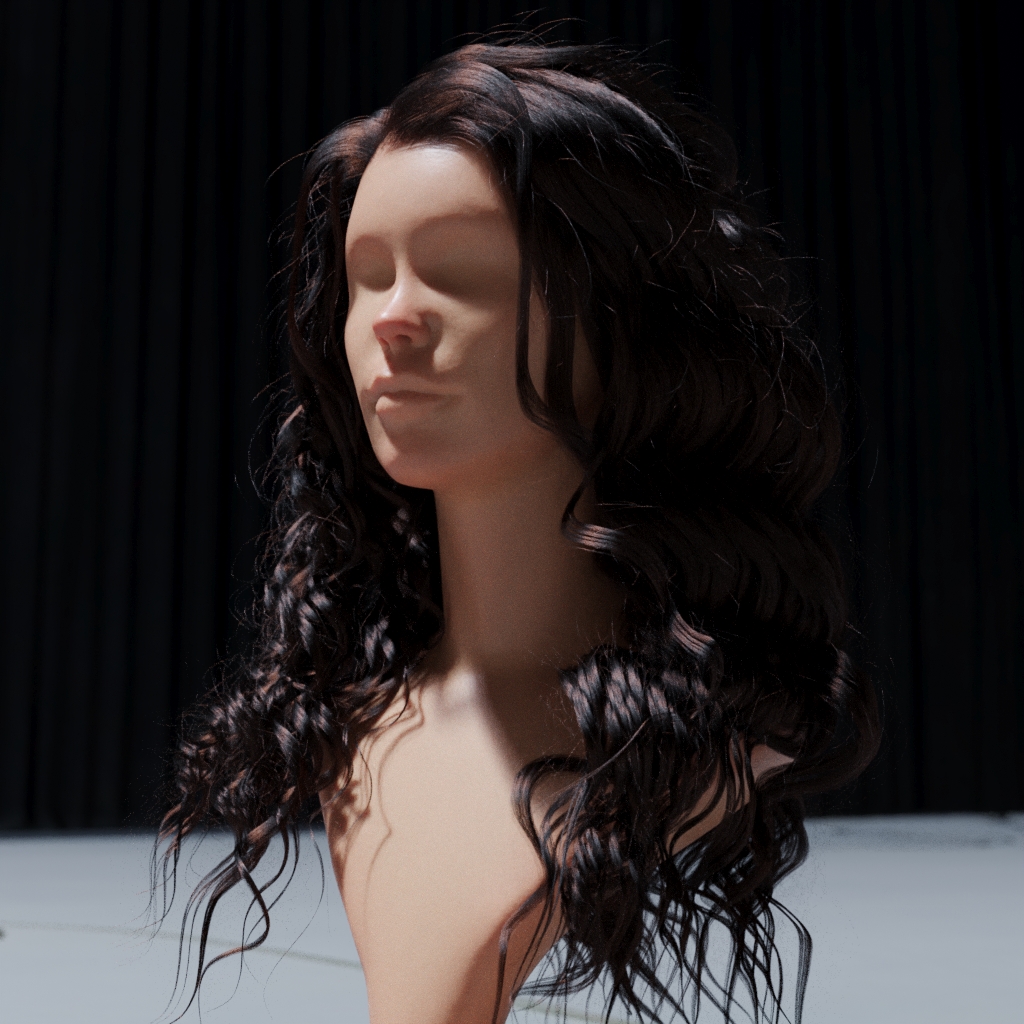
Melanin increased to 0,75 (from the default 0,5). This results in darker, brown hair, compared to the default rendering:
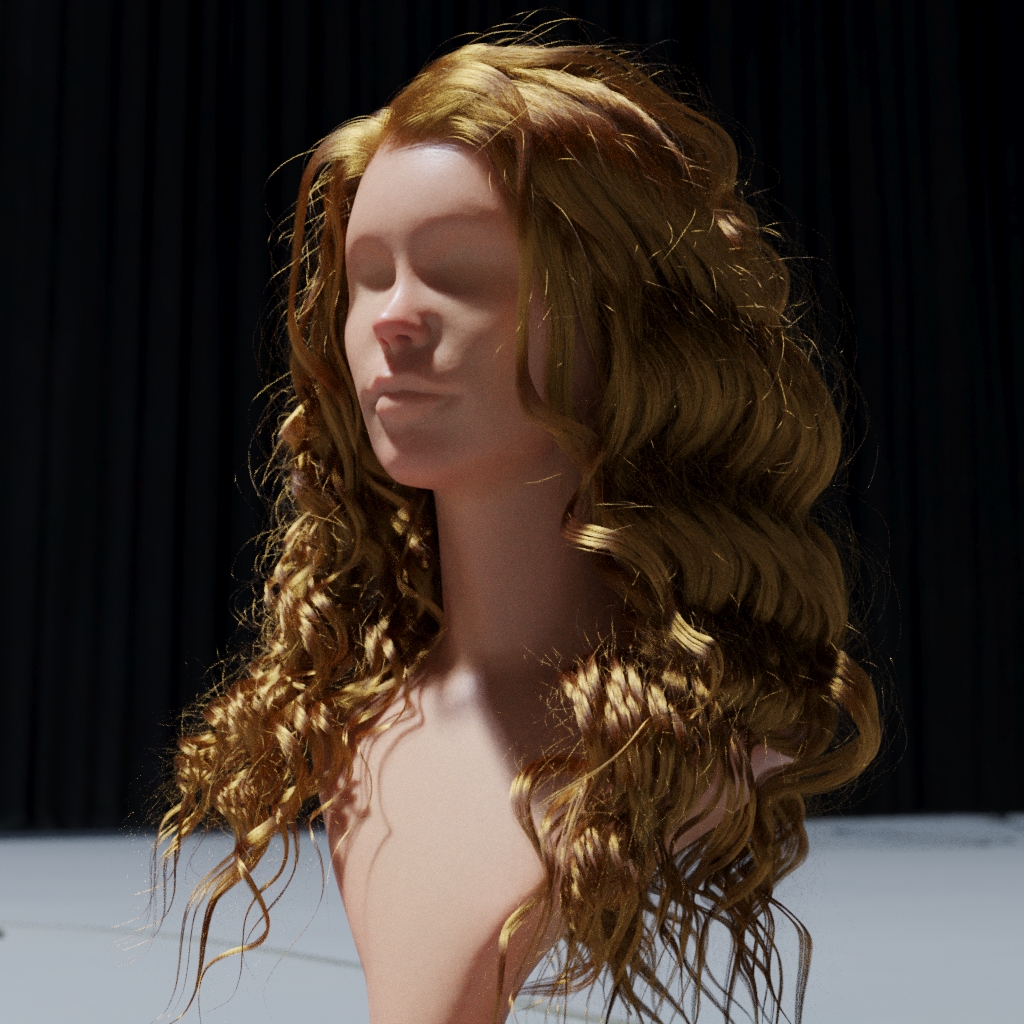
Pheomelanin increased to 1 (from the default 0). This results in reddish hue visible in the hair:
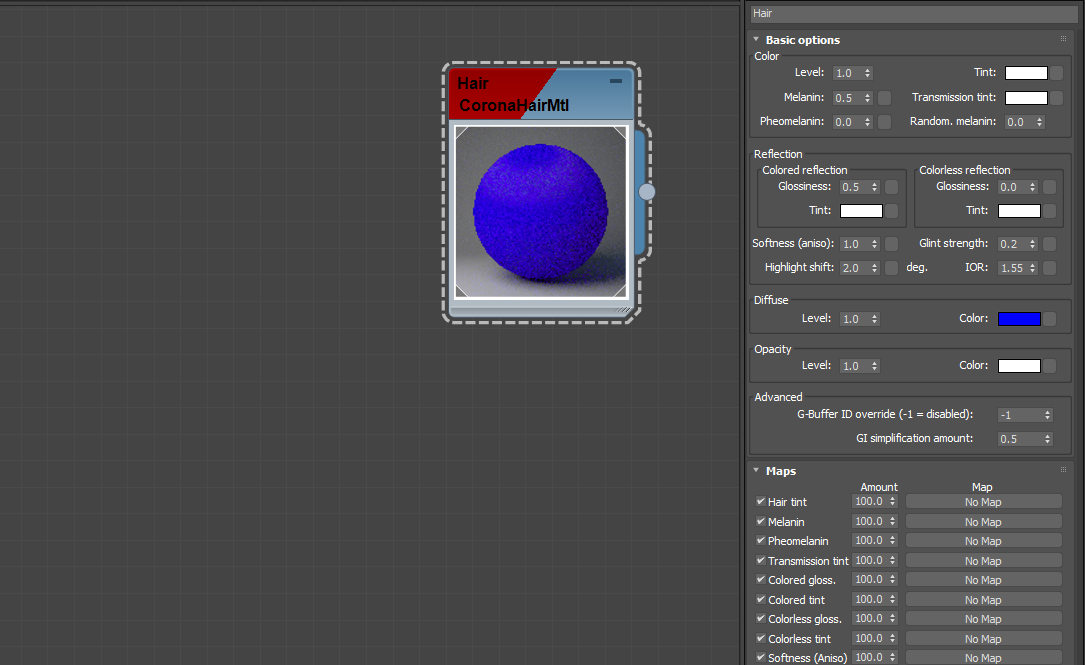
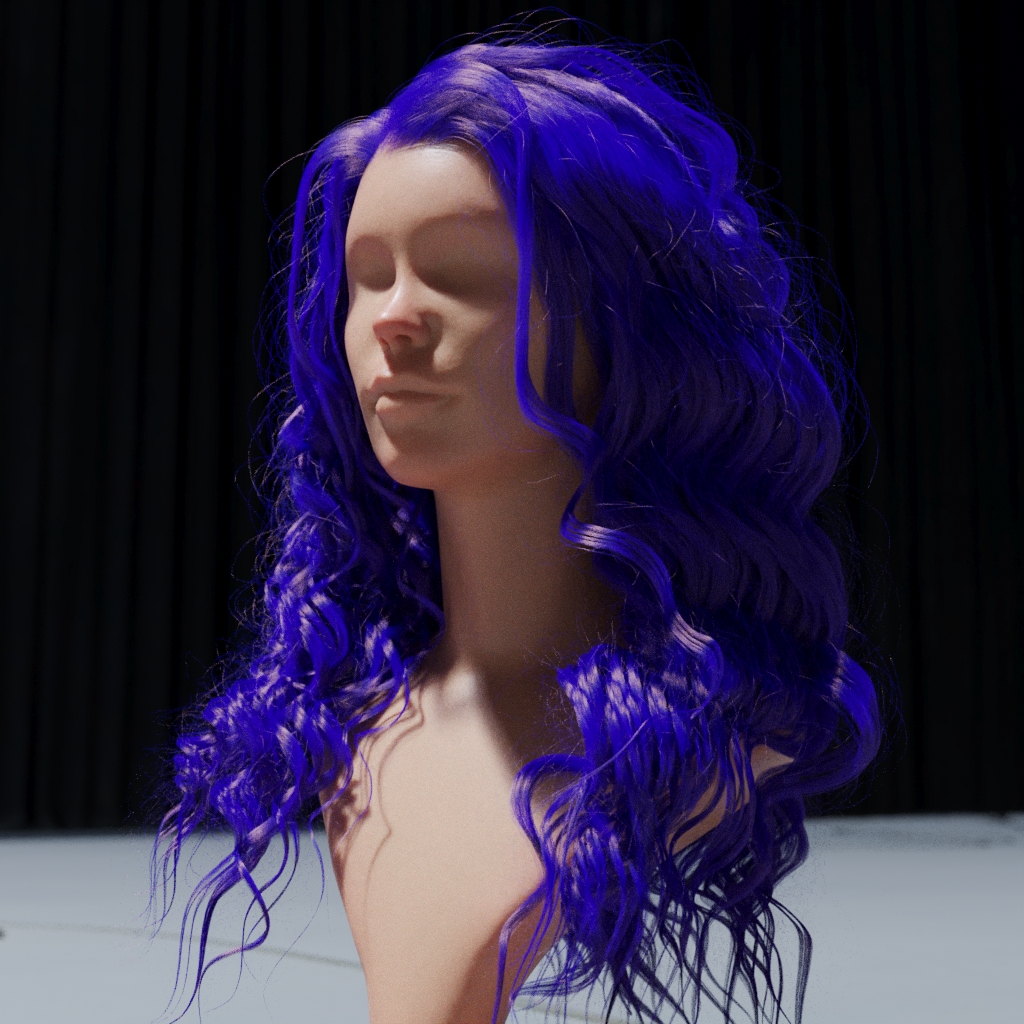
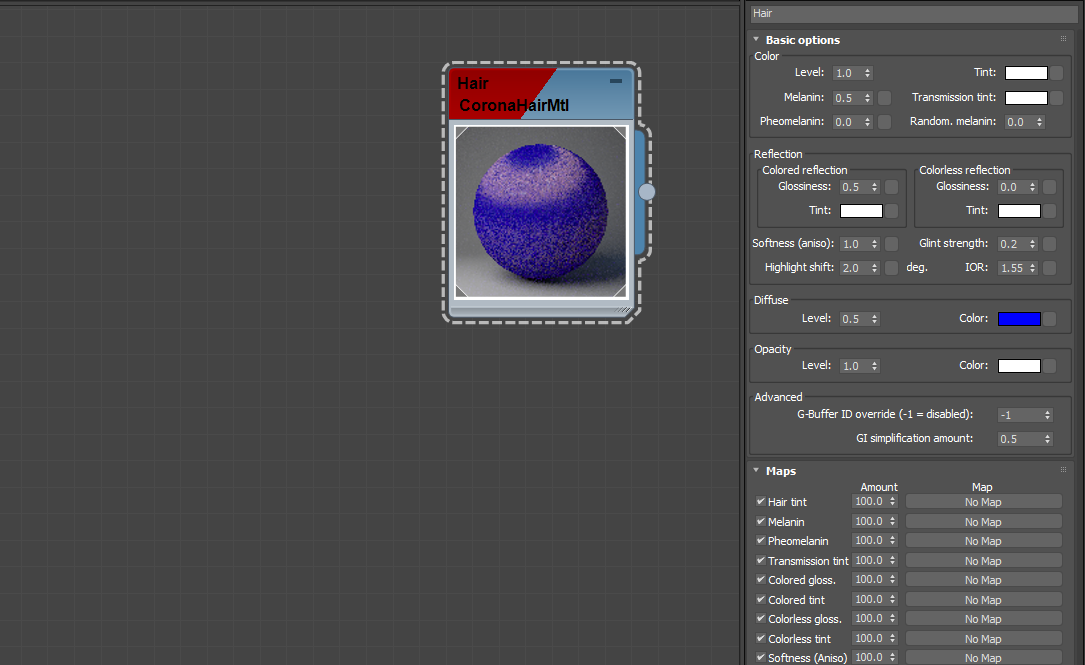
Diffuse color changed to blue (from the default black). This results in hair appearing covered with a layer of paint, or some other material, which is added on top of it. It can be used to add dust or dirt to the hair:

Diffuse color set to blue again, but this time the diffuse level has been lowered from the default 1 to 0,5:
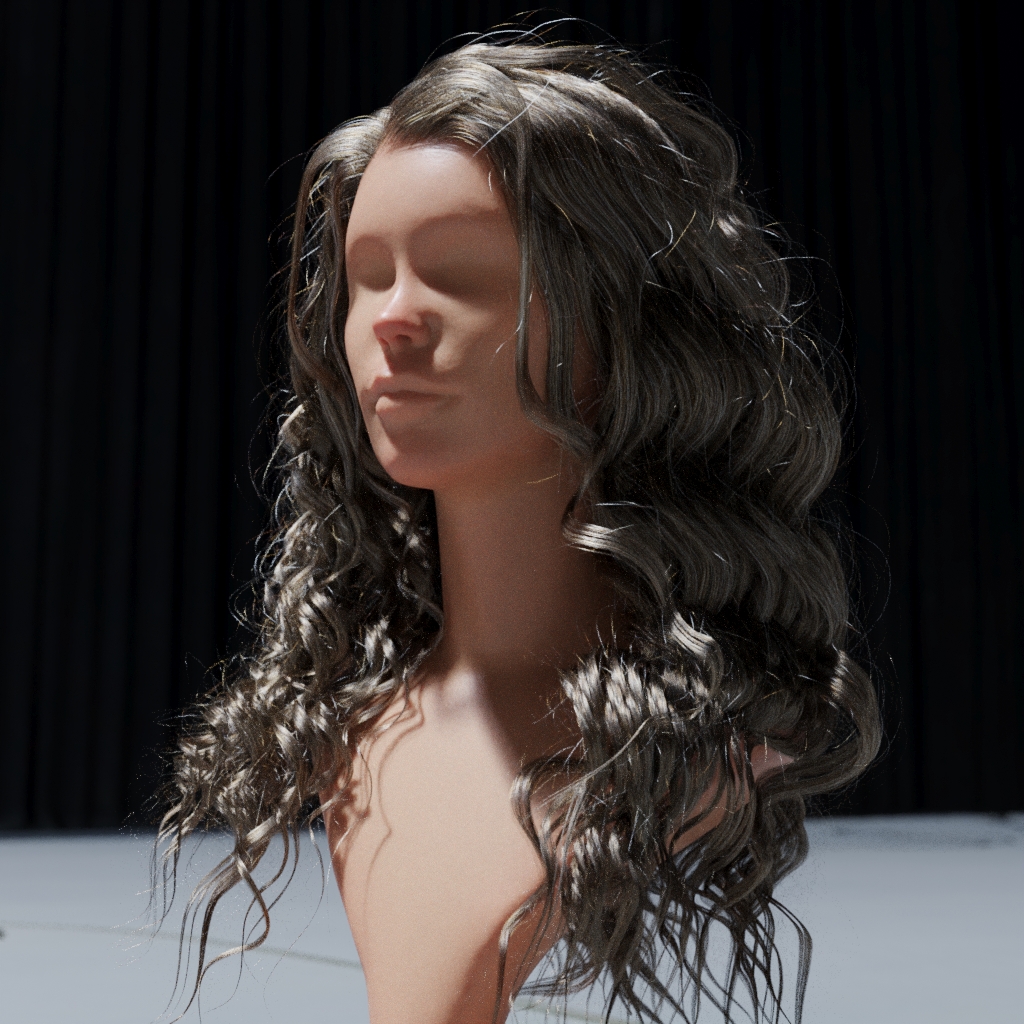
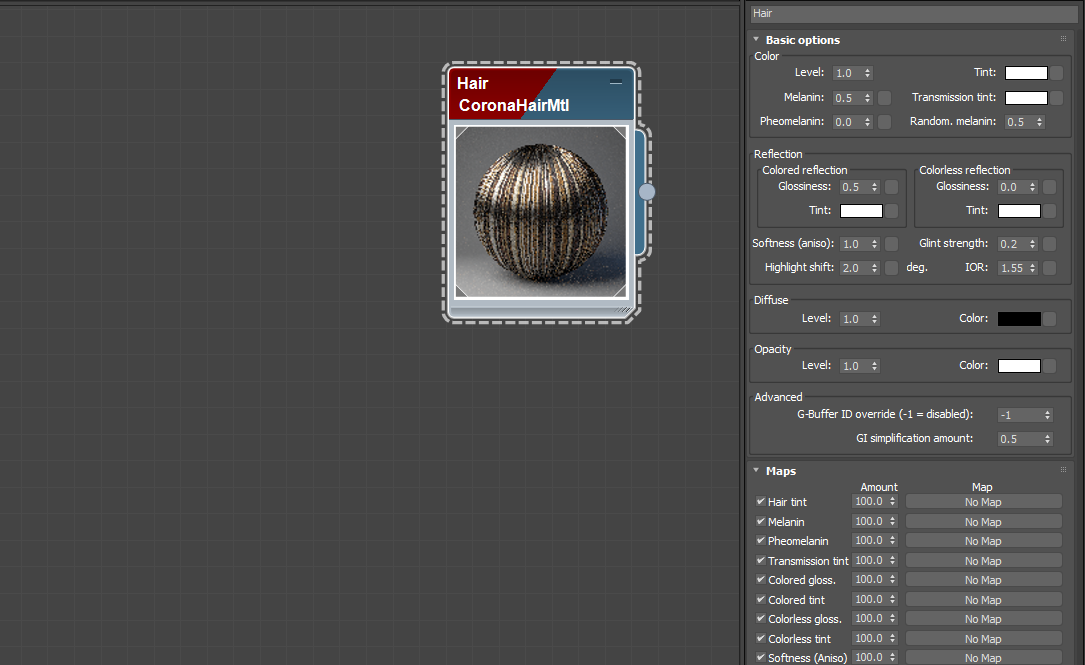
Random melanin changed from the default 0 (no randomization) to 0.5. This results in various melanin levels across different hair strands:
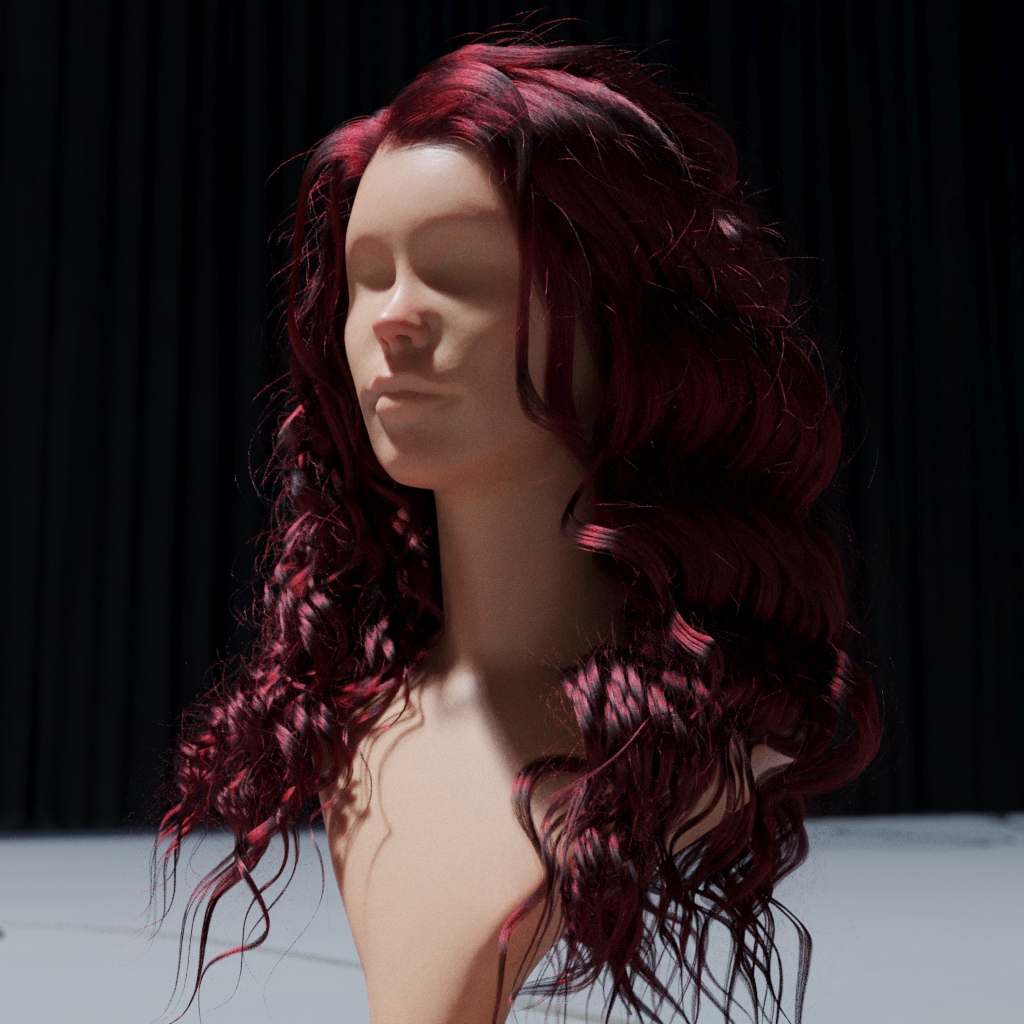
Tint changed to pure red (from the default white). This gives the hair surface a reddish overall tint:

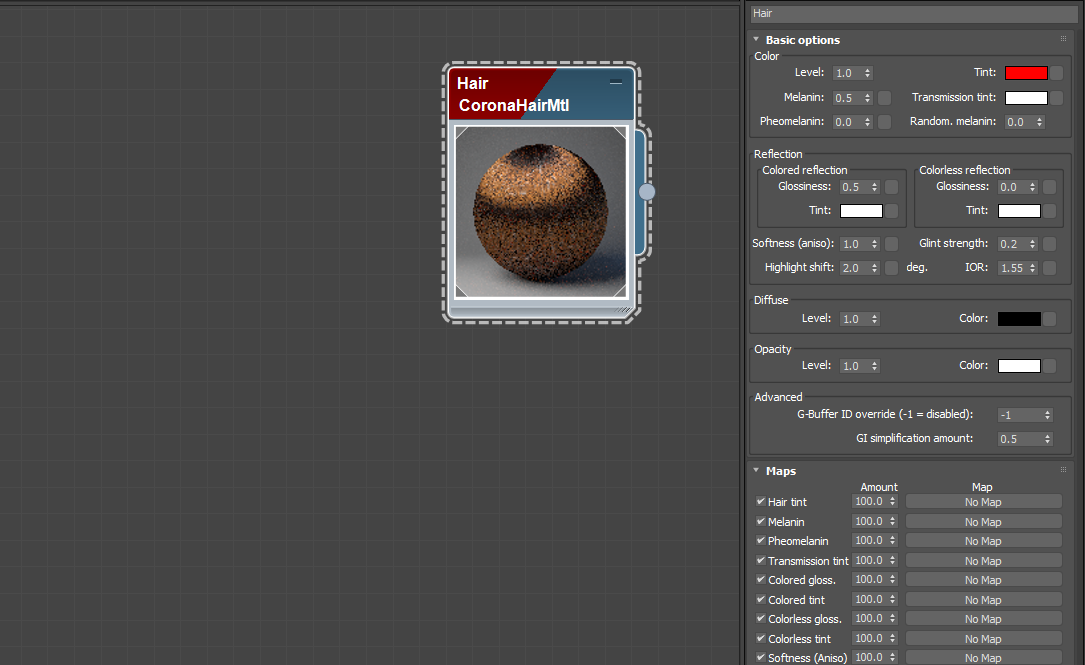
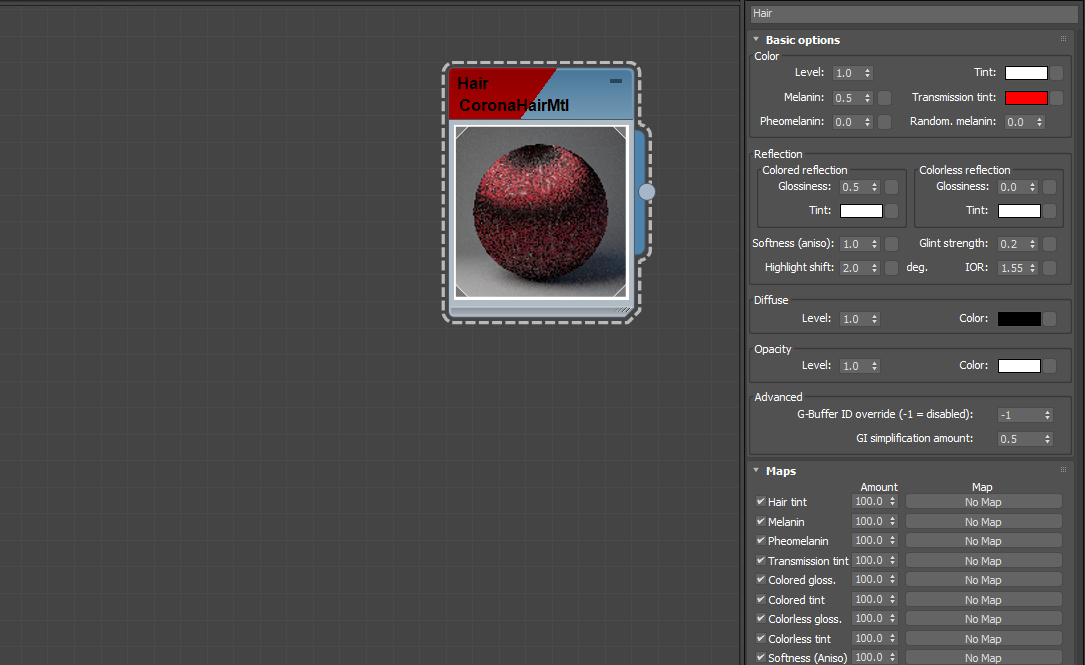
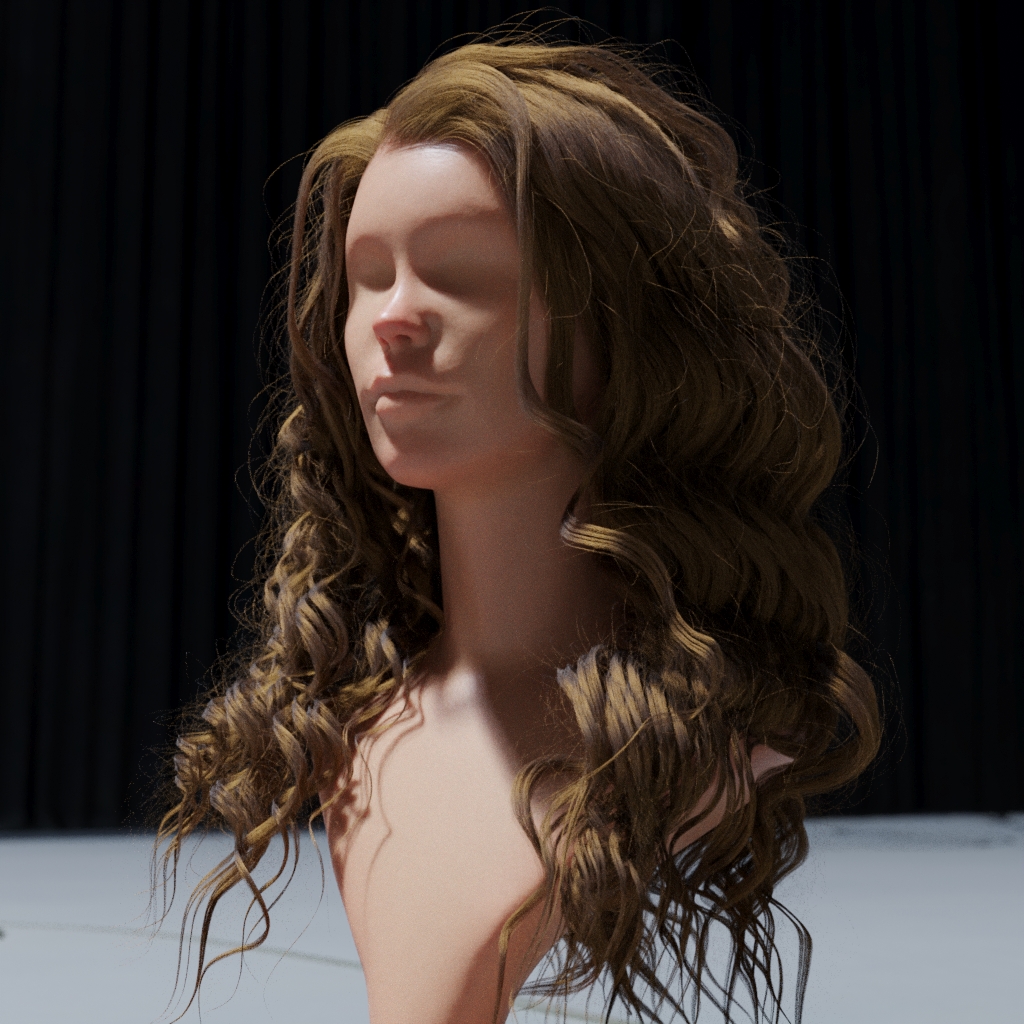
Transmission tint changed to pure red (from the default white). This gives the hair volume a reddish overall tint:
Colored reflection glossiness lowered from the default 0.5 to 0.25. This makes hair appear matted and less shiny:
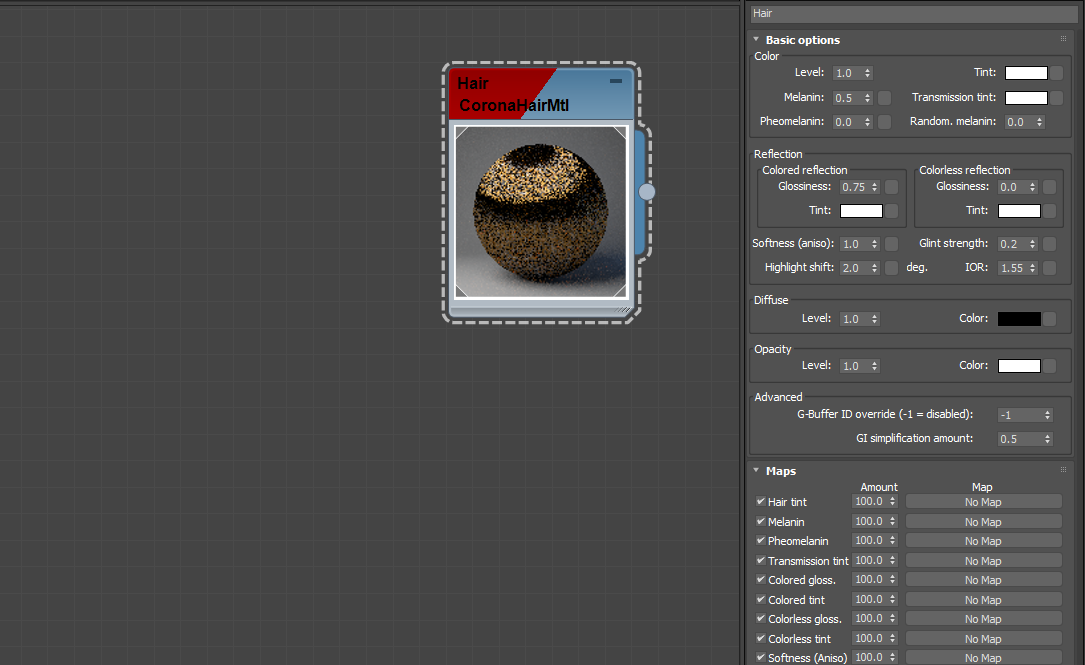
Colored reflection glossiness increased from the default 0.5 to 0.75. This makes hair appear more shiny and oily:
Colorless reflection glossiness increased from the default 0 to 0.5. This makes the colorless reflections more focused and the hair shinier:


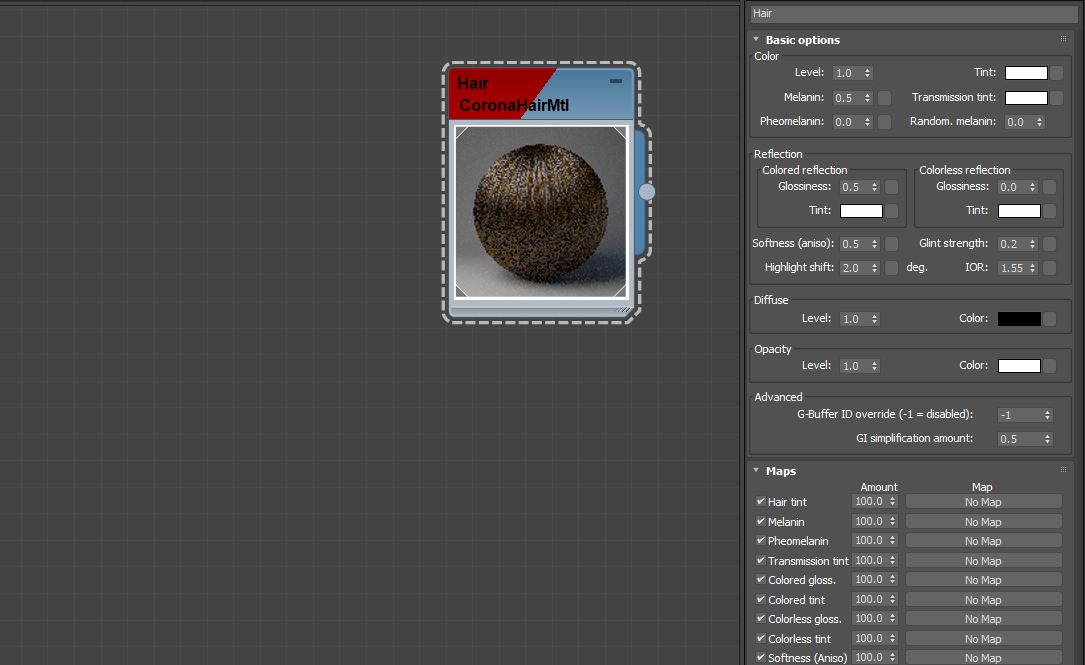
Softness (aniso) lowered from the default 1 to 0.5. This makes hair appear softer by reducing its reflection anisotropy:

Highlight shift increased from the default 2 to 5. This moves the colored and colorless highlights farther from each other, effectively splitting them into two separate highlights:

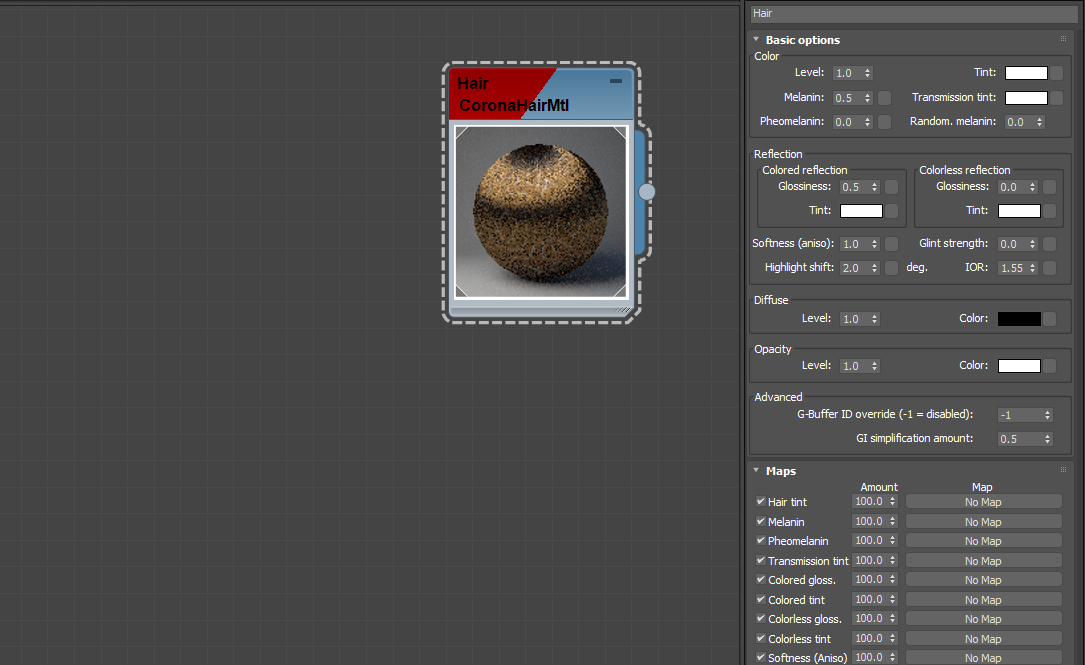
Highlight shift reduced from the default 2 to 0. This moves the colored and colorless highlights close to each other, in this case making them perfectly overlap with each other:


Glint strength lowered from the default 0.2 to 0. This affects the tiny variations of hair structure. Higher values mean that hair is more damaged. In case of this value set to 0, the structure is uniform, so the hair do not appear damaged at all:

Glint strength increased from the default value of 0.2 to 1. This changes the structure of hair making them appear more damaged and less healthy:


IOR lowered from the default 1.55 to 1.1. This reduces the overall hair reflectivity:

IOR increased from the default value of 1.55 to 2. This increases the overall hair reflectivity:
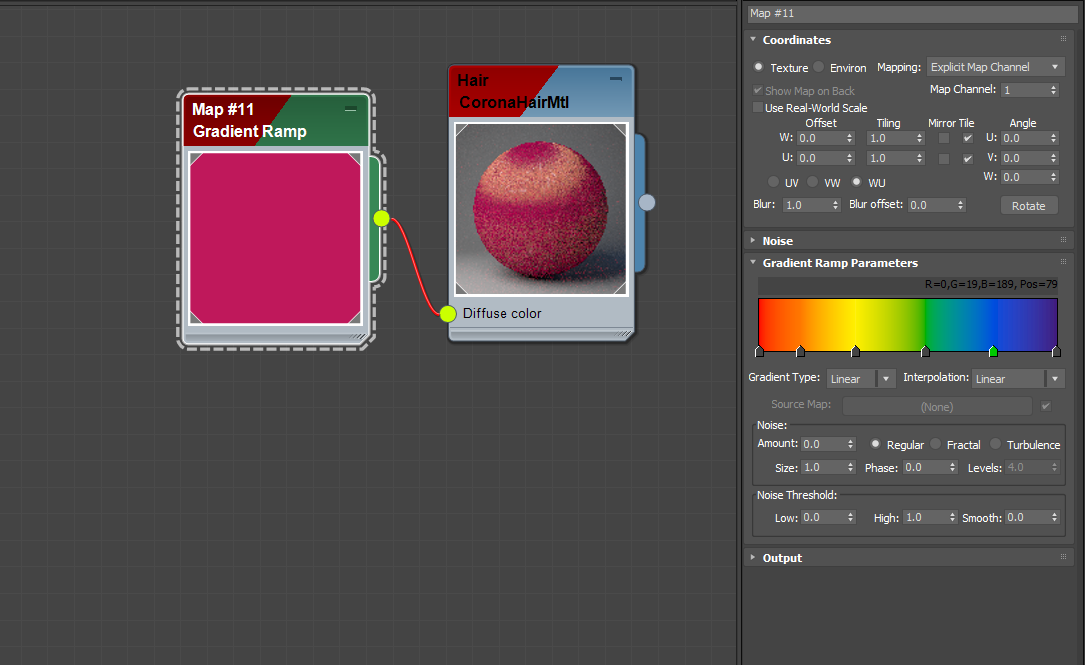
Texturing hair. A rainbow gradient from the roots to the tips can be achieved by applying a gradient map set to WU coordinates: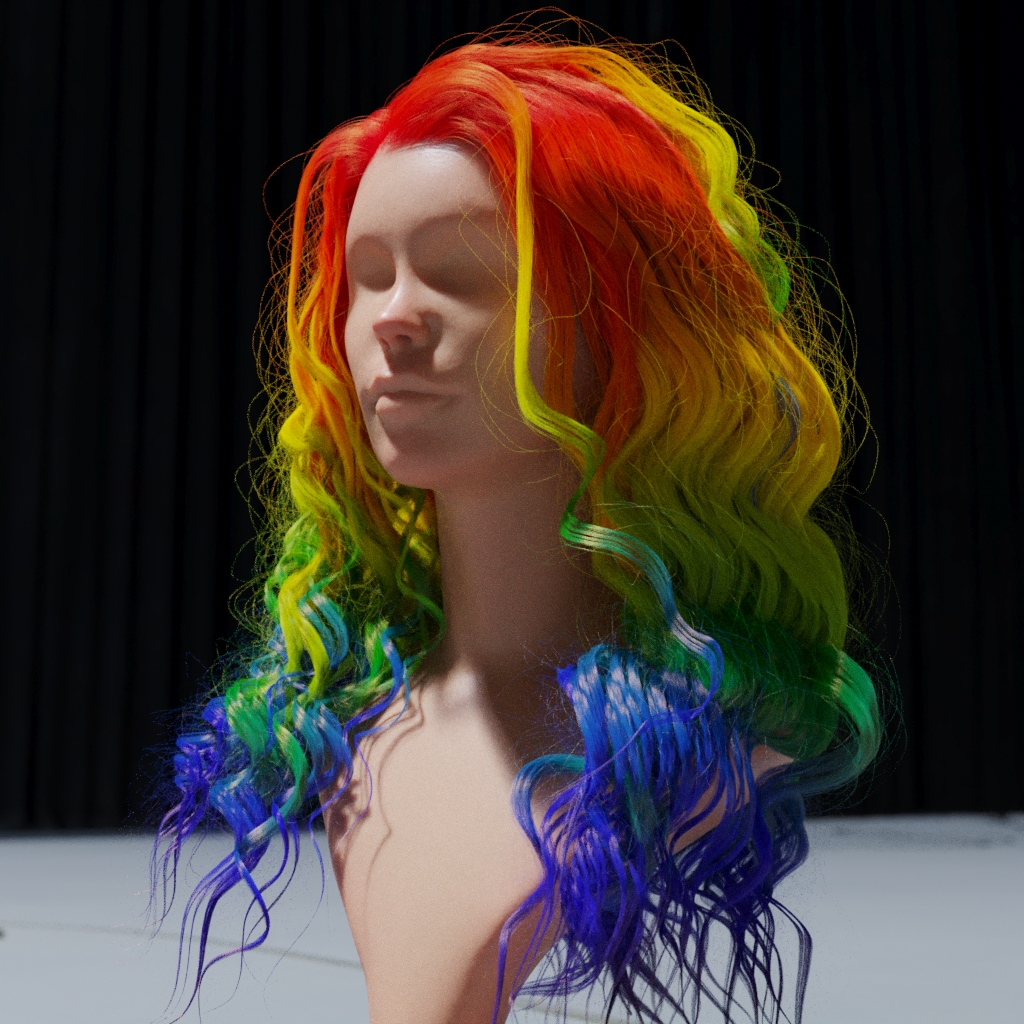
Texturing hair. A checker map was used in this example to vary the hair diffuse color. Note that the texture is evaluated on the surface of the base mesh and then is evenly distributed along hair strands based on that:
Источник
Ошибка Corona Render 1.7.2 (Hair and Fur)

При внесения в сцену моделей с ворсом или домашних животных выдает ошибку. Есть у кого нибудь такая же проблема? как решить? 

Тут тоже подобная проблема.

Сейчас столкнулся с такой же ерундой. Вылетает ошибка при попытке запуска рендера с объектом, на который наложен модификатор Hair and Fur. Стоит «народная» 1.7.2 на 2014 Max’е. «geometry» в эффектах включено. Есть решение какое-нибудь?

![]()
я пока через конвертацию в меш, tools; hair>mesh, и здравствуйте 20000000 поликов))

![]()

Сейчас столкнулся с такой же ерундой. Вылетает ошибка при попытке запуска рендера с объектом, на который наложен модификатор Hair and Fur. Стоит «народная» 1.7.2 на 2014 Max’е. «geometry» в эффектах включено. Есть решение какое-нибудь?
У меня была проблема что при рендере волос вылетал Макс. Так Вот в свитке Effect я поставил Buffer а не Geometry и УУУРААА «помогло».
Метод Geometry никогда на использовал т.к. просчитывать волосы как геометрию, по моему мнению это ППЦ (хотя как знать, как знать). Я вообще никогда не юзал Geometry. Для Vray использовал только mrprim.
Мне говорили что Coronа лучше рендерит буфером, у меня пока без траблов. В отличи от Vray, Buffer в Corone работает куда адекватнее.
результат Corona+Hair and Fur в режиме Buffer
Источник


