- Baritone + Fabritone — бот, авто стройка, авто добыча ресурсов [1.16.5] [1.15.2] [1.14.4] [1.12.2]
- Краткий гайд:
- Самые важные команды:
- Чит бот баритон, авто-добыча, постройка — Baritone + Fabritone [1.16.5] [1.15.2] [1.14.4] [1.12.2]
- Как установить мод в майнкрафт?
- Как установить мод на 1.14.4, не для Fabric в майнкрафт?
- Как настроить баритон чтобы он копал золото
- Как настроить баритон чтобы он копал золото
Baritone + Fabritone — бот, авто стройка, авто добыча ресурсов [1.16.5] [1.15.2] [1.14.4] [1.12.2]
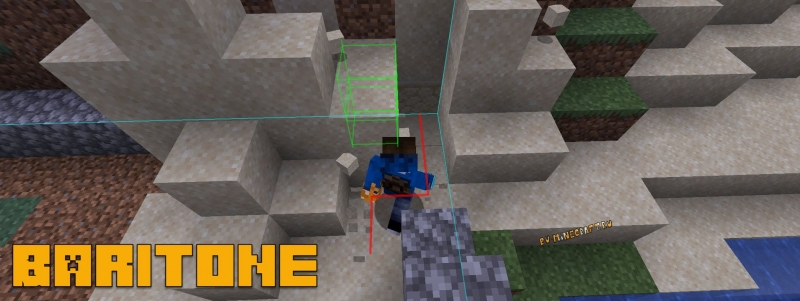
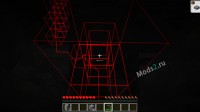
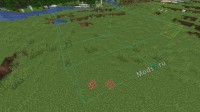
Мод Baritone — это невероятный чит-бот для серверов и одиночной игры, он позволяет в автоматическом режиме добывать ресурсы, копать тоннели, перемещаться, очищать и застраивать территорию, а так же строить автоматически строить постройки по Shematic файлу, притом все это ваш персонаж будет делать сам, в режиме выживания.
Данный бот позволит без труда добывать ресурсы пока вы отдыхаете, позволит построить красивую постройку, либо очистить\застроить огромную площадь, все что боту нужно — время, ресурсы, а он сам выберет самый оптимальный маршрут и будет избегать разных неприятностей.
Бот очень функциональный и интересный, у него множество возможностей, потому в этой статье я напишу как пользоваться самыми востребованными и простыми функциями, а, позже, возможно в отдельной статье, я опишу все функции бота (просите в комментариях).
Бот управляется из чата, и для удобства автор создал достаточно удобное меню помощи, где перечисляются все команды и как ими пользоваться, если вы хотя бы немного знаете английский, гайд вам особо не нужен.
На версии 1.12.2 мод умеет работать с модом Schematica по команде #schematica.
Мод Fabritone — это переделка мода для Fabric от другой команды.
Краткий гайд:
Что бы выполнить любую команду, нужно написать команду с префиксом, в нашем случае это # (либо в каких то версиях может быть @)
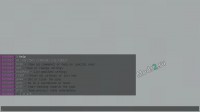
Самая главная команда, это #help она выведет удобное меню в котором перечислены все функции и возможности мода, кликнув на каждую вы сможете прочитать о ней подробнее, в том числе с полными примерами.
Самые важные команды:
Предупреждение :
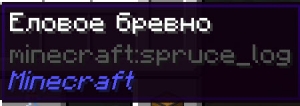
Ниже в примерах команд будут использовать названия блоков, например minecraft:diamond_block, этот блок принадлежит самой игре (а не моду) и это алмазный блок, узнать название блока можно при помощи модов, либо при помощи самой игры.
Нажмите F3 + H, в игре включатся расширенные подсказки, теперь при наведении мышки на блок вы увидите его название.
- #help — помощь
- #stop — остановить то, что делает мод
- #pause — поставить выполнение на паузу
- #resume — возобновить выполнение
- #paused — сообщит, включена пауза или нет, полезно если не помните завершил ли мод действие.
Ходьба:
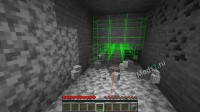
Туннель:
Добыча блоков:
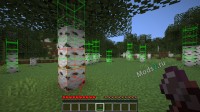
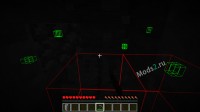
#mine block — начнет искать и добывать указанный блок, например #mine diamond_ore ,еще можно задать блоком, #mine minecraft:diamond_ore (выше написано как узнать название любого блока.
#legitMine — переключить режим читерства, в одном положении бот будет находить руды (подобно xray) и добывать их, а в другом режиме он будет искать их подобно обычному игроку.
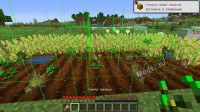
Фермерство:
#farm — начнет добывать ближайшие растения с целью получить семена и засадит их обратно, настроек не имеет.
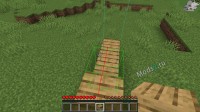
Строительство:
#sel fill block — заложить выделенную область блоком, например #sel fill minecraft:cobblestone, блок должен быть в инвентаре, мешающие блоки будут сломаны.
#sel wall block — построить стены у выделенной области с пустотой внутри.
#sel shell block — тоже самое что и стены, только пол и потолок.
#sel cleararea — сломать все блоки в выделенной области
#sel replace block1 block2 — заменить блок 1 на блок2, пример #sel replace minecraft:cobblestone minecraft:diamond_block
#sel undo — отменить последнее измерение
В моде есть еще функции и возможности, вы можете создавать Shematic файлы и автоматически строить по ним, указывать точки дома, просто идти в каком-то направлении, или наоборот от какой-то точки, отмечать точки, взаимодействовать с сундуками, следовать за существом, черный список и прочее.
Источник
Чит бот баритон, авто-добыча, постройка — Baritone + Fabritone [1.16.5] [1.15.2] [1.14.4] [1.12.2]
Чит мод Baritone (баритон) является ультра функциональным ботом для майнкрафт, всё что вам нужно это написать в чат команду с нужным вам действием и бот автоматически всё сделает за вас! Baritone нельзя назвать читом, единственное что в нём есть из читов, это авто-добыча ресурсов, вы можете просто написать команду и данный бот будет искать ресурсы в шахте за вас, в чит режиме не пытаясь скрывать что вы используете этого бота, или же в легит-режиме, здесь всё будет выглядит как-будто вы обычный игрок. С помощью этого бота вы можете к примеру сказать ему добывать дерево, а сами пойдёте пить чай, или выкопать огромный тунель в тысячи, или десятки тысяч блоков, сказать ему построить за вас дом, дойти до определённого блока и многое, многое другое. Чтобы открыть интерфейс мода, достаточно написать в чат #.
Для более подробной информации о возможностях мода, перейдите сюда.

Как установить мод в майнкрафт?
- Установите Forge для майнкрафт, или Fabric.
- Скачайте файл мода.
- Скопируйте файл в C:/Users/ИМЯ_ПОЛЬЗОВАТЕЛЯ/AppData/Roaming/.minecraft/mods .
- Запускайте в лаунчере версию майнкрафта с припиской Forge.
Подробная инструкция по установке модов в майнкрафт.
Как установить мод на 1.14.4, не для Fabric в майнкрафт?
- Скачайте файл мода.
- Скопируйте папку из архива в C:/Users/ИМЯ_ПОЛЬЗОВАТЕЛЯ/AppData/Roaming/.minecraft/versions .
- Запускайте в лаунчере версию майнкрафта с припиской 1.14.4 Baritone.
Источник
Как настроить баритон чтобы он копал золото
(assuming you already have Baritone set up)
Baritone’s chat control prefix is # by default. In Impact, you can also use .b as a prefix. (for example, .b click instead of #click )
Baritone commands can also by default be typed in the chatbox. However if you make a typo, like typing «gola 10000 10000» instead of «goal» it goes into public chat, which is bad, so using # is suggested.
To disable direct chat control (with no prefix), turn off the chatControl setting. To disable chat control with the # prefix, turn off the prefixControl setting. In Impact, .b cannot be disabled. Be careful that you don’t leave yourself with all control methods disabled (if you do, reset your settings by deleting the file minecraft/baritone/settings.txt and relaunching).
For Baritone 1.2.10+, 1.3.5+, 1.4.2+
Lots of the commands have changed, BUT #help is improved vastly (its clickable! commands have tab completion! oh my!).
Try #help I promise it won’t just send you back here =)
«wtf where is cleararea» -> look at #help sel
«wtf where is goto death, goto waypoint» -> look at #help wp
just look at #help lmao
All of these commands may need a prefix before them, as above ^.
To toggle a boolean setting, just say its name in chat (for example saying allowBreak toggles whether Baritone will consider breaking blocks). For a numeric setting, say its name then the new value (like primaryTimeoutMS 250 ). It’s case insensitive. To reset a setting to its default value, say acceptableThrowawayItems reset . To reset all settings, say reset . To see all settings that have been modified from their default values, say modified .
Some common examples:
- thisway 1000 then path to go in the direction you’re facing for a thousand blocks
- goal x y z or goal x z or goal y , then path to set a goal to a certain coordinate then path to it
- goto x y z or goto x z or goto y to go to a certain coordinate (in a single step, starts going immediately)
- goal to set the goal to your player’s feet
- goal clear to clear the goal
- cancel or stop to stop everything
- goto portal or goto ender_chest or goto block_type to go to a block. (in Impact, .goto is an alias for .b goto for the most part)
- mine diamond_ore iron_ore to mine diamond ore or iron ore (turn on the setting legitMine to only mine ores that it can actually see. It will explore randomly around y=11 until it finds them.) An amount of blocks can also be specified, for example, mine 64 diamond_ore .
- click to click your destination on the screen. Right click path to on top of the block, left click to path into it (either at foot level or eye level), and left click and drag to select an area ( #help sel to see what you can do with that selection).
- follow player playerName to follow a player. follow players to follow any players in range (combine with Kill Aura for a fun time). follow entities to follow any entities. follow entity pig to follow entities of a specific type.
- wp for waypoints. A «tag» is like «home» (created automatically on right clicking a bed) or «death» (created automatically on death) or «user» (has to be created manually). So you might want #wp save user coolbiome , then to set the goal #wp goal coolbiome then #path to path to it. For death, #wp goal death will list waypoints under the «death» tag (remember stuff is clickable!)
- build to build a schematic. build blah.schematic will load schematics/blah.schematic and build it with the origin being your player feet. build blah.schematic x y z to set the origin. Any of those can be relative to your player (
-420 would build at x=player x, y=69, z=player z-420).
For the rest of the commands, you can take a look at the code here.
All the settings and documentation are here. If you find HTML easier to read than Javadoc, you can look here.
There are about a hundred settings, but here are some fun / interesting / important ones that you might want to look at changing in normal usage of Baritone. The documentation for each can be found at the above links.
- allowBreak
- allowSprint
- allowPlace
- allowParkour
- allowParkourPlace
- blockPlacementPenalty
- renderCachedChunks (and cachedChunksOpacity ) avoidance (avoidance of mobs / mob spawners)
- legitMine
- followRadius
- backfill (fill in tunnels behind you)
- buildInLayers
- buildRepeatDistance and buildRepeatDirection
- worldExploringChunkOffset
- acceptableThrowawayItems
- blocksToAvoidBreaking
- mineScanDroppedItems
- allowDiagonalAscend
Troubleshooting / common issues
Why doesn’t Baritone respond to any of my chat commands?
This could be one of many things.
First, make sure it’s actually installed. An easy way to check is seeing if it created the folder baritone in your Minecraft folder.
Second, make sure that you’re using the prefix properly, and that chat control is enabled in the way you expect.
For example, Impact disables direct chat control. (i.e. anything typed in chat without a prefix will be ignored and sent publicly). This is a saved setting, so if you run Impact once, chatControl will be off from then on, even in other clients. So you’ll need to use the # prefix or edit baritone/settings.txt in your Minecraft folder to undo that (specifically, remove the line chatControl false then restart your client).
Why can I do .goto x z in Impact but nowhere else? Why can I do -path to x z in KAMI but nowhere else?
These are custom commands that they added; those aren’t from Baritone. The equivalent you’re looking for is goto x z .
Источник
Как настроить баритон чтобы он копал золото
Baritone — искусственный интеллект в Minecraft
Построить маршрут к определенным координатам
Копать ресурсы (Есть поддержка Xray)
Делать постройки из шематиков
Чтобы подать Baritone команду, достаточно ввести в чат .b
thisway — поставить цель в N блоках от вас в направлении взгляда
goal — Поставить цель на координатах x, y ,z
path — Начать выполнение маршрута
stop — Остановить выполнение маршрута
goto — Пойти к определенному блоку.
mine … — Начать копать перечисленные блоки.
click — Открыть управление мышью.
build — Построить шематик
tunnel — Копать туннель в направлении взгляда
axis — Подойти к ближайшему хайвею (x = 0 или z = 0 или x = z или x = -z)
explore — Бегать вокруг и изучать местность
Переключить настройку — .b
Установить настройку — .b
allowBreak — Разрешить ломать блоки
allowSprint — Разрешить бег
allowPlace — Разрешить ставить блоки
legitMine — Копать без Xray
legitMineYLevel — Y координата, на которой копать при
allowInventory — Разрешить перемещать вещи из инвентаря в хотбар
freeLook — Разрешить смотреть по сторонам во время следования к цели
sprintInWater — Разрешить спринт в воде
allowWaterBucketFall — Разрешить падение с ведром воды
assumeWalkOnWater — Учитывать возможность ходить по воде (требуется включенный модуль Jesus)
assumeWalkOnLava — Учитывать возможность ходить по лаве (требуется эффект огнестойкости и включенный модуль Jesus)
assumeStep — Учитывать возможность быстро забираться на блоки (требуется включенный модуль Step)
allowJumpAt256 — Разрешить прыгать на высоте 256 блоков
allowDiagonalDescend — Разрешить спускаться по диагонали (небезопасно)
allowDownward — Разрешить копать под себя
acceptableThrowawayItems … — Список блоков, которые можно расходовать на мосты, столбы и так далее
blocksToAvoidBreaking … — Список блоков, которые запрещено ломать
avoidUpdatingFallingBlocks — Избегать разрушения блоков рядом с сыпучими блоками
allowWalkOnSlab — Разрешить ходить по полублокам
allowParkour — Разрешить паркур
allowParkourPlace — Разрешить паркур с установкой блоков
considerPotionEffects — Учитывать эффекты зелий
sprintAscends — Заранее бежать и прыгать перед блоком
overshootTraverse — Если вы оказались на расстоянии
1 блока от цели, считать маршрут завершенным (полезно при большой скорости)
rightClickSpeed — Сколько тиков между кликами разрешено (по умолчанию равно 4)
avoidance — Избегать мобов, спавнеры и так далее
mobAvoidanceRadius — Радиус, на котором избегать мобов
enterPortal — Когда идем к порталу, заходить в него, а не останавливаться рядом
maxFallHeightNoWater — Максимальная высота падения не в воду
maxFallHeightBucket — Максимальная высота падения с ведром воды
backfill — Заполнять пространство за игроком
renderPath — Отрисовывать путь
renderGoal — Отрисовывать цель
renderSelectionBoxes — Отрисовывать выделения
renderGoalXZBeacon — Отрисовывать луч GoalXZ
fadePath — Не отрисовывать путь дальше чем 30 блоков (улучшает FPS)
exploreForBlocks — Когда в памяти не сохранены координаты блока, искать его, а не сдаваться.
buildInLayers — Строить по слоям (лучше включить)
layerOrder — Строить сверху вниз, а не снизу вверх
mineScanDroppedItems — Подбирать ли предметы (например алмазы из алмазной руды), если не подобрались сразу
axisHeight — Высота хайвея
followOffsetDistance — Расстояния от игрока, которого преследуете
followRadius — Расстояние, на котором видно преследуемого игрока
Инструкция к простым действиям:
Бежать на координаты:
1) .b goal ИЛИ .b thisway
Пример: .b goal 1230 60 4560; .b path
Названия блоков должны быть на английском языке! Точное название блока можно посмотреть с помощью f3 + H
Пример: .b mine diamond_ore iron_ore gold_ore
1) Скопировать файл шематика в папку .minecraft/Pontifex/baritone/schematics/
Если вы в выживании, то в инвентарь сначала нужно сложить все необходимые блоки. Если вы в креативе, блоки появятся в инвентаре сами.
Пример: .b build cool_house
Следовать за игроком:
Пример: .b follow Vasyan123
Пример: .b save domik
Пойти к вейпоинту:
Пример: .b goto domik
Если не работает та или иная функция, проверьте логику настроек (например, вы пытаетесь копать блоки при allowBreak false)
Если вы умудрились столкнуться с трудностями, пишите в лс сообщества, вам помогут (я надеюсь)
Полная документация (англ)
Полный список настроек (англ)
(assuming you already have Baritone set up)
Baritone’s chat control prefix is # by default. In Impact, you can also use .b as a prefix. (for example, .b click instead of #click)
Baritone commands can also by default be typed in the chatbox. However if you make a typo, like typing «gola 10000 10000» instead of «goal» it goes into public chat, which is bad, so using # is suggested.
To disable direct chat control (with no prefix), turn off the chatControl setting. To disable chat control with the # prefix, turn off the prefixControl setting. In Impact, .b cannot be disabled. Be careful that you don’t leave yourself with all control methods disabled (if you do, reset your settings by deleting the file minecraft/baritone/settings.txt and relaunching).
Lots of the commands have changed, BUT #help is improved vastly (its clickable! commands have tab completion! oh my!).
Try #help I promise it won’t just send you back here =)
«wtf where is cleararea» -> look at #help sel
«wtf where is goto death, goto waypoint» -> look at #help wp
just look at #help lmao
Watch this showcase video!
All of these commands may need a prefix before them, as above ^.
To toggle a boolean setting, just say its name in chat (for example saying allowBreak toggles whether Baritone will consider breaking blocks). For a numeric setting, say its name then the new value (like primaryoutMS 250). It’s case insensitive. To reset a setting to its default value, say acceptableThrowawayItems reset. To reset all settings, say reset. To see all settings that have been modified from their default values, say modified.
Some common examples:
- thisway 1000 then path to go in the direction you’re facing for a thousand blocks
- goal x y z or goal x z or goal y, then path to set a goal to a certain coordinate then path to it
- goto x y z or goto x z or goto y to go to a certain coordinate (in a step, starts going imtely)
- goal to set the goal to your player’s feet
- goal clear to clear the goal
- cancel or stop to stop everything
- goto portal or goto ender_chest or goto block_type to go to a block. (in Impact, .goto is an alias for .b goto for the most part)
- mine diamond_ore iron_ore to mine diamond ore or iron ore (turn on the setting legitMine to only mine ores that it can actually see. It will explore randomly around y=11 until it finds them.) An amount of blocks can also be specified, for example, mine 64 diamond_ore.
- click to click your destination on the screen. Right click path to on top of the block, left click to path into it (either at foot level or eye level), and left click and drag to select an area (#help sel to see what you can do with that selection).
- follow player playerName to follow a player. follow players to follow any players in range (combine with Kill Aura for a fun ). follow entities to follow any entities. follow entity pig to follow entities of a specific type.
- wp for waypoints. A «tag» is like «home» (created automatically on right clicking a bed) or «death» (created automatically on death) or «user» (has to be created manually). So you might want #wp save user coolbiome, then to set the goal #wp goal coolbiome then #path to path to it. For death, #wp goal death will list waypoints under the «death» tag (remember stuff is clickable!)
- build to build a schematic. build blah.schematic will load schematics/blah.schematic and build it with the origin being your player feet. build blah.schematic x y z to set the origin. Any of those can be relative to your player (
-420 would build at x=player x, y=69, z=player z-420).
For the rest of the commands, you can take a look at the code here.
All the settings and documentation are here. If you find HTML easier to read than Javadoc, you can look here.
There are a hundred settings, but here are some fun / interesting / important ones that you might want to look at changing in normal usage of Baritone. The documentation for each can be found at the above s.
Источник


