- [FancyMenu] Cave Animation
- Загрузка
- Предыдущие версии
- Описание
- [Мод] FancyMenu Майнкрафт [Анимированное меню]
- Что собой представляет FancyMenu?
- Возможности мода
- Установка FancyMenu для Minecraft
- Что в итоге?
- FancyMenu — изменение, настройка, уникальное анимированное меню [1.17.1] [1.16.5] [1.15.2] [1.12.2] [1.8.9]
- Визуально это выглядит вот так:
- Готовые варианты меню:
- FancyMenu [1.16.5] [1.15.2] [1.14.4] [1.12.2]
- 1.7.X | Menu Customization System
- About
- Getting started
- Customize menus
- Action types and its variables
- animatebackground
- setbackgroundpanorama
- setbackgroundslideshow
- setcloseaudio
- setopenaudio
- texturizebackground
- overridemenu
- addaudio
- addbutton
- setbuttontexture
- setbuttondescription
- clickbutton
- hidebutton
- hidebuttonfor
- sethoverlabel
- addhoversound
- setbuttonclicksound
- setbuttonlabel
- resizebutton
- movebutton
- addtext
- addwebtext
- addentity
- addtexture
- addwebtexture
- addshape
- addanimation
- addslideshow
- setscale
- Apply customizations without restarting the game
[FancyMenu] Cave Animation
Загрузка
Предыдущие версии
| Название | Размер | Обновлено | Версия игры | Загрузок | |
| [FancyMenu] Minecraft Cave Animation v1.1.0 release | 102.79 MB | Oct 12, 2021 | 1.17.1 | 20 |  Скачать Скачать |
| [FancyMenu] Minecraft Cave Animation v1.0.0 release | 102.81 MB | Jul 31, 2021 | 1.17.1 | 2,750 | Скачать |
Описание


Зависимости
Ткань:
— FancyMenu (v2.2.0+)
Ковать:
— FancyMenu (v2.2.0+)
О
Это анимационный пакет для FancyMenu!
FancyMenu позволяет вам настраивать меню Minecraft с помощью множества интересных вещей, включая анимацию!
Эта анимация используется в качестве вывода на YouTube для официального YouTube-канала Minecraft.
В загруженной версии нет нижнего колонтитула с социальными учетными записями и прочим.
Как добавить Анимацию в Игру
1. Загрузка представляет собой ZIP-файл с двумя папками внутри.
Первая папка называется «конфигурация«, а вторая —» пакеты ресурсов«.
Просто скопируйте эти две папки в свой каталог «.minecraft«.
НЕ УДАЛЯЙТЕ уже существующие папки «конфигурация» и «пакетыресурсов» в каталоге, просто скопируйте две папки анимации по этому пути, чтобы они были объединены.
2. Запустите игру и перейдите в настройки пакетов ресурсов. Включите пакет «minecraft_cave_animation_fancymenu«, и все готово.
3. Теперь вы можете использовать анимацию в редакторе FancyMenu в качестве элемента анимации и в качестве анимированного фона меню.
Особая Благодарность
Моим покровителям:
— Кризксил
— кью.
— Джолихан
— Дер_Лаппен
Авторское право
— Анимация пещеры Майнкрафт Авторское право © Mojang AB.
Нужен сервер?
Вам нужен сервер Minecraft, чтобы играть со своими друзьями, но просто слишком много работы, чтобы настроить его самостоятельно?
Нет проблем, просто арендуйте готовый к использованию сервер и начните играть в мгновение ока!
Просто нажмите на изображение ниже и используйте код keksuccino, чтобы получить скидку 25% в первый месяц!
Источник
[Мод] FancyMenu Майнкрафт [Анимированное меню]
Существует множество вариантов доработки и изменения внешнего вида игры Minecraft. Но не так много аддонов и дополнений позволяют усовершенствовать игровое поле, которое мы видим после запуска игры. И мод FancyMenu предназначен именно для этого. Что можно сделать с его помощью и как установить этот набор инструментов? Обо всем по порядку.
Что собой представляет FancyMenu?
Мод FancyMenu – это простой редактор главного меню игры. Разобраться в нем не составит труда даже тому пользователю, который до этого сталкивался только со стандартными программами. При этом FancyMenu поможет кардинально изменить то, что вы видите при запуске Майнкрафта. И сделает вашу версию игры по-настоящему уникальной.

Возможности мода
После запуска FancyMenu позволяет полностью преображать вид главного меню. В том числе:
- менять картинки и текст (в том числе напрямую из Интернета); добавлять анимированные вставки и музыку; добавлять или убирать кнопки; перемещать элементы на свое усмотрение; менять размер отдельных деталей и текстур.
Пример на видео:
Установка FancyMenu для Minecraft
Для корректной работы дополнения потребуется наличие инструмента для работы с модами. К примеру, Forge или Fabric. Также понадобится специальные библиотеки Konkrete. Сначала загрузите эти инструменты, если не делали этого ранее.
Затем для запуска игры с FancyMenu необходимо:
- Скачать мод.
- Установить его в соответствующую папку с игрой (…/minecraft/mods).
- При запуске Майнкрафта выбрать версию с Fabric или Forge.
После этого вам будут доступны все опции и возможности FancyMenu.
Что в итоге?
Для всех любителей дорабатывать и кастомизировать Minecraft FancyMenu станет отличным помощником. Мод позволит наделить игру уникальными чертами. А со временем полностью переработать окно запуска или создать сразу несколько его вариантов на любой вкус.
Источник
FancyMenu — изменение, настройка, уникальное анимированное меню [1.17.1] [1.16.5] [1.15.2] [1.12.2] [1.8.9]
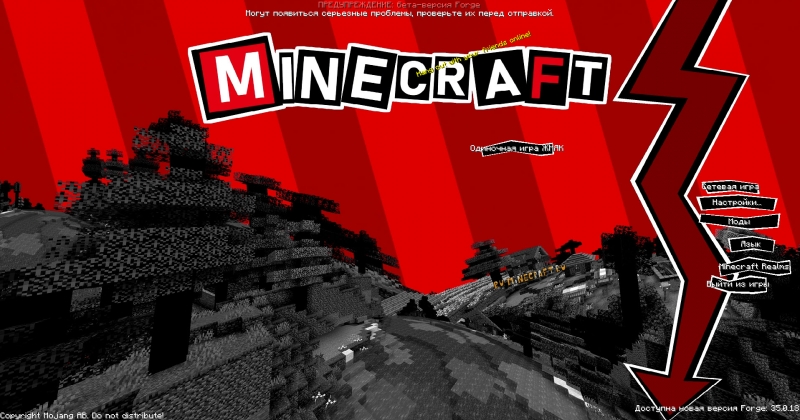
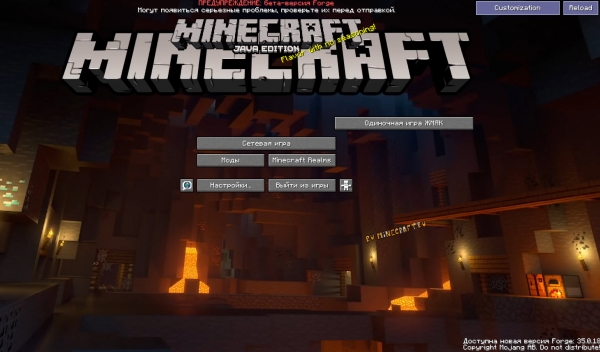
Мод FancyMenu — является серьезным продолжением мода FancyMain который добавлял в игру анимированное меню. Автор реализовал огромное количество функций для изменения внешнего вида меню. С этим модом можно как изменить стандартное игровое меню, заменить фоновую картинку, название и положение кнопок, но и сделать куда более крутые и сложные изменения с фоновыми анимациями и звуками.
Мод впечатляет своим функционалом, а так же удобным и и достаточно простым интерфейсом, к сожалению пока в нем не очень хорошо реализована функция быстрой и просто установки уже готовых кастомных меню. (аля ресурспаков), да и самих готовых вариантов не так много, но в будущем, вероятно это появится.
Небольшой гайд по моду
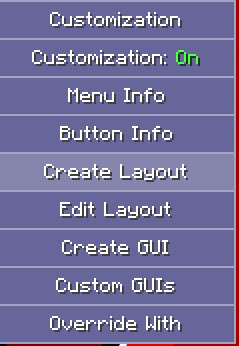
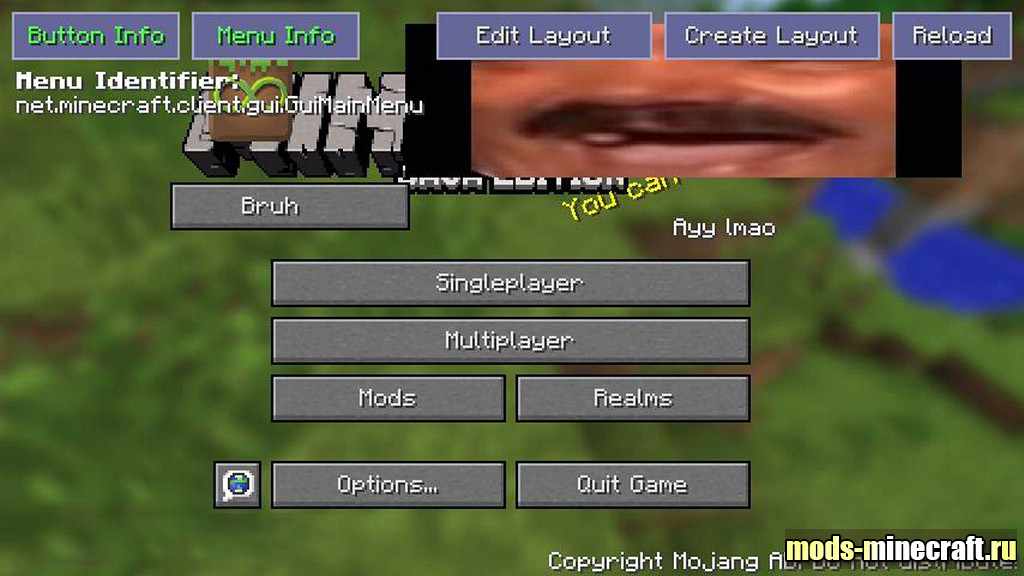
После запуска игры вы увидите справа сверху 2 кнопки, вам необходимо включить кастомизацию и нажать на Create layout (создать слой)
Вы увидите пустую заготовку которую можно изменять.
Так, например кликнув ПКМ по кнопкам можно изменить надписи (Edit Label), можно добавить текстуру для кнопки выбрав файл(ButtonTexture), изменить текст при наведении мыши (Hoverlabel), добавить звук при наведении мыши (HoverSound), установить звук при клике (ClickSound), сделать автоматический клик и задержку появления (DelayAppearance).
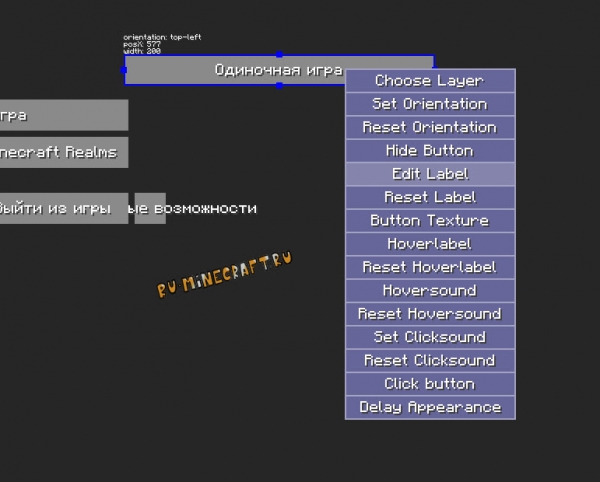
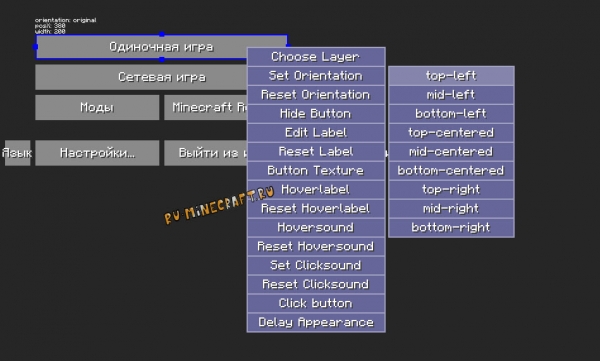
Для того что бы изменить размер и положение кнопки, сначала нужно задать Operation кнопкой SetOperation, это сместит кнопку в определенное положение, но мышкой вы сможете поместить ее куда угодно, а так же изменить ее размер. Помните, что у кнопок есть стандартные текстуры, изменив размер кнопки стандартные текстуры не подойдут и будут выглядеть глючно.
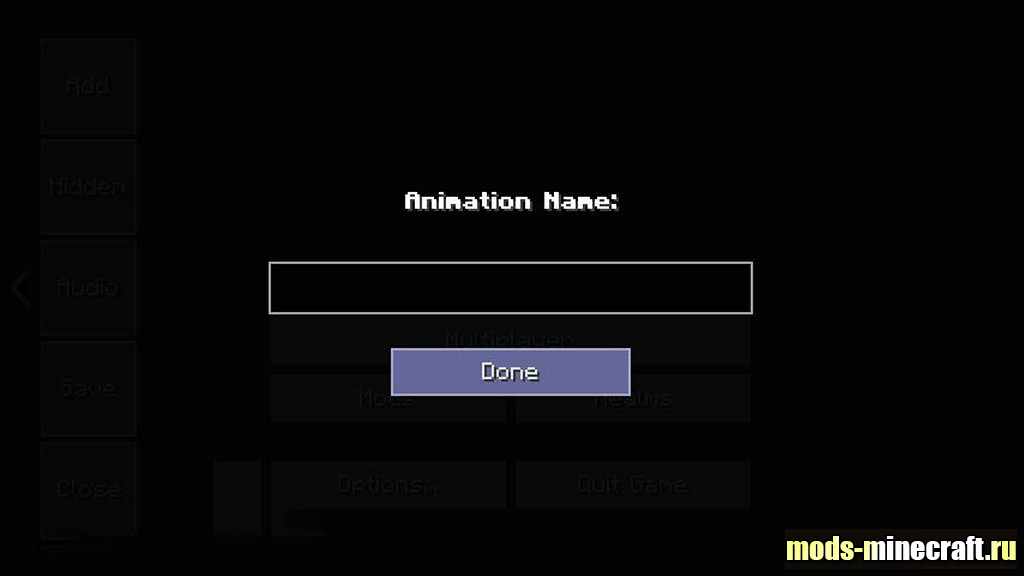
Если нажать пкм по фону, вы сможете настроить фон (Bacground Options), вы можете выбрать картинку, она может быть статичной или панорамной, а так же выбрать анимацию. Для анимации не используется видео или Gif, для анимации используются картинки кадров (раскадровка видео например), а так же файл properties.txt в котором указывается разные параметры, название, зациклить воспроизведение, скорость (частота кадров, FPS), размер. Потыкать пример можете на примере готовых анимаций ниже.
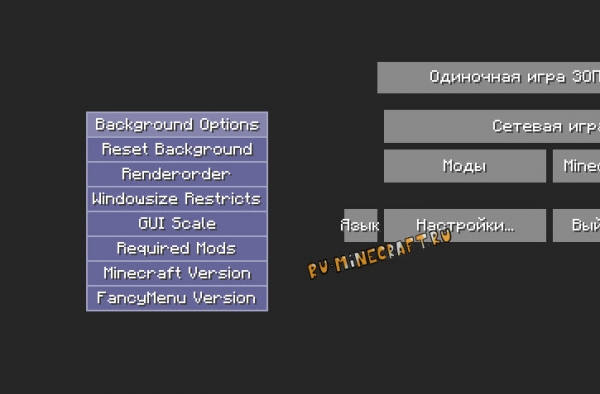
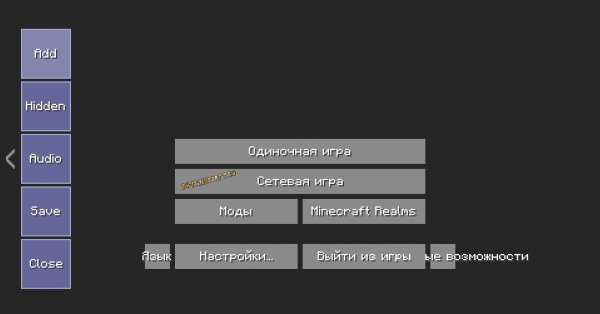
Слева есть выпадающее меню которое позволит вам добавить что то новое, собственные кнопки, картинки, анимации, текст, аудио итд итп.
Вы сможете добавлять собственные объекты, что позволит относительно просто создать очень крутое меню.
В основном меню мода есть возможность создать GUI, по сути это дополнительные «страницы» вашего меню, вы сможете настраивать их подобно обычному меню, добавить кнопки которые будут открывать и закрывать эту страницу. Все это позволит сделать кастомные подменю, например с информацией о сборке, гайдом, проблемами итд итп.
Визуально это выглядит вот так:
Готовые варианты меню:
Новые готовые варианты могут появиться в посте автора на реддите
Анимация в пещере
Желательно устанавливать на чистый мод, иначе одно меню может наложиться на другое, вы можете удалить содержимое \.minecraft\config\fancymenu и запустить игру с модом, дефолтные настройки восстановятся.
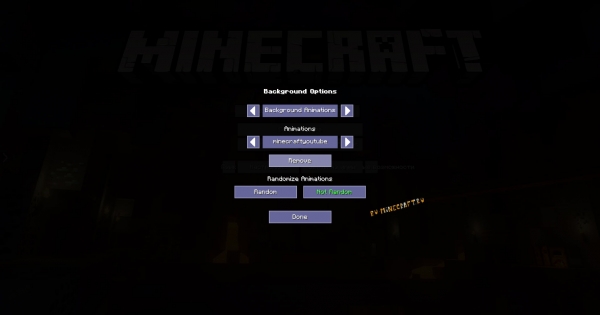
Это не готовое меню, это просто анимация которую можно установить на фон, либо посмотреть как она устроена.
Запустите игру с модом и выключение.
Скачав файл, откройте его, папку minecraftyoutube переместите в \.minecraft\config\fancymenu\animations\minecraftyoutube
Запустив игру с модом, справа увидите кнопку Customisation, нажмите на нее и первым делом включите кастомизацию с красного Off на On
Далее нажмите Create Layout
В пустом месте фона нажмите ПКМ, выберите Background Options
Далее в верхнем меню — BackgroundAnimations
В нижнем MinecraftYoutube и нажмите ADD и Done
Далее в левом меню нажмите кнопку Save, после Save and disable other layouts
Далее в левом меню — Close
Красное меню с дождем
Желательно устанавливать на чистый мод, иначе одно меню может наложиться на другое, вы можете удалить содержимое \.minecraft\config\fancymenu и запустить игру с модом, дефолтные настройки восстановятся.
Автор выложил полностью готовое меню которое нужно просто скопировать с заменой файлов в нужное место, но это заменит ваше меню, будьте аккуратны.
Запустите игру с модом и выключите ее.
Скачав файл, откройте его, папки button и config скопируйте в папку .minecraft, согласитесь с объединением папок и с заменой файлов.
Запустите игру, возможно потребуется включить кастомизацию нажав на кнопку Cusomization и выбрав Cusomization On

Желательно устанавливать на чистый мод, иначе одно меню может наложиться на другое, вы можете удалить содержимое \.minecraft\config\fancymenu и запустить игру с модом, дефолтные настройки восстановятся.
Скачайте архив, распакуйте, внутри будет \konosuba_main_menu\config\fancymenu, папки animations, customization, konosuba_resources скопировать в .minecraft\config\fancymenu, объединить папки.
Запустите игру, возможно потребуется включить кастомизацию нажав на кнопку Cusomization и выбрав Cusomization On
Источник
FancyMenu [1.16.5] [1.15.2] [1.14.4] [1.12.2]
FancyMenu добавляет редактор для настройки внутриигрового меню, в котором можно создавать и редактировать элементы игрового интерфейса без особых знаний. Редактор позволяет скрывать, перемещать, переименовывать и изменять размер кнопок, можно изменять текстуры, добавлять в кнопки с ссылками, оформлять анимацией и звуком.
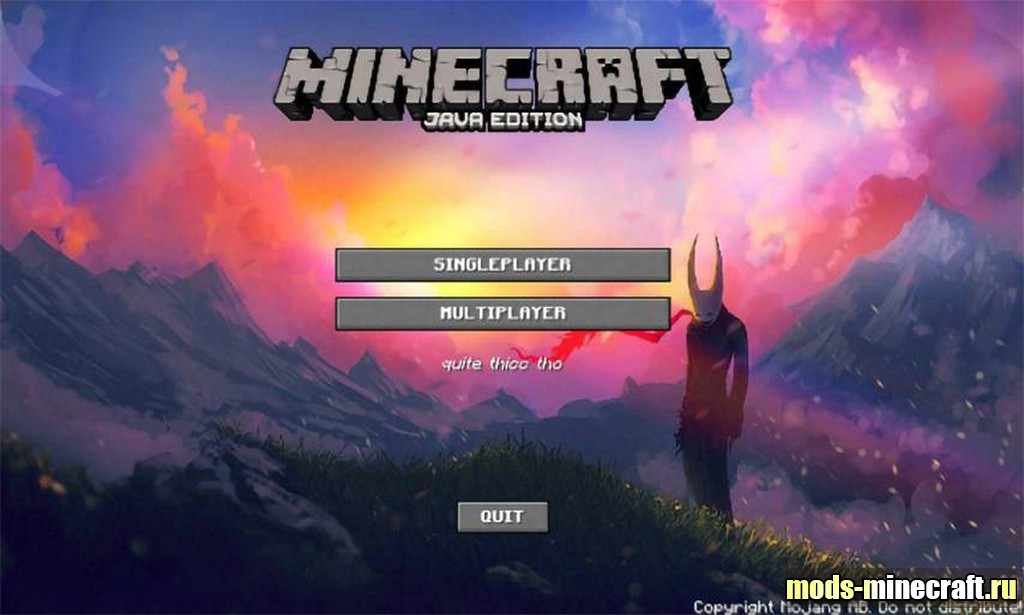
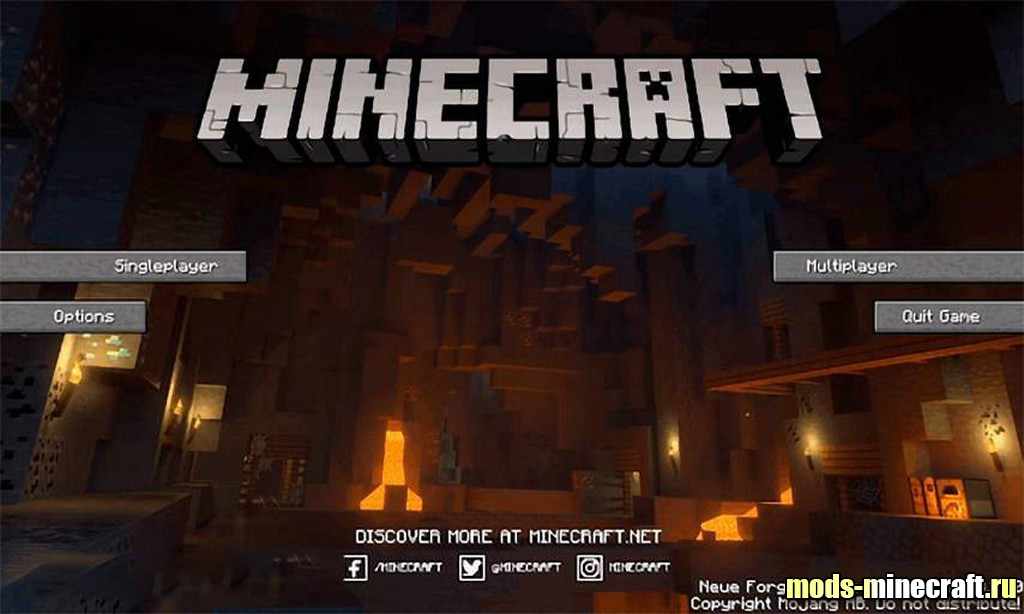

Особенность FancyMenu заключается в том, что в моде нет ограничений и вы можете настроить все меню на свое усмотрение. Вы можете скачать архив с примером начального экрана игры. Архив содержит две папки, одна с анимацией, другая с настройками. Просто скопируйте эти две папки в /.minecraft/config/fancymenu/, перезагрузите игру, и вы увидите анимацию главного меню.
Источник
1.7.X | Menu Customization System
About
The menu customization system allows you to customize nearly every menu in the game, even menus from other mods!
NOTE: This documentation page is focused on manually creating layouts for menus. If you don’t want to do this, you can use the layout editor to edit menus ingame with a GUI, like you know it from all the fancy editing softwares out there.
Getting started
Customizations are applied to menus by writing them into customization files.
To make it as simple as possible, the file type of said customization files is «TXT» (e.g. mainmenu.txt).
You can create one by right-clicking into a folder and click on New -> Textfile.
So before starting to customize a menu, its necessary to create a customization file for the menu you want to edit in /.minecraft/config/fancymenu/customization/.
Customize menus
After you created a new customization file, you can start to fill it with stuff!
The basic layout of every menu customization file should be:
On top of every customization file has to be its type . For now, there’s only one type ( menu ).
The type variable is followed by the customization-meta . This section starts with customization-meta < and ends with >.
There are several variables you can put into this section:
| Variable | Assignable value(s) | Mandatory | Description | Examples |
|---|---|---|---|---|
| identifier | The menu identifier. | Yes | The identifier of the mod you want to customize. You can find it by clicking on the «Menu Info» in the top-left corner of a menu. | identifier = the.menu.identifier |
| renderorder | background/foreground | No | Specifies if all customizations of this file should be rendered behind or on top of all default objects in the menu. | renderorder = background |
| minimummcversion | The minimum minecraft version. | No | If you want to limit your file to specific Minecraft versions, use this. | minimummcversion = 1.14.4 |
| maximummcversion | The maximum Minecraft version. | No | « | maximummcversion = 1.15 |
| minimumfmversion | The minimum FancyMenu version. | No | If you want to limit your file to specific FancyMenu versions, use this. | minimumfmversion = 1.0 |
| maximumfmversion | The maximum FancyMenu version. | No | « | maximumfmversion = 1.0.2 |
| requiredmods | Required mods, separated by commas. | No | Specify mods which have to be loaded for the customization file to work. You have to use the mod’s mod-id here. | requiredmods = amodid, anothermodid |
| biggerthanwidth | The minimum window width. | No | Can be used to activate/load the layout only if the window width is bigger than the specified value. | biggerthanwidth = 1000 |
| biggerthanheight | The minimum window height. | No | Can be used to activate/load the layout only if the window height is bigger than the specified value. | biggerthanheight = 800 |
| smallerthanwidth | The maximum window width. | No | Can be used to activate/load the layout only if the window width is smaller than the specified value. | smallerthanwidth = 600 |
| smallerthanheight | The maximum window height. | No | Can be used to activate/load the layout only if the window height is smaller than the specified value. | smallerthanheight = 500 |
The most important of all these is the identifier variable.
This variable specifies the menu type you want to customize by its «menu identifier».
For example, the identifier for the main menu in Minecraft 1.15.2 is net.minecraft.client.gui.screen.MainMenuScreen .
The menu identifier can be found by clicking on «Menu Info». This button can be found in the top-right «Customization» dropdown menu of supported menus, if not disabled in the config.
NOTE: The identifier for the same type of menu is NOT always the same for different versions of Minecraft and mods you want to customize!
After telling the system which menu you want to customize, the REAL customization part begins.
Every customization section starts with customization < and ends with >.
Customization sections always contains an action variable like movebutton to specify what you want to do in this section.
Other customization variables in sections can variate. They depend on the action type you choose for your section and can be everything (e.g. name or orientation ).
A working customization section to add a texture to a menu can look like this:
Customization sections are shortable and it’s not needed to add every possible variable for an action to every section, if not needed.
Many variables have default values, like width and height for textures or scale for textlines.
You can add as many customization sections to one file as you want and the best thing is, customization files are stackable, so you can split actions for the same menu type to multiple files.
If two files contain the same action for the same object, the action of the last scanned file overrides the previous ones.
Action types and its variables
animatebackground
Add animations as menu background.
| Variable | Assignable value(s) | Mandatory | Description | Examples |
|---|---|---|---|---|
| name | The animation name(s). | Yes | The name you gave your animation in its properties. If you want to add multiple animations, separate the names by commas. | name = someanimation —- name = someanimation, anotheranimation |
| random | true/false | No | If the animations should randomly switch between each other every time the menu gets loaded. (Only if more than one animation is defined) | random = true |
setbackgroundpanorama
Set a custom 6-image panorama cube as menu background.
| Variable | Assignable value(s) | Mandatory | Description | Examples |
|---|---|---|---|---|
| name | The panorama name. | Yes | The name you gave your panorama in its properties file. | name = your_panorama_name |
setbackgroundslideshow
Set one of your slideshows as menu background.
| Variable | Assignable value(s) | Mandatory | Description | Examples |
|---|---|---|---|---|
| name | The slideshow name. | Yes | The name you gave your slideshow in its properties file. | name = your_slideshow_name |
setcloseaudio
Play a sound when the menu is getting closed.
| Variable | Assignable value(s) | Mandatory | Description | Examples |
|---|---|---|---|---|
| path | The sound file path. | Yes | The path to your WAV sound file. | name = config/mysound.wav |
setopenaudio
Play a sound when the menu is getting opened.
| Variable | Assignable value(s) | Mandatory | Description | Examples |
|---|---|---|---|---|
| path | The sound file path. | Yes | The path to your WAV sound file. | name = config/mycoolersound.wav |
texturizebackground
Add a static image as menu background.
| Variable | Assignable value(s) | Mandatory | Description | Examples |
|---|---|---|---|---|
| path | The image path. | Yes | Specifies the image path. The image should be inside «config/fancymenu». | path = images/image.jpg |
| wideformat | true/false | No | If the image is a wide format/panoramic image or not. Panoramic images will slowly move from one side to the other. | wideformat = true |
overridemenu
Override a menu with a custom GUI.
| Variable | Assignable value(s) | Mandatory | Description | Examples |
|---|---|---|---|---|
| identifier | The custom GUI identifier | Yes | The identifier of the custom GUI you want to override the menu with. | identifier = mycoolmenu |
addaudio
Add audio to menus which will start playing when the menu loads.
| Variable | Assignable value(s) | Mandatory | Description | Examples |
|---|---|---|---|---|
| path | The audio path. | Yes | Specifies the audio path. The audio should be inside «config/fancymenu». Only WAV files are supported! | path = myaudios/audio.wav |
| loop | true/false | No | If the audio should be looped or not. | loop = true |
addbutton
Add a custom button to a menu and use it to send messages, open links and much more!
| Variable | Assignable value(s) | Mandatory | Description | Examples |
|---|---|---|---|---|
| label | The button label. | No | The label of the button. | label = My Button |
| buttonaction | The buttonaction | Yes | Specifies what the button should do when clicked. | buttonaction = openlink |
| value | The button action content. | Not for every button action, but for some of them. | The content which will be used by the button action. May be not needed for specific actions. | value = https://google.de |
| backgroundnormal | Path to texture | No (Yes, if «backgroundhovered» is used) | Sets a custom button background texture for the normal (not hovered) button state. | backgroundnormal = path/to/texture.png |
| backgroundhovered | Path to texture | No (Yes, if «backgroundnormal» is used) | Sets a custom button background texture for the hovered (mouse over) button state. | backgroundhovered = path/to/texture.png |
| hideforseconds | Delay in seconds | No | Delay the appearance of a button. Decimal values are supported! | hideforseconds = 2 —- hideforseconds = 0.3 |
| delayonlyfirsttime | true/false | No | If the button’s appearance should only be delayed the first time it gets loaded or everytime. | delayonlyfirsttime = true |
| onlydisplayin | outgame/singleplayer/multiplayer | No | If the button should only be visible in singleplayer, multiplayer or outgame (when no world is loaded). | onlydisplayin = singleplayer |
| clicksound | Path to click sound | No | Set a custom click sound to the button. ONLY WAV FILES ARE SUPPORTED! | clicksound = path/to/sound.wav |
| description | Button description | No | Set a description to the button that will be displayed when hovering it. Format code &n will switch to a new line. | description = Hey, what’s up?&nI’m a button! |
setbuttontexture
Customize the background texture of DEFAULT (not custom) buttons.
| Variable | Assignable value(s) | Mandatory | Description | Examples |
|---|---|---|---|---|
| identifier | Button key or id | Yes | The button identifier. This can be the button ID (written as %id= % ) or its key. Both can be found by using the «Button Info» feature in menus. Just hover over a button with your mouse to get useful informations. | identifier = %id=1% —- identifier = the.button.key |
| backgroundnormal | Path to texture | Yes | The normal button background (not hovered). | backgroundnormal = path/to/texture.png |
| backgroundhovered | Path to texture | Yes | The hovered button background (mouse over button). | backgroundhovered = path/to/texture.png |
setbuttondescription
Set a description to a vanilla button that is displayed when hovering the button.
| Variable | Assignable value(s) | Mandatory | Description | Examples |
|---|---|---|---|---|
| identifier | Button key or id | Yes | The button identifier. This can be the button ID (written as %id= % ) or its key. Both can be found by using the «Button Info» feature in menus. Just hover over a button with your mouse to get useful informations. | identifier = %id=1% —- identifier = the.button.key |
| description | The description text | Yes | The text of your description. You can go to a new text line by using the format code &n . | description = Hello, what’s up?&nThis is a new line. |
clickbutton
Automatically click default menu buttons X times when the menu gets loaded.
| Variable | Assignable value(s) | Mandatory | Description | Examples |
|---|---|---|---|---|
| identifier | Button key or id | Yes | The button identifier. This can be the button ID (written as %id= % ) or its key. Both can be found by using the «Button Info» feature in menus. Just hover over a button with your mouse to get useful informations. | identifier = %id=1% —- identifier = the.button.key |
| clicks | Number of clicks | Yes | The number of clicks to do when the menu gets loaded. | clicks = 2 |
hidebutton
Hide one of the menu’s default buttons.
| Variable | Assignable value(s) | Mandatory | Description | Examples |
|---|---|---|---|---|
| identifier | Button key or id | Yes | The button identifier. This can be the button ID (written as %id= % ) or its key. Both can be found by using the «Button Info» feature in menus. Just hover over a button with your mouse to get useful informations. | identifier = %id=1% —- identifier = the.button.key |
hidebuttonfor
Delay the appearance of one of the menu’s default buttons.
| Variable | Assignable value(s) | Mandatory | Description | Examples |
|---|---|---|---|---|
| identifier | Button key or id | Yes | The button identifier. This can be the button ID (written as %id= % ) or its key. Both can be found by using the «Button Info» feature in menus. Just hover over a button with your mouse to get useful informations. | identifier = %id=1% —- identifier = the.button.key |
| seconds | Delay in seconds | Yes | The delay in seconds until the button gets visible. Decimal values are supported! | seconds = 1 —- seconds = 0.4 |
| onlyfirsttime | true/false | No | If the button’s appearance should be delayed only the first time it gets loaded or everytime. | onlyfirsttime = true |
sethoverlabel
Change labels of default buttons when they are hovered.
| Variable | Assignable value(s) | Mandatory | Description | Examples |
|---|---|---|---|---|
| identifier | Button key or id | Yes | The button identifier. This can be the button ID (written as %id= % ) or its key. Both can be found by using the «Button Info» feature in menus. Just hover over a button with your mouse to get useful informations. | identifier = %id=1% —- identifier = the.button.key |
| label | The hover label | Yes | The label which should be displayed when the button is hovered. | label = A New Button Label |
addhoversound
Add a short sound to default buttons which will be played when the button is getting hovered.
| Variable | Assignable value(s) | Mandatory | Description | Examples |
|---|---|---|---|---|
| identifier | Button key or id | Yes | The button identifier. This can be the button ID (written as %id= % ) or its key. Both can be found by using the «Button Info» feature in menus. Just hover over a button with your mouse to get useful informations. | identifier = %id=1% —- identifier = the.button.key |
| path | The sound path | Yes | The path to the hover sound. Only WAV files are supported! | path = sounds/mysound.wav |
setbuttonclicksound
Set a custom click sound to a vanilla button.
| Variable | Assignable value(s) | Mandatory | Description | Examples |
|---|---|---|---|---|
| identifier | Button key or id | Yes | The button identifier. This can be the button ID (written as %id= % ) or its key. Both can be found by using the «Button Info» feature in menus. Just hover over a button with your mouse to get useful informations. | identifier = %id=1% —- identifier = the.button.key |
| path | Path to click sound | Yes | The path to the click sound file. ONLY WAV FILES ARE SUPPORTED! | path = path/to/sound.wav |
setbuttonlabel
Change the label of one of the menu’s default buttons.
| Variable | Assignable value(s) | Mandatory | Description | Examples |
|---|---|---|---|---|
| identifier | Button key or id | Yes | The button identifier. This can be the button ID (written as %id= % ) or its key. Both can be found by using the «Button Info» feature in menus. Just hover over a button with your mouse to get useful informations. | identifier = %id=1% —- identifier = the.button.key |
| value | The new button label | Yes | The new button label which overrides the old one. | value = Cool Button |
resizebutton
Resize one of the menu’s default buttons.
| Variable | Assignable value(s) | Mandatory | Description | Examples |
|---|---|---|---|---|
| identifier | Button key or id | Yes | The button identifier. This can be the button ID (written as %id= % ) or its key. Both can be found by using the «Button Info» feature in menus. Just hover over a button with your mouse to get useful informations. | identifier = %id=1% —- identifier = the.button.key |
| width | The new button width | No | Changes the width of a button. | width = 100 |
| height | The new button height | No | Changes the height of a button. | height = 20 |
movebutton
Change the position of one of the menu’s default buttons.
| Variable | Assignable value(s) | Mandatory | Description | Examples |
|---|---|---|---|---|
| identifier | Button key or id | Yes | The button identifier. This can be the button ID (written as %id= % ) or its key. Both can be found by using the «Button Info» feature in menus. Just hover over a button with your mouse to get useful informations. | identifier = %id=1% —- identifier = the.button.key |
| x | The horizontal button position | No | Moves the button to the new position on its horizontal axis. | x = -100 |
| y | The vertical button position | No | Moves the button to the new position on its vertical axis. | y = 20 |
| orientation | original, top-left, mid-left, bottom-left, top-centered, mid-centered, bottom-centered, top-right, mid-right, bottom-right | No | Aligns the button by the given orientation value. | orientation = top-centered |
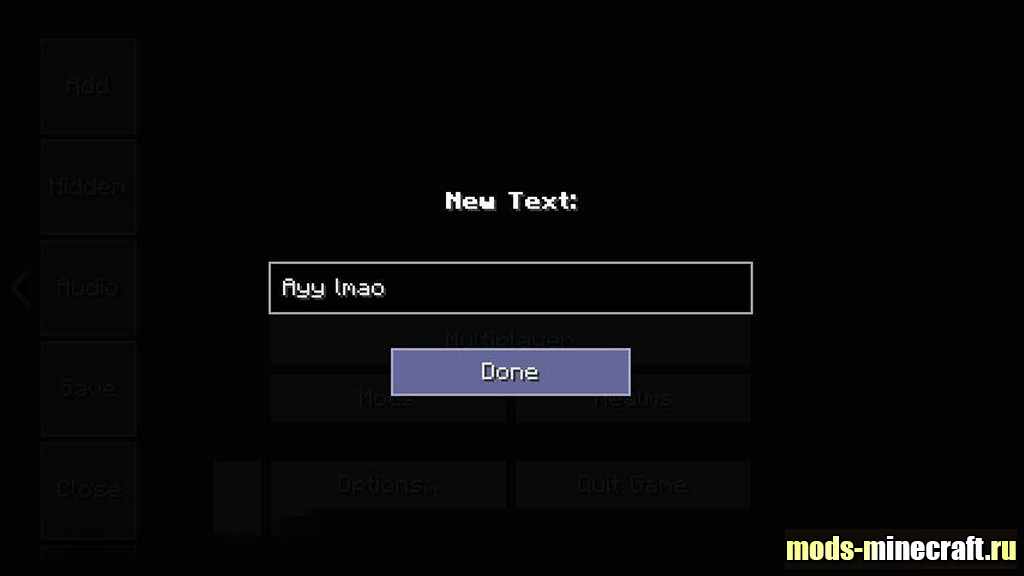
addtext
Add text to a menu.
| Variable | Assignable value(s) | Mandatory | Description | Examples |
|---|---|---|---|---|
| value | The text to display | Yes | The text which should be displayed. Can contain formatting codes (e.g. §5 )! | value = §eThis is a yellow text. |
| x | The horizontal text position | No | Moves the text to the given position on its horizontal axis. | x = 0 |
| y | The vertical text position | No | Moves the text to the given position on its vertical axis. | y = 150 |
| orientation | top-left, mid-left, bottom-left, top-centered, mid-centered, bottom-centered, top-right, mid-right, bottom-right | No | Aligns the text by the given value. | orientation = mid-centered |
| scale | The text scale | No | The text scale. Minecraft has a default text scale of 1.0, so a value of 2.0 would double its scale and 0.5 would half it. | scale = 1.5 |
| centered | true, false | No | If your text should be centered or not. | centered = true |
| shadow | true, false | No | If your text should have a visible shadow or not. | shadow = false |
addwebtext
Add web text from an URL to your menu.
| Variable | Assignable values(s) | Mandatory | Description | Examples |
|---|---|---|---|---|
| url | The text url | Yes | The url, starting with HTTP/HTTPS, to the (plain-)text. Automatically converts GitHub and Pastebin links to plaintext. Markdown-like headline formatting included (# [your textline], ## [«], ### [«], #### [«]). | url = https://mywebsite.com/changelog |
| x | The horizontal text position | No | Moves the text to the given position on its horizontal axis. | x = 20 |
| y | The vertial text position | No | Moves the text to the given position on its vertical axis. | y = -100 |
| orientation | top-left, mid-left, bottom-left, top-centered, mid-centered, bottom-centered, top-right, mid-right, bottom-right | No | Aligns the text by the given orientation. | orientation = bottom-left |
| scale | The text scale | No | The text scale. Minecraft has a default text scale of 1.0, so a value of 2.0 would double its scale and 0.5 would half it. | scale = 0.4 |
| shadow | true/false | No | If your text should have a visible shadow or not. | shadow = true |
| multiline | true/false | No | If the system should only display the first line of text or all lines. | multiline = true |
addentity
Add a player entity to your menu.
| Variable | Assignable values(s) | Mandatory | Description | Examples |
|---|---|---|---|---|
| playername | The name of the entity | No | The name displayed above the entity’s head. When set to a real player name, the skin and cape of the entity will automatically be set to the player’s skin and cape. | playername = Somali |
| x | The horizontal position | No | Moves the entity to the given position on its horizontal axis. | x = 20 |
| y | The vertial position | No | Moves the entity to the given position on its vertical axis. | y = -100 |
| orientation | top-left, mid-left, bottom-left, top-centered, mid-centered, bottom-centered, top-right, mid-right, bottom-right | No | Aligns the entity by the given orientation. | orientation = bottom-left |
| scale | The entity scale | No | The size of the entity. For example, the player entity in the inventory has a scale of 30. | scale = 60 |
| skinpath | Path to skin texture | No | Set a custom skin to the entity by using a local skin texture image. Can be used as backup texture when the web skin download failed. | skinpath = config/TheTeddynator.png |
| skinurl | URL to skin texture | No | Set a custom skin to the entity by using a web skin texture image. | skinurl = https://mywebsite.com/TheTeddynator.png |
| capepath | Path to cape texture | No | Set a custom cape to the entity by using a local cape texture image. Can be used as backup texture when the web cape download failed. | capepath = config/EpicLookingBadassCape.png |
| capeurl | URL to cape texture | No | Set a custom cape to the entity by using a web cape texture image. | capeurl = https://mywebsite.com/EpicLookingBadassCape.png |
| slim | true/false | No | If the entity should use the slim (small arms) model. | slim = true |
| crouching | true/false | No | If the entity should crouch. | crouching = true |
| showname | true/false | No | If the entity name should be visible above its head. | showname = false |
| parrot | true/false | No | If the entity should have a parrot sitting on its shoulder. | parrot = true |
| slim | true/false | No | If the entity should use the slim (small arms) model. | slim = true |
| autorotation | true/false | No | If the entity should automatically follow the mouse cursor. | autorotation = true |
| headrotationx | The horizontal head rotation | No | Set the horizontal head rotation. Will be ignored when auto-rotation is enabled. | headrotationx = 90.0 |
| headrotationy | The vertical head rotation | No | Set the vertical head rotation. Will be ignored when auto-rotation is enabled. | headrotationy = 20.0 |
| bodyrotationx | The horizontal body rotation | No | Set the horizontal body rotation. Will be ignored when auto-rotation is enabled. | bodyrotationx = 70.0 |
| bodyrotationy | The vertical body rotation | No | Set the vertical body rotation. Will be ignored when auto-rotation is enabled. | bodyrotationy = 10.0 |
addtexture
Add an image to a menu.
As of version 1.5, this action supports GIF files, but using large GIFs with too many frames will cause the game and the GIF to lag when playing for the first time.
| Variable | Assignable value(s) | Mandatory | Description | Examples |
|---|---|---|---|---|
| path | The texture path | Yes | The path of your image. This can either be the full path like «C:\full\path\to\texture.png» or a short path like «config\fancymenu\texture.png», which always starts in the «.minecraft» folder. The image should be inside «config/fancymenu». Valid image types are PNG, JPEG/JPG and GIF. | path = textures/mytexture.jpg |
| x | The horizontal texture position | No | Moves the texture to the given position on its horizontal axis. | x = 100 |
| y | The vertical texture position | No | Moves the texture to the given position on its vertical axis. | y = -230 |
| orientation | top-left, mid-left, bottom-left, top-centered, mid-centered, bottom-centered, top-right, mid-right, bottom-right | No | Aligns the texture by the given value. | orientation = mid-centered |
| width | The texture width | No | The width of your texture. This can be any value, but stretching a small texture too much makes it blurred. | width = 100 |
| height | The texture height | No | The height of your texture. This can be any value, but stretching a small texture too much makes it blurred. | height = 100 |
addwebtexture
Add an web image to a menu by its URL.
| Variable | Assignable values(s) | Mandatory | Description | Examples |
|---|---|---|---|---|
| url | The image url | Yes | The url, starting with HTTP/HTTPS, to the image. Supported images types are JPG/JPEG and PNG. | url = https://mywebsite.com/image.jpg |
| x | The horizontal image position | No | Moves the texture to the given position on its horizontal axis. | x = 20 |
| y | The vertial image position | No | Moves the texture to the given position on its vertical axis. | y = -100 |
| orientation | top-left, mid-left, bottom-left, top-centered, mid-centered, bottom-centered, top-right, mid-right, bottom-right | No | Aligns the texture by the given orientation. | orientation = top-left |
| width | The image width | No | The width of your texture. This can be any value, but stretching a small texture too much makes it blurred. | width = 150 |
| height | The image height | No | The height of your texture. This can be any value, but stretching a small texture too much makes it blurred. | height = 30 |
addshape
Add a basic shape to your menu.
| Variable | Assignable values(s) | Mandatory | Description | Examples |
|---|---|---|---|---|
| shape | rectangle, | Yes | The shape type. There’s currently only the rectangle shape type. More will be added soon. | shape = rectangle |
| color | The shape HEX RGBA color | Yes | The HEX color of your shape. This supports opacity (RGBA)! | color = #ffffff30 |
| x | The horizontal position | No | Moves the shape to the given position on its horizontal axis. | x = 20 |
| y | The vertial position | No | Moves the shape to the given position on its vertical axis. | y = -100 |
| orientation | top-left, mid-left, bottom-left, top-centered, mid-centered, bottom-centered, top-right, mid-right, bottom-right | No | Aligns the shape by the given orientation. | orientation = top-left |
| width | The width | No | The width of your shape. | width = 150 |
| height | The height | No | The height of your shape. | height = 30 |
addanimation
Add an animation to a menu.
| Variable | Assignable value(s) | Mandatory | Description | Examples |
|---|---|---|---|---|
| name | The animation name | Yes | The name of your animation you choose in its properties. | name = rikka_finger_spin |
| x | The horizontal animation position | No | Moves the animation to the given position on its horizontal axis. This will not override its animation properties. | x = -60 |
| y | The vertical animation position | No | Moves the animation to the given position on its vertical axis. This will not override its animation properties. | y = -60 |
| orientation | top-left, mid-left, bottom-left, top-centered, mid-centered, bottom-centered, top-right, mid-right, bottom-right | No | Aligns the animation by the given value. This will not override its animation properties. | orientation = top-right |
| width | The animation width | No | The width of your animation. This can be any value, but stretching a small animation too much makes it blurred. This will not override its animation properties. | width = 50 |
| height | The animation height | No | The height of your animation. This can be any value, but stretching a small animation too much makes it blurred. This will not override its animation properties. | height = 50 |
addslideshow
Add a [slideshow](./Slideshows] to your menu.
| Variable | Assignable value(s) | Mandatory | Description | Examples |
|---|---|---|---|---|
| name | The slideshow name | Yes | The name you gave your slideshow in its properties file. | name = memes_of_the_world |
| x | The horizontal slideshow position | No | Moves the slideshow to the given position on its horizontal axis. This will not override its slideshow properties. | x = 60 |
| y | The vertical slideshow position | No | Moves the slideshow to the given position on its vertical axis. This will not override its slideshow properties. | y = 40 |
| orientation | top-left, mid-left, bottom-left, top-centered, mid-centered, bottom-centered, top-right, mid-right, bottom-right | No | Aligns the slideshow by the given value. This will not override its slideshow properties. | orientation = top-right |
| width | The slideshow width | No | The width of your slideshow. This can be any value, but stretching a small slideshow too much makes it blurred. This will not override its slideshow properties. | width = 50 |
| height | The slideshow height | No | The height of your slideshow. This can be any value, but stretching a small slideshow too much makes it blurred. This will not override its slideshow properties. | height = 50 |
setscale
Force the menu to load with a specific GUI scale.
This action is currently not supported by all menus in MC 1.12.X.
| Variable | Assignable value(s) | Mandatory | Description | Examples |
|---|---|---|---|---|
| scale | GUI scale | Yes | The scale to load the menu with. The default scale values for minecraft are 1 for small, 2 for normal and 3 for large. | scale = 1 |
Apply customizations without restarting the game
All changes made to customization files can be applied without restarting the game!
You only need to click on the Reload button and all changes you made to your customization files will be loaded.
Источник


