- T-Rex Miner — Батники, Комиссия, системные требования
- Как начать пользоваться
- Как выбрать карту?
- T-Rex Miner — Настройки, Команды, Параметры Командной Строки
- Скачать
- Basic parameters in command line
- Usage
- GPU fine tuning (Windows & Linux)
- GPU fine tuning (Windows only)
- Как настроить и запустить майнер T-Rex? Подробное руководство
- Что такое T-Rex
- Что майнить на T-Rex
- Хешрейты видеокарт на T-Rex
- Где скачать T-Rex
- Как настроить T-Rex
T-Rex Miner — Батники, Комиссия, системные требования
2 мин на чтение
You can use this list as a reference for all Launch Parameters supported by T-Rex Miner. 
Чтобы добывать криптовалюту, вам нужно получить адрес кошелька, выбрать пул с самым низким пингом, настроить командный .bat файл для его запуска и запустить его.
Вам нужно получить адрес кошелька, если у вас его еще нет. Мы рекомендуем Binance и Huobi.
Как начать пользоваться
Чтобы запустить программное обеспечение для майнинга и эффективно изменять параметры, вам потребуются .bat файлы. Вы также можете подумать о настройке файла конфигурации ( .config ), но файл .bat — это проще и это то, что нужно большинству пользователей.
- Создайте новый текстовый файл и переименуйте расширение в .bat . Возможно, вам придется изменить параметры папки, чтобы отображать расширения, если они еще не включены.
- Введите свои параметры (аргументы командной строки).
- Поместите .bat файл в папку, в которой находится исполняемый файл ( .exe ) программы для майнинга.
- Чтобы .bat файл загружался при запуске, поместите его в каталог автозагрузки Windows.
Вот как настроить T-Rex для майнинга Ravencoin в пуле 2Miners.
t-rex.exe -a x16rv2 -o stratum+tcp://rvn.2miners.com:6060 -u RAXCRKF2JdYwYLn2RiMxDPNgvKMwfVrjY9.RIG_ID -p x pause
Настройте T Rex Miner для максимальной прибыли! Читайте полный гайд по настройке T Rex Miner
Ниже пример для монеты Firo:
t-rex.exe -a mtp -o stratum+tcp://xzc.2miners.com:8080 -u aBdEaaPnZpkJGVaHoKaFNfDYdodNqUBAQy.RIG_ID -p x pause
Не забудьте заменить YOUR_ADDRESS на свой фактический адрес кошелька, чтобы вы могли получить свои монеты.
Кроме того, не забудьте изменить RIG_ID (имя установки) по вашему выбору. Это может быть полезно, если у вас более одного рига. Вы можете использовать до 32 латинских символов, цифр, а также «-» и «_».
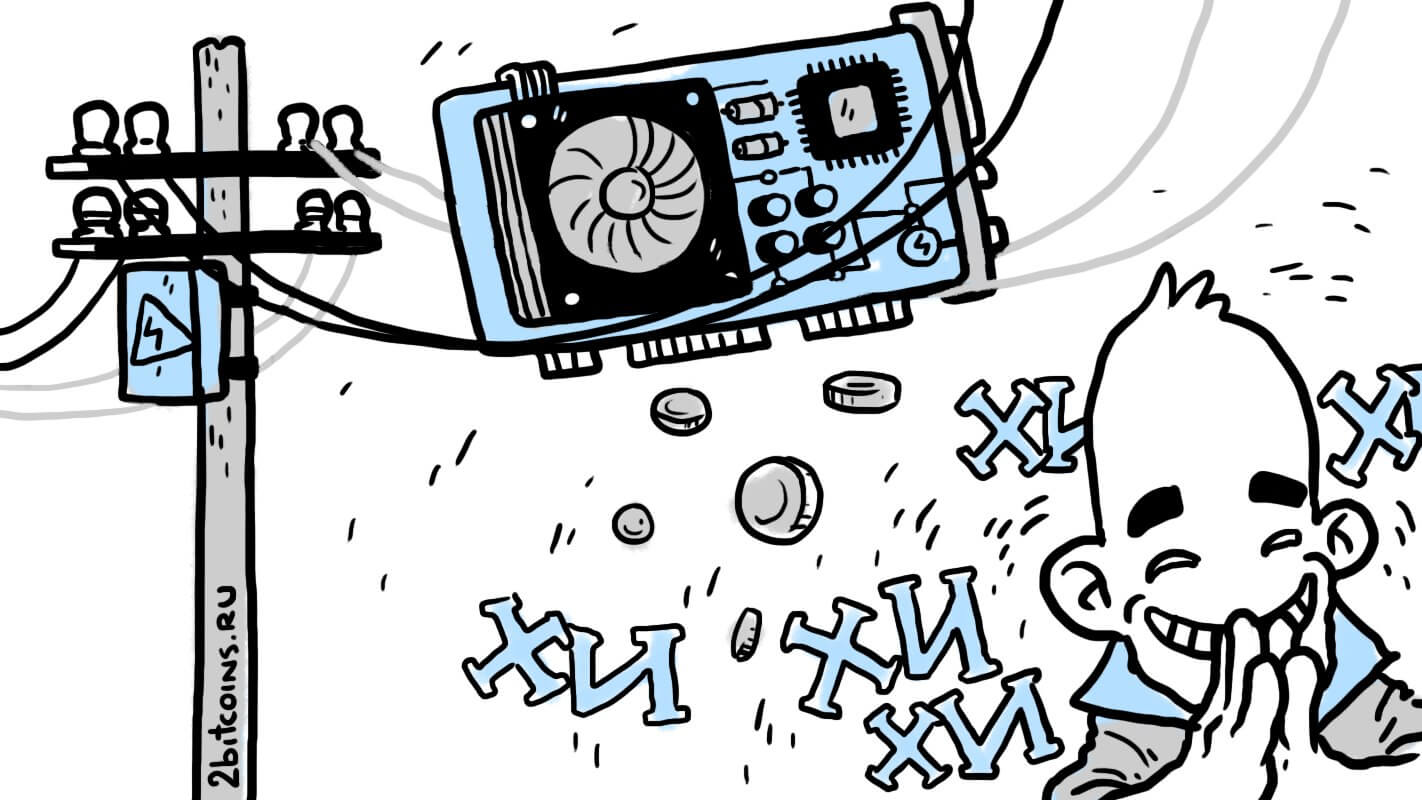
Как выбрать карту?
Команда -d или —devices=DEVLIST позволяет указать устройства GPU для использования из обнаруженного списка. Список должен быть разделенным запятыми списком индексов устройства, например, -d 0,1,2,4 . Если не указано, будут использоваться все устройства.
ПРИМЕЧАНИЕ для Linux: если используется —bus_reorder , используются индексы после переупорядочения. Используйте —list_devices для показа индексов.
Источник
T-Rex Miner — Настройки, Команды, Параметры Командной Строки
7 мин на чтение
**
Скачать
Basic parameters in command line
There are three things lolMiner needs in any case to know to start mining, namely
- the algorithm to mine
- the pool or solo node address to connect to
- the user / wallet name to mine for
Usage
Full list of command line options:
—coin [Ethash, ProgPOW] Set coin name. Helps avoid DAG rebuilds when switching back from a dev fee session.
Example: “eth” for Ethereum, “zil” for Zilliqa.
—extra-dag-epoch Allocate extra DAG at GPU for specified epoch. Can be useful for dual mining of coins like Zilliqa (ZIL). (eg: —extra-dag-epoch 0 ) Can be set for each GPU separately by using comma separated list of values (set to -1 for the GPUs that should not allocate the extra DAG).
—nonce-start [Ethash, ProgPOW] Starting nonce for the solution search.
—nonce-range-size [Ethash, ProgPOW] Nonce range size for nonce search. The range will be split between all devices.
-d, —devices Comma separated list of CUDA devices to use. Device IDs start counting from 0.
—pci-indexing Sort devices by PCI bus ID. Device IDs start with 0.
—ab-indexing Afterburner indexing (same as —pci-indexing but starts from 1).
-i, —intensity GPU intensity 8-25 (default: auto). Controls the GPU workload size, in other words how many nonces the miner is processing “in one go”: N = 2 ^ intensity
—low-load Low load mode (default: 0). 1 — enabled, 0 — disabled. Reduces the load on the GPUs if possible. Can be set to a comma separated string to enable the mode for a subset of the GPU list (eg: —low-load 0,0,1,0 )
—kernel [Ethash] Choose CUDA kernel (default: 0). Range from 0 to 5. Set to 0 to enable auto-tuning: the miner will benchmark each kernel and select the fastest. Can be set to a comma separated list to apply different values to different cards. (eg: —kernel 2,1,1,3 ) The support for this parameter may later be extended to cover other algorithms.
—gpu-init-mode Enables DAG sequential initialization (default: 0). 0 — all GPUs are initialized in parallel 1 — fully sequential initialization, one GPU at a time 2 — two GPUs at a time etc.
—dag-build-mode [Ethash, ProgPOW, Octopus] Controls how DAG is built (default: 0). 0 — auto (miner will choose the most appropriate mode based on the GPU model) 1 — default (suitable for most graphics cards) 2 — recommended for 30xx cards to prevent invalid shares Can be set to a comma separated list to apply different values to different cards. (eg: —dag-build-mode 1,1,2,1 )
—keep-gpu-busy Continue mining even in case of connection loss.
-o, —url URL of the mining pool in the following format: :// :
Supported schemes: stratum+tcp stratum+ssl stratum+http stratum2+tcp stratum2+ssl stratum2 is normally used by Nicehash, MiningPoolHub and other similar mining pools Example: stratum+tcp://eu1.ethermine.org:4444 stratum+ssl://zcoin.mintpond.com:3005 stratum2+tcp://daggerhashimoto.hk.nicehash.com:3353
-u, —user Username for mining server.
-p, —pass Password for mining server.
-w, —worker Worker name.
-r, —retries Number of times to retry if a network call fails.
-R, —retry-pause Pause in seconds between retries.
-T, —timeout Network timeout, in seconds (default: 300)
—time-limit Miner shutdown interval in seconds. (default: 0 — disabled)
—temperature-color Set temperature color for GPUs stat. Example: 55,65 — it means that temperatures above 55 will have yellow color, above 65 — red color. (default: 67,77)
—temperature-limit GPU shutdown temperature. (default: 0 — disabled)
—temperature-start GPU temperature to enable card after disable. (default: 0 — disabled)
-b, —api-bind-telnet IP:port for the miner API via telnet (default: 127.0.0.1:4068). Set to 0 to disable. For external access set IP to 0.0.0.0, in which case setting “ —api-read-only ” is recommended as well.
—api-bind-http IP:port for the miner API via HTTP (default: 127.0.0.1:4067). Set to 0 to disable. For external access set IP to 0.0.0.0, in which case setting “ —api-read-only ” is recommended as well.
—api-read-only Allow only read operations for API calls.
-J —json-response Telnet API server will make json responses.
-N, —hashrate-avr Sliding window length in seconds used to compute average hashrate (default: 60).
—sharerate-avr Sliding window length in seconds used to compute sharerate (default: 600).
—gpu-report-interval GPU stats report frequency. Minimum is 5 sec. (default: 30 sec)
—gpu-report-interval-s GPU stats report frequency in shares. 0 by default (disabled).
-q, —quiet Quiet mode. No GPU stats at all.
—hide-date Don’t show date in console.
—send-stales Don’t drop stale shares.
—validate-shares Validate shares before sending to a pool. Also enables share diff info.
—no-color Disable color output for console.
—no-hashrate-report Disable hashrate report to pool.
—no-nvml Disable NVML GPU stats.
—no-strict-ssl Disable certificate validation for SSL connections.
—no-watchdog Disable built-in watchdog.
—watchdog-exit-mode Specifies the action “A” the watchdog should take if the miner gets restarted “N” times within “M” minutes. Format: N:M:A. Valid values: N: any positive integer, M: any positive integer, A: r(system reboot), s(system shutdown), e(miner exit) Actions “r” and “s” require running the miner with administrative privileges. Examples: 20:10:s — watchdog will shutdown the system if the miner gets restarted 20 times within any 10 minute interval 5:7:r — watchdog will reboot the system if the miner gets restarted 5 times within any 7 minute interval
-B, —benchmark Benchmark mode.
—benchmark-epoch Epoch number used during benchmark (only for algorithms that generate DAG).
-P, —protocol-dump User protocol logging.
-c, —config Load a JSON-format configuration file.
-l, —log-path Full path of the log file.
—cpu-priority Set process priority (default: 2) 0 idle, 2 normal to 5 highest.
—autoupdate Perform auto update whenever a newer version of the miner is available.
—back-to-main-pool-sec Forces miner to switch back to main pool in case working with failover pool. Parameter is set in seconds. (default: 600)
—exit-on-cuda-error Forces miner to immediately exit on CUDA error.
—exit-on-connection-lost Forces miner to immediately exit on connection lost.
—exit-on-high-power Forces miner to immediately exit on high power consumption. (eg: —exit-on-high-power 600 — exit in case of total power consumption exceeds 600W)
—reconnect-on-fail-shares Forces miner to immediately reconnect to pool on N successively failed shares (default: 10).
—fork-at Forces miner to change algorithm on predefined condition (works only with built-in watchdog enabled)
To change main pool port you must write it right after algo: :
(eg: —fork-at x16rv2:4081=time:2019-10-01T16:00:00 ).
—script-start Executes user script right after miner start (eg: —script-start path_to_user_script )
—script-exit Executes user script right before miner exit.
—script-epoch-change Executes user script on epoch change.
—script-crash Executes user script in case of miner crash.
—script-low-hash Executes user script in case of low hash. Hash threshold is set in MegaHashes/second. Example: —script-low-hash script_to_activate:50 (activates “script_to_activate” script once total hashrate drops to 50MH/s)
GPU fine tuning (Windows & Linux)
—lock-cclock Specifies desired locked GPU core clock speed in MHz. (default: 0 — disabled). Requires running the miner with administrative privileges. Example: —lock-cclock 1000 (applies clock 1000Mhz to all cards that support this functionality) —lock-cclock 1000,1300,0 (applies clock 1000Mhz to GPU #0, 1300MHz to GPU #1, ignore GPU #2)
—mt Memory tweak mode (default: 0 — disabled). Range from 0 to 6. General recommendation is to start with 1, and then increase only if the GPU is stable. The effect is similar to that of ETHlargementPill. Supported on Pascal GPUs with GDDR5 or GDDR5X memory only. Requires running the miner with administrative privileges. Can be set to a comma separated list to apply different values to different cards. Example: —mt 4 (applies tweak mode #4 to all cards that support this functionality) —mt 3,3,3,0 (applies tweak mode #3 to all cards except the last one)
GPU fine tuning (Windows only)
All options can be set to a comma separated list to apply different values to different cards. (default value for all options: 0 — not used)
—fan Sets GPU fan speed in percent or target temperature (auto-fan).
—fan N (where N is the fan speed)
—fan t:N (where N is the target temperature)
Example: —fan 45,t:67 GPU #0: set fan speed to 45% GPU #1: maintain GPU core temperature at 67C Note: fan speeds are limited to [5%, 95%] range in auto-fan mode.
—pl Sets GPU power limit in percent. Must be within [0, 100] range.
—cclock Sets GPU core clock offset in MHz. Requires running the miner with administrative privileges. Will be set to 0 on exit and during DAG rebuild.
—mclock Sets GPU memory clock offset in MHz. Requires running the miner with administrative privileges. Will be set to 0 on exit and during DAG rebuild.
—cv Sets GPU core voltage in percent. Must be within [0, 100] range. Use it only in case you know what you are doing! Requires running the miner with administrative privileges.
—lock-cv Specifies desired GPU core voltage in mV. (default: 0 — disabled). Requires running the miner with administrative privileges.
—pstate Sets GPU P-state. Valid values: p0. Requires running the miner with administrative privileges.
—version Display version information and exit.
-h, —help Display this help text and exit.
Источник
Как настроить и запустить майнер T-Rex? Подробное руководство
Ravencoin — одна из самых популярных криптовалют на пуле 2Miners. После хардфорка сеть монеты избавилась от ASIC-майнеров, благодаря чему её доходность для обладателей видеокарт серьёзно выросла. По состоянию на 25 января 2021 году криптовалюту на 2Miners добывает более 3 тысяч человек — а это очень много. Копать эту и другие монеты на видеокартах Nvidia позволяет T-Rex. Знакомимся с майнером и его особенностями поближе.

Что такое T-Rex
T-Rex — майнер с поддержкой более 30 алгоритмов. Программа создана для “зелёных” видеокарт, то есть от Nvidia. Из операционных систем поддерживаются Windows и Linux. На странице проекта на официальном сайте разработчики подчёркивают, что пытаются сделать T-Rex настолько удобным и быстрым, насколько это только возможно.
За свой труд им полагается вознаграждение. Комиссия составляет 1 процент, то есть за два часа ваше оборудование будет работать на разработчиков чуть больше одной минуты. Исключение — алгоритм Tensority. На нём комиссия равна 3 процентам.
Комиссия нормальная: у lolMiner она составляет тот же 1 процент, так что разработчики не отличаются повышенной жадностью. Хотя, например, у PhoenixMiner показатель составляет 0.65 процента.
Что майнить на T-Rex
T-Rex поддерживает больше тридцати алгоритмов. Действительно популярных среди них всего два: x16rv2, на котором после форка работает сеть Ravencoin, и MTP — это Zcoin.
Майнить Ravencoin лучше на пуле 2Miners. RVN — вторая по популярности криптовалюта на платформе, добычей которой занимаются десятки тысяч человек.

Вот остальные алгоритмы: x16rt, x16r, x16s, x17, x22i, x25x, x21s, x11r, geek, bcd, hmq1725, honeycomb, tensority, dedal, sha256t, sha256q, timetravel, lyra2z, bitcore, sonoa,renesis, balloon, polytimos, skunk, c11, phi, tribus, astralhash, jeonghash, padihash и pawelhash.
Хешрейты видеокарт на T-Rex
Мы протестировали видеокарты Nvidia на T-Rex. Вот результаты для добычи Zcoin XZC на алгоритме MTP:
- Nvidia GTX 1060 6gb — 1.6 Mh/s;
- Nvidia GTX 1070 8gb — 2.1 Mh/s;
- Nvidia GTX 1070Ti 8gb — 2.65 Mh/s;
- Nvidia GTX 1080 8gb — 3 Mh/s;
- Nvidia GTX 1080Ti 11gb — 3.65 Mh/s;
- Nvidia GTX 1660 6 gb — 1.5 Mh/s;
- Nvidia GTX 1660Ti 6gb — 2.3 Mh/s;
- Nvidia RTX 2060 6gb — 2.1 Mh/s;
- Nvidia RTX 2070 8gb — 2.6 Mh/s;
- Nvidia RTX 2080 8gb — 3.5 Mh/s;
- Nvidia RTX 2080Ti 11gb — 4.3 Mh/s.
А такими оказались хешрейты для добычи Ravencoin.
- Nvidia GTX 1050 Ti 4gb — 6.5 Mh/s;
- Nvidia GTX 1060 3/6gb — 9.5 Mh/s;
- Nvidia GTX 1070 8gb — 17 Mh/s;
- Nvidia GTX 1070Ti 8gb — 24 Mh/s;
- Nvidia GTX 1080 8gb — 27 Mh/s;
- Nvidia GTX 1080Ti 11gb — 34 Mh/s;
- Nvidia GTX 1660 6 gb — 16 Mh/s;
- Nvidia GTX 1660Ti 6gb — 19 Mh/s;
- Nvidia RTX 2060 6gb — 21 Mh/s;
- Nvidia RTX 2070 8gb — 30 Mh/s;
- Nvidia RTX 2080 8gb — 31 Mh/s;
- Nvidia RTX 2080Ti 11gb — 38 Mh/s.
Кстати, хешрейты для других видеокарт и алгоритмов мы собираем в этой таблице. Скоро они будут интегрированы в калькулятор доходности майнинга 2CryptoCalc.
Где скачать T-Rex
Последняя версия майнера на данный момент — 0.14.6. В ней разработчики сосредоточились на фиксе багов и исправили четыре известных проблемы. Загрузить T-Rex можно на официальном сайте. Вариант поудобнее — скачать этот архив со всеми программами и файлами. Пароль 2miners.
Как настроить T-Rex
Ниже — настройки T-Rex для добычи Zcoin и Ravencoin на пуле 2Miners. Начнём с Zcoin XZC.
t-rex.exe -a mtp -o stratum+tcp://xzc.2miners.com:8080 -u YOUR_ADDRESS.RIG_ID -p x
pause
А вот настройки для добычи Ravencoin.
t-rex.exe -a x16rv2 -o stratum+tcp://rvn.2miners.com:6060 -u YOUR_ADDRESS.RIG_ID -p x
pause
Не забудьте заменить YOUR_ADDRESS на свой адрес кошелька, чтобы монеты уходили именно вам.
Также измените RIG_ID — это желаемое название фермы. Возможность пригодится тем, у кого несколько ригов. Используйте не больше 32 символов латиницы, цифры, а также символы «-» и «_».
Мы подготовили инструкцию по добыче монеты в формате видео. Вот ролик, посвящённый Zcoin. Не забудьте включить субтитры.
Источник


