- Эффекты группы Color Correction: Change To Color эффект (After Effects)
- Не работает change to color
- Не работает change to color
- Video Tutorial: How to Change Colors on Footage in Premiere Pro
- Share this:
- Ready to see how you can get more mileage out of your footage by adjusting colors in Premiere Pro? Here’s a tutorial to get you started!
- Changing Color Hues
- Change to Color
- Leave Color
- How to Change Colors in Adobe After Effects?
- Express your cinematic Fair with After Effects Alternative FilmoraPro
- How to Change Colors in AE?
- Method 1: Using the Fill Effect
- Method 2: Using the Tint Effect
- Method 3: Using the Hue/Saturation Effect
- Method 4: Combining Keylight with the Hue/Saturation Effect
- Method 5: Using the Change to Color Effect
Эффекты группы Color Correction: Change To Color эффект (After Effects)
Описание эффекта Change To Color в After Effects.
Описание эффекта Change To Color в After Effects
Эффект Change To Color меняет цвет, который вы выбираете в изображении, на другой цвет с помощью значений оттенка, светлости и насыщенности (HLS), при этом не влияя на другие цвета.
Change To Color предлагает гибкость и опции, недоступные в эффекте Change Color. Эти параметры включают в себя ползунки допуска для оттенка, яркости и насыщенности для точного сопоставления цветов и возможность выбирать точные значения RGB целевого цвета, который вы хотите изменить.
Параметры эффекта Change To Color в After Effects
Центр цветового диапазона который нужно изменить.
Цвет на который нужно изменить. Примечание: Чтобы анимировать изменение цвета, установите ключевые кадры или выражение для цвета To.
На какие каналы влияет эффект.
Как изменить цвет. Параметр Setting To Color выполняет непосредственное изменение затронутых пикселей до целевого цвета. Transforming To Color преобразует значения пикселя в соответствии с целевым цветом, используя интерполяцию HLS; Количество изменений для каждого пикселя зависит от того, насколько близок цвет пикселя к цвету From.
Насколько цвета могут отличаться от исходного цвета «From» и по-прежнему сопоставляться. Разверните этот элемент управления, чтобы отобразить отдельные ползунки для значений оттенка, яркости и насыщенности.
Сглаженность, мягкость, применяемый для краев подложки коррекции. Более высокие значения создают более плавные переходы между областями, затронутыми изменением цвета и незатронутыми областями.
View Correction Matte
Отображает подложку в оттенках серого, которая указывает объем воздействия эффекта на каждый из пикселей. Области белого изменяются в наибольшей степени, области черного — в наименьшей.
Источник
Не работает change to color
Эффект Изменить цвет Change Color After Effects
Эффект Изменить цвет выполняет настройку тона, яркости и насыщенности для диапазона цветов. Этот эффект работает с цветом 8 бит на канал и 16 бит на канал.
Представление
В разделе «Скорректированный слой» отображаются результаты применения эффекта «Изменить цвет». Маска цветокоррекции отображает подложку оттенков серого, которая указывает области слоя, которые будут изменены. Белые области в маске цветокоррекции изменяются в наибольшей степени, а черные — в наименьшей.
Преобразование тона
Объем корректировки тона (в градусах).
Преобразование яркости
Положительные значения увеличивают яркость сопоставленных пикселов. Отрицательные значения уменьшают яркость.
Преобразование насыщенности
Положительные значения увеличивают насыщенность сопоставленных пикселов (смещение в сторону чистого цвета). Отрицательные значения уменьшают насыщенность сопоставленных пикселов (смещение в сторону серого).
Цвет для изменения
Центральный цвет диапазона, который требуется изменить.
Соответствующий допуск
Насколько цвета могут отличаться от цвета для изменения и при этом оставаться сопоставляемыми.
Соответствующая мягкость
Объем влияния эффекта на несопоставленные пикселы пропорционально их сходству с цветом для изменения.
Сравнить цвета
Определяет цветовое пространство, в котором выполняется сравнение цветов в целях выявления сходства. RGB сравнивает цвета в цветовом пространстве RGB. Параметр «Тон» сравнивает цветовые тона, пропуская насыщенность и яркость, поэтому сопоставляются, например, ярко-красный и светло-розовый цвета. Параметр «Цветность» использует два компонента цветности для определения сходства, игнорируя при этом яркость.
Обратить маску цветокоррекции
Инвертирует маску, которая определяет, какие цвета будут затронуты.
Источник
Не работает change to color
Эффект Change to Color After Effects
Эффект Заменить на цвет (ранее назывался эффектом «Изменить HLS цвета») изменяет цвет, выбранный в изображении, на другой цвет, используя для этого значения тона, яркости и насыщенности (HLS), не затрагивая другие цвета.
Эффект «Заменить на цвет» обеспечивает гибкие возможности и параметры, недоступные для эффекта «Изменить цвет». Эти параметры содержат погрешности для тона, яркости и насыщенности, которые используются для точного совмещения цветов, и предоставляют возможность выбора точных значений RGB целевого цвета, который будет использоваться для замены.
Этот эффект работает с цветом 8 бит на канал и 16 бит на канал.
Центр цветового диапазона, который нужно изменить.
В
Цвет, на который требуется заменить сопоставленные пикселы. Для применения анимации при изменении цвета следует задать ключевые кадры или выражения для цвета, на который выполняется замена.
Изменить
Каналы, на которые влияет эффект.
Заменить на
Порядок изменения цветов. При настройке цвета, на который выполняется замена, выполняется непосредственное изменение затрагиваемых пикселов на целевой цвет. При преобразовании цвета, на который выполняется замена, выполняется преобразование значений затрагиваемых пикселов в сторону целевого цвета с использованием интерполяции HLS; степень изменения каждого пиксела зависит от того, насколько близко цвет пиксела находится к исходному цвету.
Допуск
Насколько цвета могут отличаться от исходного цвета и при этом оставаться сопоставляемыми. Разверните этот элемент управления, чтобы отобразить отдельные ползунки для значений «Тон», «Яркость» и «Насыщенность».
Примечание.
Используйте параметр «Посмотреть подложку коррекции» для более полного определения сопоставляемых и затрагиваемых пикселов.
Мягкость
Степень растушевки, которая будет использоваться для краев подложки коррекции. Более высокие значения используются для создания более плавных переходов между областями, затрагиваемыми изменением цвета, и между не затрагиваемыми областями.
Посмотреть подложку коррекции
Отображает подложку в оттенках серого, которая указывает объем воздействия эффекта на каждый из пикселов. Области белого изменяются в наибольшей степени, области черного — в наименьшей.
Источник
Video Tutorial: How to Change Colors on Footage in Premiere Pro
Share this:
Ready to see how you can get more mileage out of your footage by adjusting colors in Premiere Pro? Here’s a tutorial to get you started!
Have you ever found a stock video clip that’s perfect for your project, but the prominent colors weren’t the ones you needed? Luckily, Premiere Pro has some effects that allow you to change colors easily. This can be handy during your search for stock video clips, or if a client asks you to change a color scheme in the middle of a project.
In this tutorial, we’ll learn different methods for changing colors on video footage in Premiere Pro. Let’s get started!
Changing Color Hues
The first method for changing colors on footage is to shift the entire color hue. This will effectively shift all of the colors, so it works best on clips with one primary color.
 Shift the entire color hue.
To do this, apply the effect Lumetri Color to your video clip. Then, under the Curves setting, find the Hue vs Hue color curve. (It looks like a rainbow line.) Click on the line, and drag it up and down to shift the entire color hue on your footage. This allows you to easily shift a clip from one color to another.
 The Hue vs. Hue color curve helps shift the color hue on your footage.
Change to Color
Next, we can change colors individually using the Change to Color effect. (This works best on bright, saturated colors in footage.) First, apply the Change to Color effect to your footage.
 Apply the Change to Color effect to individually change colors.
Next, select the color you’d like to change From with the color picker. Hold CTRL (CMD on Mac) when you select the color to select a better color average.
 Using the color picker, select your intended color.
To change the selected color to a specified color, click on the To setting and shift the color hue. Then, you can alter the selected color under the Tolerance settings, primarily by adjusting the Hue setting.
 Use the Tolerance setting to adjust the hue.
To get better results, you may want to apply the Lumetri Color effect before the Change to Color effect. This allows you to adjust the setting on your video clip (like the White Balance) before you apply the Change to Color effect.
 By applying the Lumetri Color effect before the Change to Color effect, you can adjust the setting on your video clip.
Leave Color
Finally, we can use the Leave Color effect to isolate a single color on black and white footage. Apply the effect Leave Color to your footage, then use the color picker to select the Color to Leave.
 Execute that final look by shifting the percentage, then adjusting the Tolerance and Edge Softness.
Shift the Amount to Decolor to 100 percent, then adjust the Tolerance and Edge Softness settings to dial in the final look. Leave Color can be a great effect to use when creating a stylized look.
 Leave Color is awesome for creating that subtle flair.
Interested in the tracks we used to make this video?
Looking for more post-production tips and tricks? Check these out.
Источник
How to Change Colors in Adobe After Effects?

Benjamin Arango
Sep 15, 2021• Proven solutions
The colors in the footage captured even by the best video cameras on the market can appear pale and, at times, even unrealistic. Sometimes the color of the sky or a body of water in your shot can be unappealing, but you can easily fix this in Adobe After Effects. You can manipulate colors in animations as well as all other types of projects you use the AE for. The best part is that you don’t have to be a video editing wizard in order to change a color of a background layer or an entire area of a shot, so in this article, we are going to take you through several easy methods of changing colors in AE.
Express your cinematic Fair with After Effects Alternative FilmoraPro
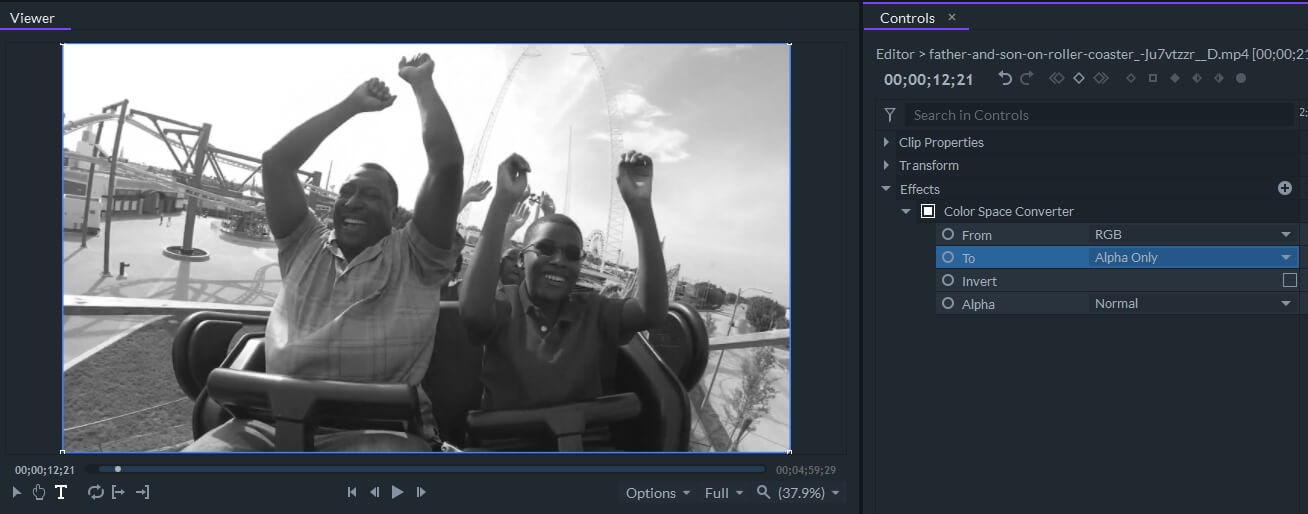
FilmoraPro provides the ability to experience detailed color correction and make fast changes with high-quality presets. You can make rapid and precise color adjustments to match the overall feeling of the video. To change video color in FilmoraPro is easy, you can use the Color Space Converter to change the color HSL, YUV, Red, green, alpha, lightness etc. Download the free trial version below and explore the color correction features of FilmoraPro.


How to Change Colors in AE?
Despite the fact that altering the color of an object in a shot doesn’t require too much effort, you should use the color correction features provided by AE in moderation. Relying on effects heavily can compromise the quality of the footage you’re working on and the final result can appear too artificial. Let’s have a look at the different methods you can use to change the colors in AE.
Method 1: Using the Fill Effect
In case you’re using a template, that contains several layers, the Fill effect can help you change the color of one of the layers in the composition. Before you apply the effect you must make sure that the layer whose color you want to change is selected. When you select a layer, proceed to locate the Generate submenu in the Effects menu, and choose the Fill option. The effect will automatically change the color of the layer to the color selected by default, but you can pick any color from the color palette by simply clicking on the Color setting in the Effect Controls panel.
This method of changing a layer’s color is only suitable for layers with only one color and failing to select a layer to which you want to apply the Fill effect will make the entire composition monochrome. You can copy the effect from one layer to another using the Command or CTRL+ C and Command or CTRL + V keyboard shortcut.
Method 2: Using the Tint Effect
Instead of changing the color of each element in a composition individually, you can use the Tint effect to achieve the same result. Simply highlight a layer and then go the Color Correction submenu in the Effects menu and select the Tint option. Use the Map Black To and Map White To settings that are accessible from the Effect Controls panel, to fine-tune the colors in the selected layer. Changing the Map Black To option will replace the black parts of the layer with the color you selected, while Map White To feature enables you to replace the white areas of a layer with a new color.
The Tint effect is really helpful if you need to change the color of black or white layers, but you can also use it to desaturate a layer. Just apply the effect to a color video you’d like to turn black and white and then you can accentuate a particular color by picking a new color under the Map Black To and Map White To settings.
Method 3: Using the Hue/Saturation Effect
You can use the Hue/Saturation effect in a lot of different contexts since it can help you alter the color of a multilayered composition or an entire shot. If you already have a complex composition that contains a lot of different elements that can’t be colored separately, using this effect can help you change their color effortlessly.
You just have to highlight the composition in the timeline, then expand the Effects menu, and select the Hue/Saturation option from the Color Correction submenu. In order to change the color of the entire composition you just have to adjust Master Hue setting in the Effect Controls panel. Optionally, you can use the Master Saturation and Master Lightness sliders to fine-tune the freshly selected color.
The color of cars, buildings, water, sky or anything else in the footage you’re processing in AE can be easily changed. After you import a clip into the software and place it on the timeline, you should go to the Layer menu, click New and then select the Adjustment Layer feature. Once you’ve added the adjustment layer over a video clip, you should use the Pen tool to mask the object whose color you’d like to change. The masking is much easier if the part of the shot doesn’t contain too many details. The Mask Feather option can help you make the edges of the masked areas smoother if you’d like to avoid hard edges between two sections of a shot. Also, keep in mind that your results may vary if the area of the shot you’re masking contains more than one color.
Once you’ve masked the object, you should select the adjustment layer you created earlier. Click on the Effects menu and then go to Color Correction and choose the Hue/Saturation effect. You can then change the color of the masked object using the Master Hue setting. Furthermore, changing the opacity of the adjustment layer will enable you to combine the object’s original color with the color you’ve added to the clip with the Hue/Saturation effect.
Method 4: Combining Keylight with the Hue/Saturation Effect
When changing the color of an object in more complex shots that have a lot of different variables, you can combine the Keying features with the Hue/Saturation effect. Create two copies of the original file you placed on the timeline, by using the CTRL + D shortcut on a PC or Command + D on Mac. Turn off the visibility for the bottom two copies of the clip, and then go to the Keying submenu of the Effects menu and select the Keyligth feature.
Select the Color Picker tool next to the Screen Color setting, hold the CTRL button and click on the color in the shot you’d like to replace. After keying out a particular color turn on the visibility for the second copy of the clip and click on it to select it. Go to the Effects menu, and then choose the Hue/Saturation effect from the Color Correction submenu. Adjusting Master Hue, Saturation and Lightness values will only affect the color you keyed, but you may also encounter some compression issues. That’s why you may want to fine-tune the Keylight options or alter the opacity value of the copy of the video clip to which you applied the Hue/Saturation effect.
Method 5: Using the Change to Color Effect
Formerly known as Change Color HSL effect, the Change to Color effect enables you to change a selected color while leaving other colors unaltered. Add an adjustment layer over a video clip on the timeline by expanding the Layer menu, and selecting the Adjustment Layer option from the New submenu.
Proceed to add the Change to Color effect to the adjustment layer and choose the color you’d like to replace by clicking on the From option in the Effect Controls panel. Afterward, you should click on the To setting to select a new color and the software will automatically change the From color to the color you picked under the To setting.
However, using this effect will replace a particular color in all areas of the shot, which is why you will have to mask the areas of a shot you don’t want to be affected by the Change to Color effect with the Pen tool.
Conclusion
Which method of manipulating colors in AE you’re going to use depends on the type of project you’re working on. So, if for example you just want to change the color of a background layer, you can use the Fill effect, while the Hue/Saturation effect is your best option if you’re trying to change a color of a river, a car or any other moving object. Which effects do you use to alter the colors in the videos you process with AE? Leave a comment below and let us know.
Источник


